Canning Green Beans: Guide for Beginners (Raw Pack & Hot Pack)
This page may contain affiliate links. More Information.
Canning green beans is one of the easiest ways to get started with pressure canning. It’s a very beginner friendly project.
Fresh green beans are simple to prep—just snap, pack, and process. You can use either a raw pack or hot pack method, depending on your preference.
I’ll walk you through exactly how to can green beans step by step, with no guesswork. You’ll also find a full video tutorial if you’d rather watch the process first.
If you are not familiar with pressure canners, this post has more detailed information on how to use your pressure canner. It will help you to know how to set up and prepare all your canning equipment.

Canning Green Beans: Step-by-Step Pressure Canning Guide
You will need about 14 pounds of fresh green beans for a canner load of 7 quarts (or 9 pounds for 9 pints).
Wash your beans in cold water and snap them to the desired size. Snapping green beans is simply breaking off the ends and break into pieces. I’ve also heard it called “snitting.” I bet there are all kinds of terms folks use for snapping beans.

You can leave the pieces longer if you want, but I prefer to snap them into 2-inch pieces. They fit in the jars much better. I always just break them by hand. My teen sons have been know to pull out some scissors as they thought it went quicker. If they are doing it, I didn’t care, just so the job got done!
Canning Green Beans – Hot or Cold Pack?
When you’re canning green beans, you can either do them hot packed or cold packed. This refers to how to pack your jars. A cold pack is sometimes also called “raw pack.” Please, oh, please, don’t think a cold pack means you don’t process.
Any method you use to pack your jars, you still must still process them in a pressure canner. Full instructions on both methods are below.
I used to always cold (raw) pack my jars. However, I now usually end up doing a hot pack. This allows me to get more in each jar. It is your choice. Either method is safe as long as you process them properly.
Hot Pack Canning Green Beans
Boil snapped beans 5 minutes before packing jars. Drain and pack into jars loosely and cover with clean, boiling water, leaving 1-inch headspace. Easy peasy!
Raw Pack Canning Green Beans
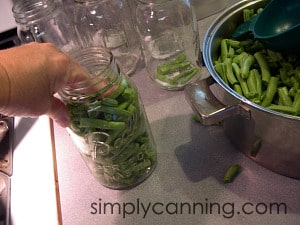
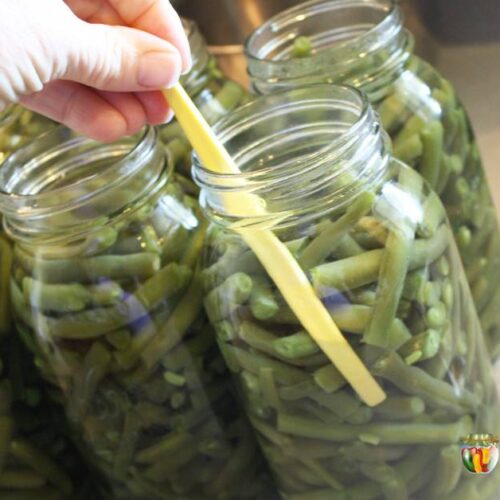
Fill jars tightly with clean, snapped, raw beans. No pre-cooking needed. Pack them down pretty tight to get as much as you can into the jar. Cover with boiling water, leaving 1-inch headspace.

Canning Process
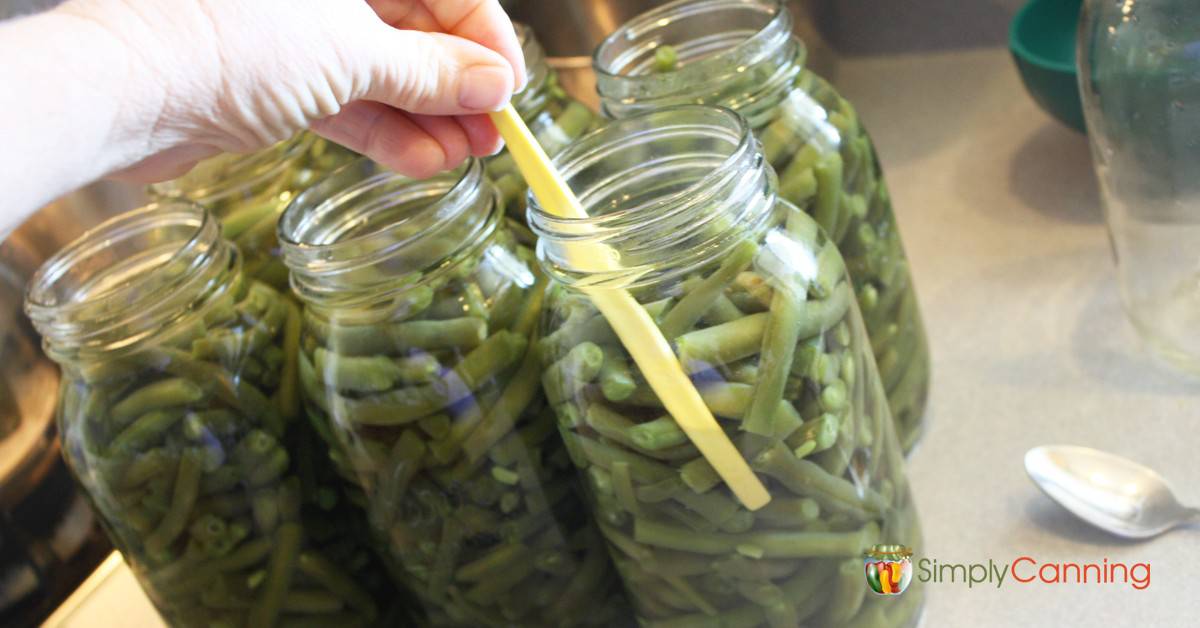
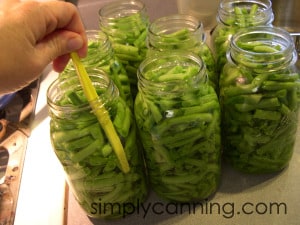
- After your jars have been filled, remove air bubbles by running a plastic utensil down inside the jar between the jar and the beans. Press lightly to release any trapped air. I like to use an orange peeler. You could also use a plastic knife. Or an official bubble tool.
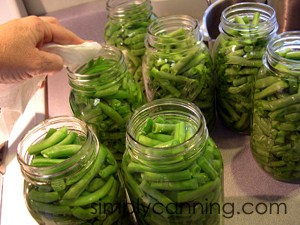
- Add canning salt to your jars: 1/2 tsp. for pints or 1 tsp. for quarts. Salt is actually optional. It is for taste only, but I do recommend it for most folks. If you add salt, it really does enhance the flavor, so I always include it. But if you are trying to lower your sodium consumption, leaving it out is acceptable.
- After jars are filled be sure and wipe the rims of your jars clean before you place canning lids on the jars and add rings. You want the rim clean so no salt or bits of food interfere with the seal during processing.
After packing your jars, place filled jars in a pressure canner and process them according to pressure canning methods. If you need more instruction on how to use your pressure canner check this link. You’ll need to heat the canner, vent it and then process it properly. Plus there is information on how to cool the canner properly. Lots of details!
Don’t forget to adjust for your altitude. Processing times are listed below. Remember, these are for canning green beans in a pressure canner, NOT a water bath! (There I go again!)
Canning Fresh Green Beans Tips & FAQs
Water Bath Canning Green Beans Is it an Option?
Many people ask if water bath canning green beans is safe. Many say their grandmother did it that way for years and no one got sick. The truth is, you can still get botulism. It is a chance you don’t want to take. Read more about my thoughts on waterbath canning green beans so you can consider the whole picture.
Can I process in a pressure cooker?
Sometimes people use the term cooker and canner interchangeably. They are actually 2 different kitchen tools. Canners are for canning, cookers are for cooking. Read more here.
Other Options
Learn more about canning, dehydrating, pickling, or freezing to keep those green beans deliciously preserved all year round.
-No, this is for water only.
-No sorry but you can’t add bacon. Add your bacon to the beans as you open the jar.
-The salt is optional so if you want to leave it out you can. We prefer to salt our veggies.
Sure! Yes you can can beans in half pints. However you don’t cut the time short. There are no tested methods for half pints. It might seem logical but half the time might not be enough for the heat to fully penetrate the jar.
You want to process it for the jar size up. If you want to do half-pints for a friend (who, I assume, probably needs a single serving, which is a great idea), process it for the pint-sized jar.
Yes, As a low acid food botulism is a risk and the pressure canner is needed. Click here to find an article explaining why I don’t recommend a waterbath.
The NCHFP suggests that canned foods last about a year, if they’re stored under proper conditions (cool and dry). But don’t throw your food away if it has been more than a year. Check this article to read more about expiration dates for home-canned food here.
No, not while canning. Learn why it isn’t safe to add bacon while canning. (You can add it after you open the jar later though, when you’re eating the food.)
How to Can Green Beans Video Tutorial
For those who skipped here… 👋 there are lots of tips and extra canning help in the article above. If you are new to this I recommend reading the full article.
Recipe Card
Canning Green Beans
Equipment
Ingredients
- 14 pounds Green Beans
- Canning Salt optional
Instructions
- Start by preparing your jars and getting water in the canner heating. You want the canner hot, but not boiling, when the jars are ready to be processed. If you are new to using a pressure canner, see this article for full pressure canning instructions. Including more detailed information and step-by-step instructions on how a pressure canner works.
For a Raw Pack
- Rinse beans in cold water. Snap beans to desired size.
- Add canning salt to jars (1/2 tsp. for pints, 1 tsp. for quarts). Pack beans tightly into jars.
- Fill jar with clean boiling water, leaving 1” headspace.
- Remove bubbles. Wipe the rim clean and place on seal and ring.
- Place jar in the warm canner. Proceed to fill all jars.
- Process in a pressure canner according to the instructions below.
For a Hot Pack
- Rinse beans in cold water and snap beans to desired size.
- Put beans in a pot of boiling water. Boil 5 minutes.
- Add canning salt to the jar (1/2 tsp. for pints, 1 tsp. for quarts).
- Pack beans loosely into jar (don’t squish).
- Cover with clean boiling water, leaving 1” headspace.
- Remove bubbles, wipe the rims clean and place on seal and ring.
- Place jar in the warm canner. Proceed to fill all jars.
- Process in a pressure canner according to the instructions. Processing time is listed below. Be sure to adjust for your altitude.
Notes
Adapted from: The National Center for Home Food Preservation, Colorado State Extension
What else can you do with green beans?
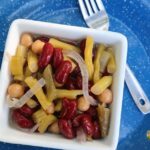
3 Bean Salad Canning Recipe
Freezing Green Beans

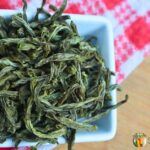
Dehydrating Green Beans
Dilly Beans

This year we planted more green beans than years past, and I have a question: Ball Blue Book for Canning says only prep as many beans as your pressure cooker can process, so that’s 7 quarts. How can I keep those extra quart of two of blanched beans safe for the next batch of beans getting canned? I do hot packs, and I am losing a quart or 2 that I’d like to can, every time I’m canning beans, which right now is about 2x a week. 🙂 lucky me, right?? 🙂 Thank you, Shelby
Just put them in the refrigerator until you are ready to can again. They can be in there a couple days. But not much more than that. And yes! Lucky you!
My weight never jiggle is it going to be okay as long as I cooked for the right amount of time
No, the timing is important. But so is the pressure. If your canner didn’t come to pressure I would not consider the jars properly preserved.
I was told that pressured green beans need to boil 15 min before eating. Is this necessary?
Hi Sally, it used to be recommended that you always boil low acid foods (which would include green beans) before you serve them. The recommendations have changed. I’ve got more explanation here–> Boiling home canned foods before serving them.
That is great news! Thanks for your response!
Would the cooking time be the same in an electric pressure canner?
I don’t know what electric pressure canner you have. I’ve got more on the concerns with these here… Electric Pressure Canner. Not saying don’t! But do be aware so you can make your own decision. If you do decide to use the Presto Electric Canner you should check the directions that come with the canner. I”m not sure if they are the same.
I just want to point out that somewhere in your instructions, you say to cold pack or hot pack, then process in the water bath canner. I know you didn’t mean to say that (based on all your other statements), so you may want to proofread again and fix this.
Thank you. Found it and corrected. I appreciate you letting me know!
I’ve pressure canned fresh green beans according to generally accepted instructions but have ended up with very soft finished product, unappetizingly so. How best to get firmer beans for my effort?
Gin when you say ‘generally accepted instructions’ that is very vague so I can’t speak to how you are canning them. But, the beans should be cooked through. They shouldn’t be total mush. If it is you might watch your pressure make sure you are at the proper pressure for your altitude. Or possibly get your gauge checked. Maybe it is reading off? I don’t recommend shortening the time or reducing the pressure from what is recommended. There are safety factors there. I can say that some people just don’t care for canned veggies. If you like a little crunch… Read more »
Thank you, Sharon; I appreciate your insight (=
I canned green beans today and when I took them from the canned the white beans were pink! I have canned for 50 years and have never had this happen. What is the problem?
Hi, Yvonne,
Hmmm…that is a curious question! What type of lids did you use? What kind of water did you use? You said they’re just plain green beans, right? Or some other kind of beans?
-Rachel (Sharon’s assistant)
I’m new to canning and did a dozen qts of green beans to someone’s method. Blanched five minutes water bathed thirty minutes. Now I’m reading it’s not safe and I should unseal and reprocess for three hours. Do I only unseal and reseal to reprocess? Do the jars of beans have to reheated and how?
You’ll just need to follow the process on this page, starting from the beginning as if they were fresh green beans. Unfortunately, I think the green beans would probably be quite mushy after processing again, so I would suggest freezing this batch and using the proper pressure canning instructions for the next round of green beans.
-Rachel (Sharon’s assistant)
And just to be clear about this, you’ll have to take the beans out of the jars and reheat and repack them using the hot pack instructions (since the beans have already been cooked). 🙂
I accidentally added 1 tsp canning salt to pints for green beans…. will they turn out okay?
It’s not a safety issue, but they might taste a little salty. 🙂
-Rachel (Sharon’s assistant)
My mother-in-law taught me how to can some 50 years ago. I would go to a “you pick” garden & pick veggies with my 9-month old daughter in a carrier on my back & my 4 year old daughter by my side to help. I then took everything home where my mother-in-law helped me can. I had two go to books (Kerr & Ball) to answer questions. However, your canning instructions have answered questions that the books didn’t. Thanks for the extra help! Excellent website! You are so right about green beans & onions processed together. If beans were processed… Read more »
It’s so nice to hear about families passing down their love of canning to multiple generations. 🙂 And Sharon is happy to hear that the book and website has been helpful as well.
Blessings,
Rachel (Sharon’s assistant)
I used the cold pak method to can my green beans. I am new to canning and followed a video to do this. I have found that some of my jars after taking them out of the pressure cooker have about 1/2 to 1 inch of water at the bottom with the beans floating to the top. What did I do wrong and are the beans ruined? Should I throw throw those jars away?
It sounds like liquid loss. If there is less than half of the jar filled with liquid, they shouldn’t be kept on the shelf – just put in the fridge and use up ASAP. You can learn more here: https://www.simplycanning.com/liquid-loss-in-home-canning/
-Rachel (Sharon’s assistant)
Pressure canned green beans, raw pack method. First day after canning them found 2 jars with button in middle of canning lid down but when I tried to lift jar by lid it came off in my hand. Rest stayed on the jar and allowed me to lift them by lid. Moved rest to a storage area and just found 2 jars spoiled. Gone over step by step directions several times. Have been canning all of my life.Not my first time of using pressure canner. Don’t understand what went wrong. But something obviously did!! Have noticed seal in lids not… Read more »
The ones that were spoiled were they the ones that didn’t seal? That would make sense then. But you are correct. I’ve seen many people mention that the rubber seals on new lids do not seem the same as older lids. Also… I don’t know where you got your lids but last year many new manufacturers popped up online. They were making poor-quality lids and passing them off as brand names. YOu might want to double-check and see if you got those. If so return them if you can. Or just watch your jars carefully.
Agreed. I have found generic brand lids aren’t sealing as well as Ball.
After canning my vegetable chicken soup, some of the peas are floating on top. The seal is good. Is this ok?
Yes, it should be fine. 🙂 Sometimes, food might float in the jars, and it would make sense with something like peas for sure. As long as you used a safe recipe and processing instructions, you should be set!
-Rachel (Sharon’s assistant)
Yes my mom and dad and I with 7 siblings been canning food from the garden we had for years and never had a pressure canner that’s something new to quickly can your food which might not be safe because at least we knew our time limit was safe so please say you prefer to use the pressure canner not that it’s not safe for we know the devil is a liar
Well, I will agree with you that the devil is a liar. 🙂 However, I can’t in good conscience agree with you that a water bath is fine for anything. We all make our own decisions and I only recommend the pressure canner for any vegetables or meats. If you’d like you can check out more on what my opinions are on canning safety here. Canning Safety – Is it overkill?