Dehydrating Green Beans
This page may contain affiliate links. More Information.
For dehydrating green beans, just as in canning green beans, you want to start with fresh, tender pods. Picking first thing in the morning will give you nice, crispy produce. If you are picking in your own garden…go ahead and snack on a few beans. Yum. And oh, so good for you.
How to Dehydrate Green Beans
Wash beans in cold water and snap the ends off.
Blanching Green Beans for Dehydrating
Blanch green beans for 2 minutes (water blanching) or 2.5 minutes (steam blanching). This will help the beans to dehydrate quicker. It releases some of the juices and stops enzyme actions.
The easiest way to blanch is to simply plunge green beans in boiling water. Start counting time as soon as you dunk the beans. (You can use steam instead too if you want to save energy boiling water.)
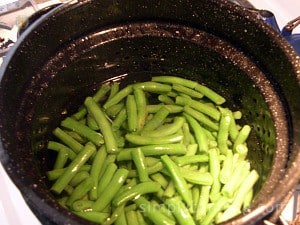
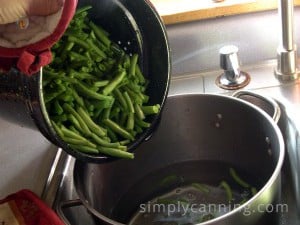
Once the amount of time has passed, plunge them into cold or even ice water. This cools the beans and stops the cooking process.
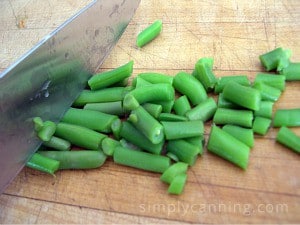
Drain well and cut into 1-inch pieces.
I’ve seen resources that suggest freezing your green beans after blanching and before drying for better texture. I have not tested this. I just blanch and dry like what I show here.
Dehydrating Green Beans
Place in a single layer on a dehydrator tray. Be sure the beans are spread enough that air flows freely around them.
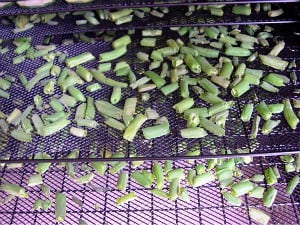
Dry at 125 degrees for about 8-14 hours until dry and crispy. Check every so often (every couple of hours) and stir the beans around. This will encourage them to dry evenly.
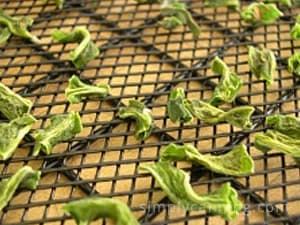
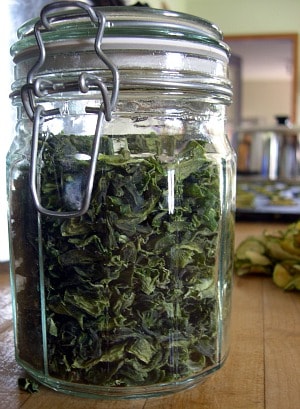
They are done when they are hard. Store in an airtight container.
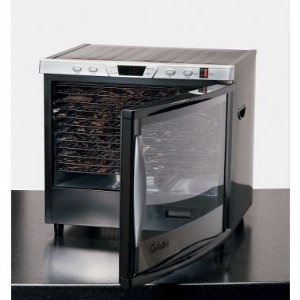
A good dehydrator is the essential piece of equipment. The most recommended is the Excalibur dehydrator.
I personally have a commercial dehydrator from Cabela’s, but I don’t think they’re available any longer. Maybe you can find another brand that’s similiar at Amazon?
Recipe Card
Dehydrating Green Beans
Equipment
- Blancher or basket
Ingredients
- Green Beans fresh & tender
- Water
- Ice
Instructions
- Wash and snap ends off beans.
- Blanch in boiling water for 2 minutes or steam for 2.5 minutes.
- Plunge beans into ice water.
- Drain well. Cut into 1” pieces.
- Place in a single layer on a dehydrator tray, allowing air flow around them.
- Dry at 125 degrees until dry and crispy, usually 8-14 hours.
- Store in an airtight container.
How Do You Use Dehydrated Green Beans?
These are great in soups, stews, casseroles, or rehydrated as a side.
When you are rehydrating dried food, it will approximately double in quantity. For example 1 cup dried green beans will reconstitute into 2 cups. This will actually vary quite a bit depending on the size of your pieces.
Also keep in mind that rehydrated vegetables won’t have the same texture as fresh ones. Try rehydrating green beans as a side—you might enjoy it! But many times, I find they work better when added to a slow cooker along with other veggies, leftover bits of meat, and some chicken or beef broth. Season it well, let it cook all day, and you’ll have a flavorful, comforting meal ready to go.
Related Pages
Pin This to Find Later:


Do you use or even recommend those little silica dehydration packets? If so, any idea where to buy them?
I have never used silica packets myself. The silica packets keep things dry in your containers. You use them with already dried foods. They do not replace the dehydrating process though. And make sure you are using food safe packets. You can’t use what you’ll find in other products. For example, new shoes will often have silica packets in them. Don’t throw those in with your food!