
Pressure Canning: Beginners Guide
This page may contain affiliate links. More Information.
Pressure canning has a reputation for being scary. All that hissing, the dials, the weights rocking… pressure! I get it. But once you understand what’s actually happening inside that pot, the fear melts away pretty fast.
I’ve been pressure canning for over 30 years now, (gosh has it been that long!?). By the end of this page, you’ll know exactly what pressure canning is, whether it’s the right method for what you want to make, what equipment you actually need, and how to do the whole process from start to finish.
What You’ll Find
- Whether pressure canning is the right method for your food (start here if you’re not sure)
- What equipment you need — dial gauge, weighted gauge, or electric, and how to choose
- Complete step-by-step directions with tips from my own experience
- Troubleshooting and FAQs
- A printable checklist to take to the kitchen
The table of contents below has links to jump to each section if you’re looking for something specific.
Is Pressure Canning the Right Method for Your Food?
The Short Answer: It’s About Acid (and Heat)
Pressure canning is the only safe method for low-acid foods.
Low acid foods generally include:
- Most vegetables
- Meat, poultry, broth, and stock
- Soups, stews, and any recipe with meat or vegetables added
These foods don’t have enough natural acidity to stop Clostridium botulinum, the bacteria that causes botulism, from growing inside a sealed jar. Boiling water alone can’t reach a high enough temperature to destroy those spores — you need the higher heat only a pressure canner can produce.
High acid foods generally include:
- Most fruits,
- Jams, jellies, marmalades, fruit butter
- Properly tested pickled items
High acid foods don’t need pressure canning. Water bath canning or steam canning is the right method for those instead.
Why Does This Matter?
A water bath canner can only get as hot as boiling water — 212°F at sea level. That’s plenty for high-acid foods, but it’s not hot enough to destroy botulism spores in low-acid food. A pressure canner traps steam and builds pressure, which pushes the temperature up to 240°F. That’s the heat that actually does the job.
I don’t say this to scare you — I say it so you understand why the recommendations exist. Once that clicks, the rest of this just makes sense. I’ve got a fuller explanation of botulism, home canning, and why you don’t need to be afraid here.
What About Tomatoes and Other Borderline Foods?
Tomatoes are a special case. Plain tomatoes are borderline enough that a water bath works if you add the right amount of acid, but the moment you add low-acid ingredients — onions, peppers, meat — you’re in pressure canner territory.
Read more about how to can tomatoes here.
A Quick Side Note on Pressure Canners vs. Pressure Cookers
Pressure Canner vs. Pressure Cooker: These two get mixed up constantly, and the confusion matters. A pressure cooker is built for cooking dinner quickly. A pressure canner is built and tested specifically for processing jars safely. You can cook in a canner, but you can’t can in a cooker. I go into the full difference here, including why size matters too.
Links to some pressure canning recipes
What Is Pressure Canning?
Here’s how it works.
You fill jars with prepared food, lock them inside a sealed canner, and let steam build up under pressure. That pressure pushes the temperature past what boiling water can reach — all the way up to 240°F — which is what destroys botulism spores in low-acid food.
What You’ll Need
Essential Equipment
- Pressure canner — see below for which type to choose
- Canning jars — make sure they’re in good condition
- Lids and screw bands — always use new lids; bands can be reused if they’re in good shape
- Jar lifter — not optional, trust me on this one
- Canning funnel — makes filling jars so much easier
- Ladle
- General kitchen supplies depending on your recipe: towels, pot holders, pots, bowls, spoons, knives, etc.
- All ingredients called for in your recipe
There’s also a page to help you get your entire canning day organized here.
Dial Gauge, Weighted Gauge, or Electric — Which Should You Get?
There are several options for pressure canners, both brands and styles. Let’s go over each briefly.
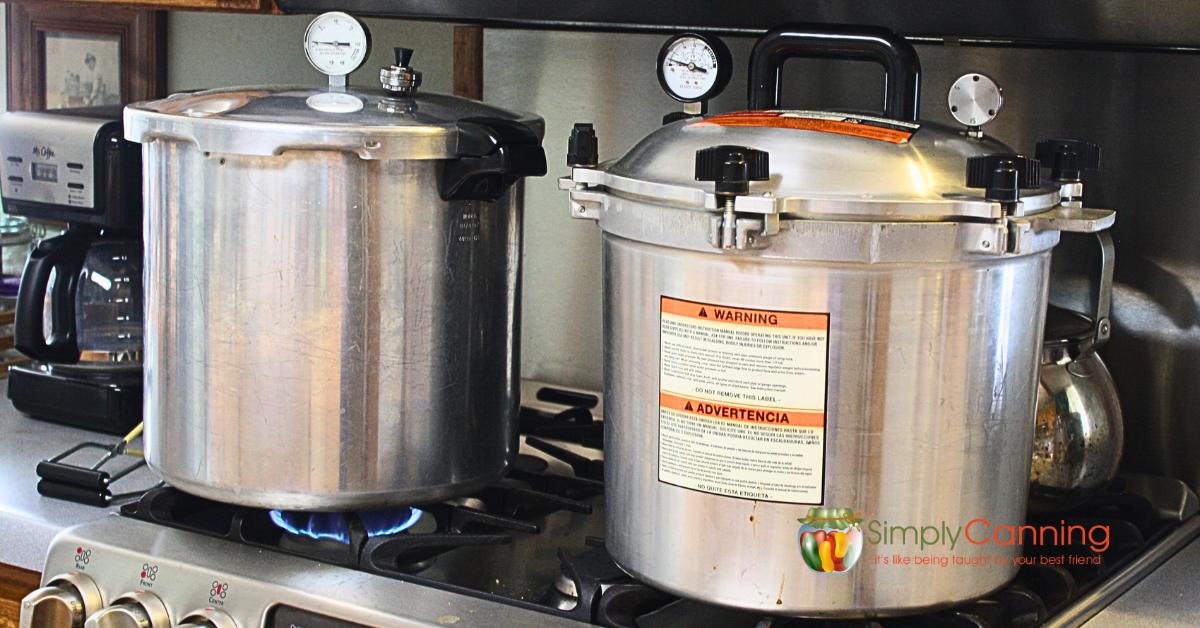
- Dial gauge canners have a gauge you watch while adjusting your stove’s heat to keep the needle at the correct number. This gauge needs to be checked for accuracy once a year. Most agricultural extension offices do this for a small fee, and some hardware stores host a canning day each season. More on gauge testing and canner brands here.
- Weighted gauge canners use a weight that rocks or jiggles to release steam once you’ve reached pressure. You’ll still use the stoves heat to adjust the temperature as needed. No gauge to get checked — you just listen and watch. This is my own preference; I like the simplicity.
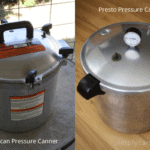
- The All American and Presto are the two brands I hear about most, and I actually own both. Here’s my full brand comparison if you want to dig in. (Tip, the Presto seems to be less intimidating to beginners.)
- Electric pressure canners are the newest option. They measure temperature directly instead of pressure, and they adjust automatically for your altitude. Very cool! Here’s what I’ve found researching one so far, if you’re curious. Remember there is a difference in a pressure cooker and pressure canner. As far as I know the only electric pressure canner is from Presto.
Whichever style you choose, your canner needs to hold at least 4 quart jars sitting upright. Anything smaller is a pressure cooker, not a canner. Remember cookers are for cooking supper, canners are for preserving food.
Choose Your First Project
Always Use a Tested Recipe
Tested recipes have been developed with safe packing and processing instructions specific to pressure canning. The USDA, Ball, and the National Center for Home Food Preservation are all reliable sources. (The recipes here on Simply Canning, in my video courses, and in the guide book all come from safe, tested resources.)
Remember, tested doesn’t just mean a lot of people have done it without getting sick. These recipes are scientifically tested by experts in the field. You’ll see lots of recipes online — they may be great, but they may not be tested at all. Don’t take a chance.
What Should You Make First?
Not sure where to begin? Here are my beginner-friendly recommendations:
- Carrots are probably my top pick for an absolute first project. Fresh carrots are easy to find year-round at the grocery store, so you’re not stuck waiting on a season to start. They’re simple to prep and forgiving if your timing is a little off.
- Green beans are a classic first project too, and for good reason — minimal prep, straightforward packing. The catch is that fresh green beans are seasonal, so this one’s better suited to summer.
- Chicken or broth is a great next step if you’re not intimidated by canning meat. Here’s a little secret: meat is honestly just as easy as vegetables. The process is the same — pack, process, done. People build up more fear around meat than the actual technique warrants.
Pressure Canning: Step-By-Step Directions for beginners
Ready? Refer to your individual recipe for specifics on the food you’re working with. This page walks you through operating the canner itself — your recipe will tell you the prep, packing, and timing for whatever you’re making.
- I’ve included notes and tips from my own experience throughout.
- Want a shorter version? There’s a printable checklist at the bottom of this post.
Step 1: Gather all your pressure canning supplies:
- Pressure canner
- Canning jars
- Canning lids and rings (sometimes called bands)
- Jar lifter and canning funnel
- All recipe ingredients
- Kitchen towels or paper towels
- A non-metallic utensil or bubble tool for removing air bubbles
- General kitchen supplies depending on your recipe
Step 2: Prepare Your Canner and Jars
Fill your canner with 3 about quarts of water. Yes, that is all the water needed. Check your manual for to verify the exact amount. But generally most need 3 quarts.
Note; The water will NOT cover the jars when the canner is full. That’s ok.
Remember, pressure is the key to safety in pressure canning. The pressure buildup is what causes the high heat necessary.
Set the rack in the bottom of the canner and heat water until hot, not boiling. Keep warm. The goal is that the canner and jars will be hot when your jars are being filled. So keep in mind your food preparation time.
Wash and rinse your jars and lids. You don’t need to sterilize jars in pressure canning. The high temperatures reached in the canner will sterilize everything. You DO need to start with clean jars.
Keep the jars hot until use. My favorite way to do this is to just place the clean jars in the hot water in the canner. I’ve got some other options too that I go over just below.
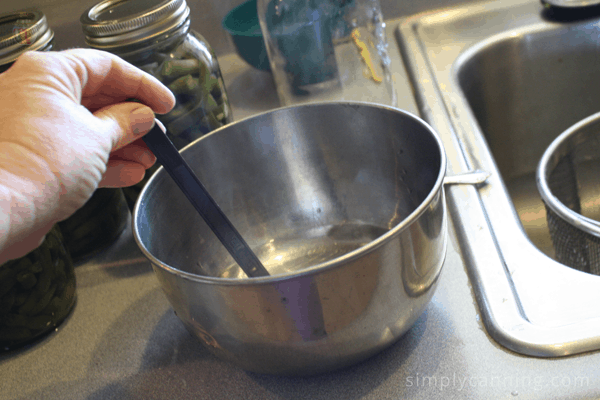
The lids also need to be clean but do not need to be boiled or sterilized. My suggestion is to put them in a bowl of warm water ready to pull out with your lid lifter. This will give you a good rinse, but no boiling needed.
Three ways to keep canning jars hot until you are ready.
Generally you will need to have hot jars to put your food in. Hot food, into hot jars, into hot canner. I have three options for you.
- Place your jars upside down right in the canner while the water heats. This is my go-to. They sometimes tip a little as the water heats up and the air inside the jar shifts around — not a big deal, just tip them back upright as needed.
- Wash the jars in the dishwasher and then simply leave them there until ready to fill. Keeping the door to the dishwasher closed keeps in the steam and heat. Remove the jars a couple at a time as needed.
- Place the clean jars upside down in a pot with 2 or 3 inches of hot water. Bring to a boil and turn off the heat. Leave the jars in the water until ready to be filled.
Step 3: Prepare & Pack Food
This is where you need to check the specific directions for your food. There will be lots of detailed instruction. Pay attention to the following.
- How the food is prepared before you pack your jars. For example, hot pack or raw pack, headspace, blanching or precooked… there may be other things. Just follow directions.
- Processing time. This will vary according to the type of food, the jar size, and if it is hot packed or raw packed.
- Altitude adjustments. You need to adjust the time according to your elevation where you live. This adjustment should be included with your recipe. More details on that can be found here… Altitude Adjustments (opens in new tab)
Here are some links to lists of food specific pressure canning recipes – Canning Vegetables and Canning Meat. These are all processed in a pressure canner.
Step 4: Filling your Canning Jars
- Fill jar, leaving the recommended headspace.
- Remove air bubbles by running a non-metallic spatula around the inside of the jar. I like to use a plastic orange peeler for this step. The handle of a rubber spatula will also work. Or an official bubble tool is pretty handy.
- Wipe the rim off the jar clean with a damp tea towel or paper towel.
- Place seal and ring on jars. Tighten finger tight. You really don’t have to crank down hard. Snug is fine.
- Place in canner. Finish filling all jars.
Step 5: Load Canner and Venting
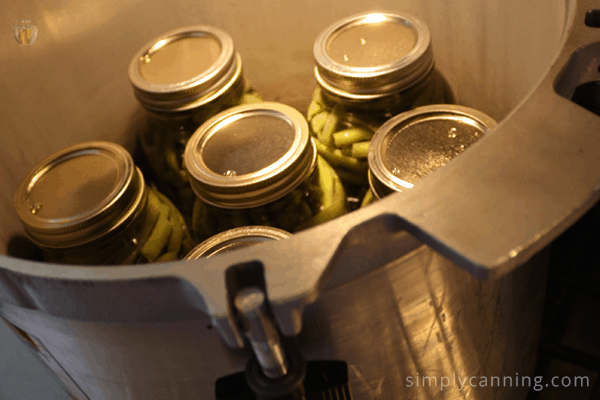
- Place your filled jars on the rack in the canner.
- Secure the lid on the canner. Don’t put the weight on yet!
- Bring to a boil. Watch for steam to start escaping from the vent pipe — this is called venting.
- Allow the steam to vent for a full 10 minutes. Don’t skip this.
What is happening during venting?
Venting means letting steam and air escape from the canner. As the water boils it produces steam. This steam forces out any remaining air. Once the vent is closed, the canner traps and pressurizes the steam. Because steam under pressure reaches higher temperatures than boiling water, your jars don’t need to be submerged—the steam does all the heating.
Step 6: Processing
After venting, add the weight. This is when pressure will start to build.
Weighted Gauge or Dial Gauge
- If you’re using a dial gauge canner, you’ll monitor the dial to see when it reaches the correct pressure.
- If you’re using a weighted gauge canner, you’ll know you’ve hit pressure when the weight starts to rock, jiggle or spin, releasing a little steam with each rock. (choose your recommended weight. Generally 10 or 15 pounds pressure.)
NOW Start Timing
Once you’ve reached the correct pressure for your altitude, start your timer. Check your gauge periodically throughout processing. Turn your heat up or down as needed to maintain the correct pressure. This is sometimes fiddly.
It will get easier to maintain steady pressure as you get to know your stove and how it reacts as you adjust. Sometimes it is very small adjustments! Eventually you’ll get it set and won’t have to adjust too often.
Note: If the pressure drops below the required level, you have to start your time over. Bummer — I hate it when that happens. Yes, I’ve done it. If it goes a little over… its fine. The goal is to maintain a steady pressure without a lot of fluctuations.
Stay in the kitchen and do other things. Check the dial gauge occasionally. If you’ve got a weighted gauge you can listen to the rock and you’ll notice if the sound changes up or down.
When time is up, turn off the heat.
Do not remove the weight yet. Let the canner cool and depressurize naturally.
NOW is the time you can leave the kitchen. DO NOT try to speed up the cooling process by pouring cold water over the canner or using some other artificial method. No fans, no cool cloths. Just let the canner cool and release pressure all by itself.
Step 7: Cool down and removing Jars
When the pressure has fully returned to zero, remove the weight and wait about 5 minutes. Then crack the lid to allow steam to escape and set the lid back down loosely on top. As you do this tilt the lid away from your face, since it will still be very hot.
Repeat – Zero pressure is still very hot!
Wait another 5 minutes and remove the lid.
Let the jars rest a bit longer if they’re still visibly boiling hard. Some boiling is normal but if you notice it boiling so hard liquid is pushing out of the jars you want to wait and slow the process down.
Next remove the jars with your jar lifter and set them upright on a towel or wooden board. Leave a little space between jars so air can circulate
- Don’t rush this — quick cooling can cause liquid loss.
- But don’t drag it out for hours or leave jars in the canner overnight either; that risks flat sour, which won’t hurt you but will ruin the taste.
My favorite part…
Listen… Did you hear it?
As the jars cool, the lids pull down and seal with a little ping. I never get tired of that sound. It is so satisfying. It means all my work is…well…working!
Just FYI, they won’t always ping. Sometimes you’ll miss it or the jars may just decide not to make a sound. It doesn’t always mean a seal failure. Learn more about what missing that ping means.
You may notice the bands have loosened a bit during processing. That’s normal and not a problem. Do not try to tighten them down. You may affect the seal. And we don’t want to mess it up now!
Resist the urge to press on the lids. Do not cover with a towel. Leave the jars completely undisturbed for 12–24 hours. I usually leave mine out overnight. I love waking up in the morning to the jars sitting out on the counter with the morning sun shining off of them!
Step 8: Check Seals and Store
Your jars should now be at room temperature and hopefully sealed. Press down on the center of each lid. A sealed lid stays down and won’t pop up or down. You should also remove the band and lift the jar by the lid edges, if it’s sealed, the lid stays in place.
If a jar didn’t seal: No problem. Just put it in the fridge and plan to use it within a few days. Reprocess may be a possibility. Check this post on reprocessing.
For jars that did seal:
- Wash the outside of the jar — it may be sticky. Sometimes a quick rinse is all that is needed, sometimes a bit of soapy water is in order.
- Remove the screw bands for storage. I recommend this; a loose band can sometimes hold a lid in place even after a seal has failed, and I’d rather know right away if that happens.
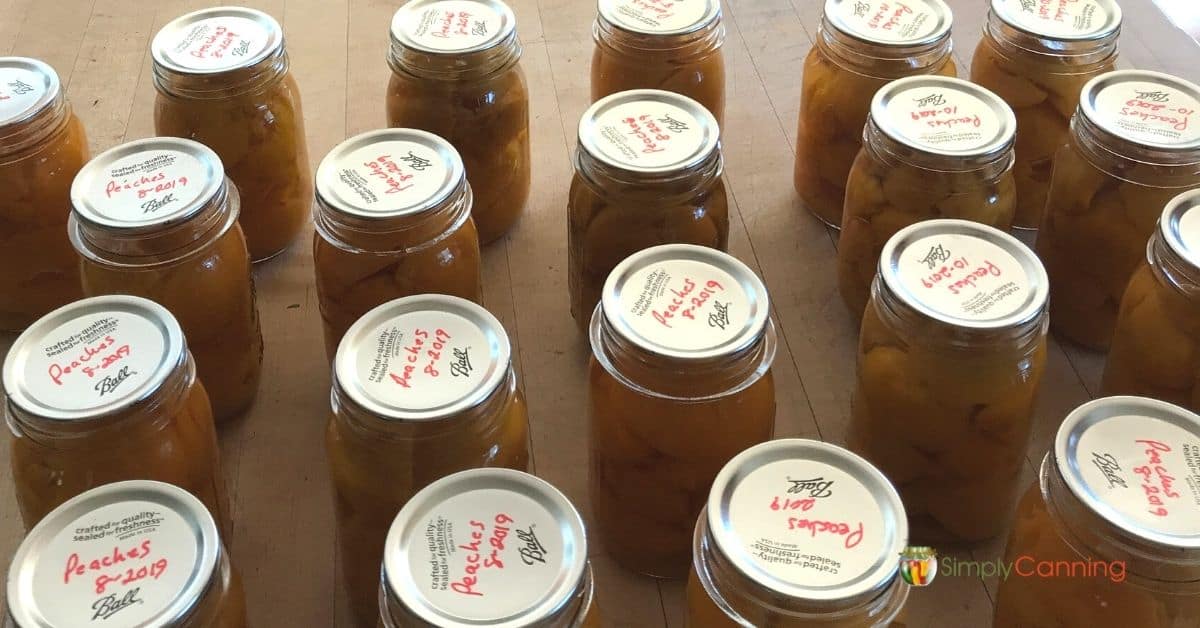
- Label each jar with the contents and the date.
Store in a cool, dark, dry place. A pantry or cool basement works well. Avoid hot pipes, high humidity, and direct sunlight.
It is a good idea (but not essential) to store without the screw cap. I highly recommend removing the bands. Sometimes the band can keep the lid on the jar even if the seal has broken. Personally I want to know if the seal has broken… I don’t want that screw band holding the lid in place. If the seal breaks, the food spoils.
For those that choose to leave the screw band on you still need to remove it to wash your jar and band. Then make sure it is completely dry and put back on your jar loosely. The bands will rust if there is any moisture remaining.
(I’m going to say it again… just leave the screw bands off. It is better.)
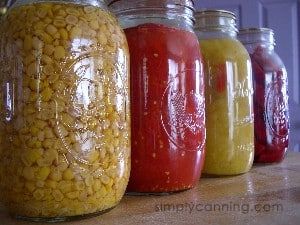
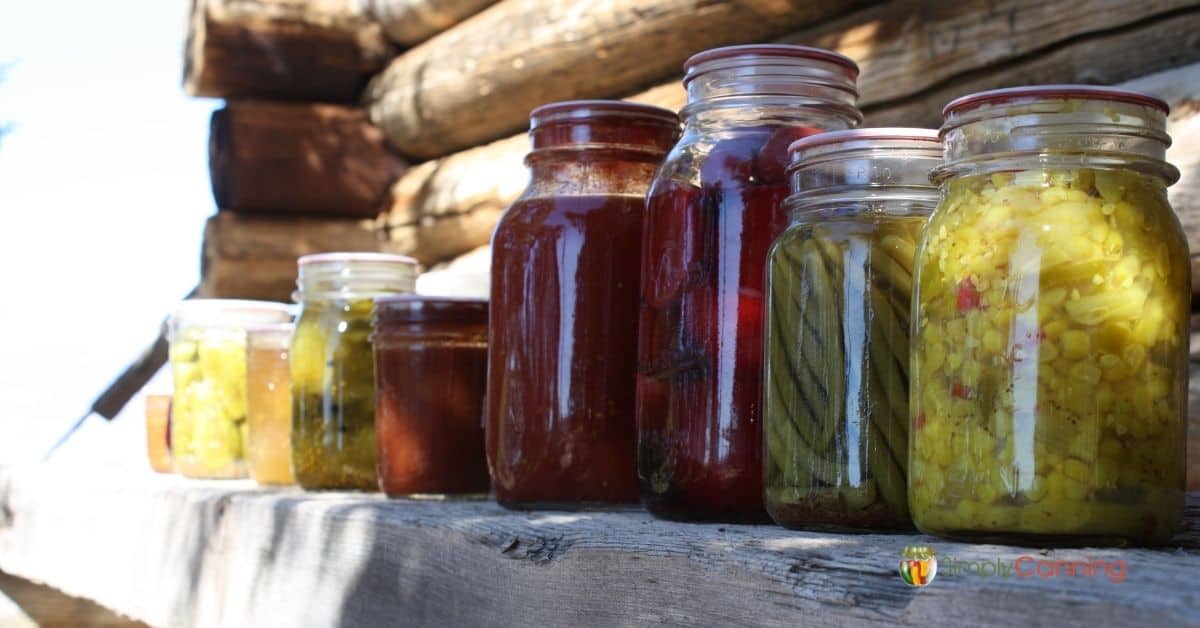
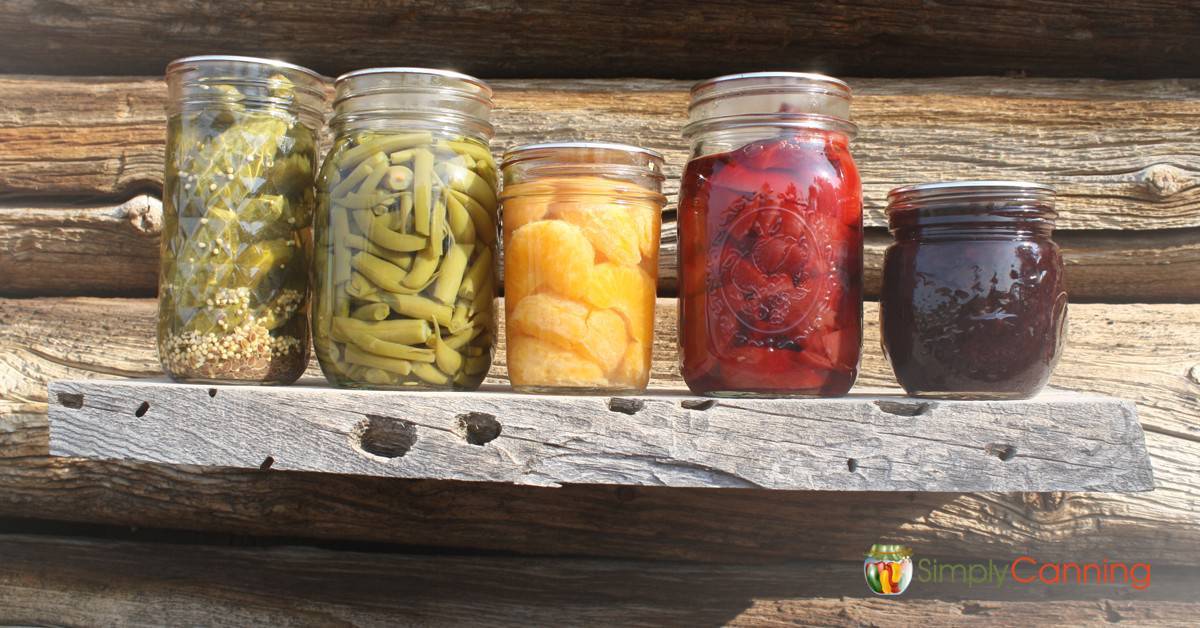
Now stand back and admire all colorful jars full of delicious, nutritious foods. You did it! Pressure canning feels intimidating the first time, but it gets easier fast.
What? You’re tired? Yes, but it is a satisfying tired, is it not?
Understanding Why It Works
You don’t need to understand the science to can safely, but knowing why the process works tends to build real confidence. Here’s the short version.
Heat penetration: As pressure builds, the temperature inside the canner climbs past what boiling water alone could reach — up to 240°F. That heat works its way through the jar’s contents, destroying spoilage organisms and the spores that cause botulism in low-acid food.
Vacuum seal formation: Heat during processing causes the food and air inside the jar to expand. As the jars cool, the contents contract, pulling the lid down and forming a vacuum seal. That seal is what keeps air, bacteria, and spoilers out during storage. And it’s what makes that satisfying ping.
What’s Next?
When you’re ready to start, browse beginner-friendly pressure canning recipes:
Curious about other methods?
- Water Bath Canning Start Here — the simpler method for high-acid foods like fruit, jam, and pickles.
- Steam Canning Start Here — a faster alternative to water bath for the same high-acid foods.
Frequently Asked Questions
Does my canner need to be completely full?
No. A partial load is safe as long as you have a minimum of 2 quart jars or 4 pint jars, and you still process for the full recommended time. More on partial loads here.
Can I double-stack jars in my pressure canner?
Yes — you’ll need a second rack between layers, and you use the same amount of water as you would for a single layer. Full details on double-stacking here.
My canner is leaking steam around the lid. What do I do?
This is most common with All American canners, usually caused by the lid sitting slightly crooked. Here’s how to fix it. For other canner styles, check that the gasket is still pliable and not dried out or cracked — a stiff or cracked gasket won’t seal properly.
Printable Checklist
How to Use a Pressure Canner
Equipment
Materials
- Low-acid food meat or vegetables (any low-acid food that you want to process)
Instructions
Before You Start
- Find a tested recipe for your food (type of food, jar size, and pack method). Familiarize yourself with the recipe’s prep steps (peeling, blanching, pre-cooking for hot pack, acid additions if called for). The recipe should also tell you headspace and whether to use raw pack or hot pack. It should also include altitude adjustments.
Gather all Equipment and Supplies
- Place the appropriate amount of water in the canner. Usually about 3 quarts or 2-3 inches of water. Check your canner manual for exact measurements. Be sure you have the rack in the canner. Start heating it up. The goal is for the canner to be hot but not boiling as you are filling your jars.
- Wash and rinse your jars and lids. (They do not need to be sterilized.)
- Keep your jars hot until ready to be filled. The easiest way is to place them upside down in the canner while it heats up. But you can also leave them in a hot steamy dishwasher.
Canning Process
- Prepare your food according to the directions for that food. This may vary by food type. Follow directions for cut size, blanching or not, pre-cook if needed, raw pack or hot pack, ingredients, acidification etc.
- Fill a jar following the recipe. Jar size matters. Pack method matters. (raw pack or hot pack) Leave the appropriate headspace. (the space between the food and the lid.)
- Remove air bubbles if needed. Adjust headspace again if needed.
- Wipe rims of your jar clean, then place on the lid and screw band.
- Place the filled jar upright into the canner. Continue until all jars are filled.
- Put your lid on the canner, leaving the weights off. Raise your heat and bring to a boil. Watch for the steam to start coming out the vent pipe in the lid.
- Allow the steam to 'vent' for 10 minutes.
- Put the weights on. This is when pressure will start to build.
- When the pressure reaches the proper level for your altitude, start your processing time at that point. Use the correct processing time and weights according to your jars size, pack style, and altitude. This should be included in your recipe.Adjust the heat as necessary to keep the canner at the proper pressure throughout the processing time. A little high is ok… if you drop below your pressure start your time over. For weighted gauges pressure is reached when the weight begins rocking; for dial gauges this is when the needle reads and stays at the target pressure.
- When processing time is completed, turn off the heat. Do not remove weights. Let the canner sit undisturbed until pressure comes back to zero. It will still be very hot!
Cool Down and Storage
- Remove the weight and wait 5 minutes. This allows for gradual cool down. Open the lid to allow steam to escape. (Carefully, don't let it hit your face or arms!) Wait 5 minutes. Take the lid off the canner and remove your jars. Jars may still be bubbling. This is normal. It should not be a hard boil. (Optionally, you can wait another 5-10 minutes if the contents appear to be bubbling hard.)
- Put the jars on a counter with a thick towel beneath them to protect the hot jar from the cool counter. Allow them to cool to room temperature undisturbed. 12 hours is suggested. Do not try to speed up the cooling process!
- When they are cool, remove the metal bands, check the seals. Lids should be concave and not flex. Another way to check seals is to remove the bands lift the lid with your fingers. Remove the bands and wash jars if needed.
- Label and store your foods in a cool dark place. I suggest storing without rings. If you want to leave the rings screw them on loosely.
Pressure Canning FAQs & Tips
Greetings! I just used my Presto pressure canner for the first time. I’m trying it out on my enchilada sauce (no meat). Is there a problem if the pressure is ABOVE the stated level the entire time? I know below would cause a start over. I found you on FB and want to also say THANK YOU for all your great recipes and help 🙂
Sharon’s Answer: Hi Gwendolyn, If your pressure goes over, it is still safe. Of course, you don’t want to go too much over, and some foods will be overcooked if you go over a lot when pressure canning. But it is safe. You are correct that if it goes under, you need to start your time over. That is always a bummer!
I have recently read that you should have your pressure gauge checked each year, but it seems as if people who I know, who have been canning for years, are not really doing that. Is it really necessary to have that gauged checked each year? Thanks. Jessica
Sharon’s Answer:
Yes, you should have your pressure canner gauge tested each year. The USDA recommends that gauges be checked every year. That way, you will know that the gauge is reading correctly for pressure canning.
I confess I also used to skip having my gauge read. Don’t make my mistake. I decided to have it checked one year just because it had been a while. I found out that my gauge was not reading correctly! Not a good thing. Now I go ahead and do it regularly. Better safe than sorry.
Check with your local Ace Hardware Store. Ours has a canning day each year. The local extension comes and checks gauges for a discounted rate. They offer advice and recipe booklets too.
I am using a pressure cooker for the first time. I have read the instructions at least 12 times. I finally got enough courage to use it today. The instructions say, u0022when the control jiggles vigorously, reduce heat…u0022
Can I assume that the loud and, quite frankly, frighting hissing was the u0022jiggling vigorouslyu0022 the instructions speak of? I have a 22 qt. MIRRO. Thanks. Shari
Sharon’s Answer:
Shari, your question made me smile! I never think of the hissing as being frightening. :0 But I suppose if you have not used a pressure canner and are not sure what it is supposed to do, it could be kinda nerve-racking.
Yes, if the sound was loud and frightening, I would definitely say it is time to reduce your heat. It will rock back and forth, letting steam out at each rock. This is what is releasing the steam, preventing the pressure from getting too high.
I am new to pressure canning but have started canning a few things. My question is, do I have to fill the canner up? Can I just do say 2-3 jars?
Just curious as I wanted to can some beef from my freezer but didn’t have enough to fill the canner. BTW, it need to be cooked as its been in the freezer about 5-6 months.
Sharon’s Answer:
Yes, you can run a partially filled load while pressure canning. It is more efficient to have a full canner, but if you only have 4 jars and you really need to get it processed, it is perfectly safe to do so. The guidelines state that you should have a minimum of 2 quart jars or 4 pint jars at a time. You need to follow the same instructions as if you had a full load. Do not reduce the time or pressure.
Sound of the weighted gauge? Could you please help me? I bought a MIRRO 16-quart pressure canner, model number 92116, brand new earlier this year. No matter what I do, I cannot get my weight to jiggle. It lifts off the vent, spins while releasing steam, then sets back onto the vent In about 15/16 counts, it does it again.
I can’t find any information on it saying if this is normal or I’m doing something wrong. Would you happen to know if this is normal for this make of canner? Thank you so very much. I’m about ready to beat it with a sledge hammer. – Karen
Sharon’s Answer:
Hi Karen,
I don’t have a Mirro, but yes, I would think that is normal. If it lifts up and releases steam…consider that a jiggle. My All American also does a weird hissing-type jiggle. The point is that the weight is releasing steam, indicating that the pressure has reached whatever poundage you are working with.
My canning book says that I can double stack pint jars in my pressure canner. Do I need to have a rack or something between the jars or can I simply place the jars on top of one another?
Sharon’s Answer:
Yes, you do need to have a rack between your jars when they are double stacked for pressure canning. You can purchase another rack just like the one that came with your canner or use some other type of rack. Remember you will use the same amount of water as if you had one layer. The reason is that the pressure buildup is what processes the food and jars. The amount of water is the same.
This page has ideas for other things to use for racks. Maybe they will give you ideas of what you may already have: Canning racks.
I’m using a pressure canner, but it seems the steam is coming out around the lid. Not sure if it has a good seal? And will the jars be okay for eating?
Sharon’s Answer:
If the pressure is not building, then your jars will not be processed correctly.
I’d suggest turning the canner off. If there is any pressure, let it release itself, then carefully remove the lid (always tilt it away so steam doesn’t hit you in the face). Check the seal and see if it is twisted or dirty or anything. Then try it again.
If it still won’t seal, you may need to buy a new gasket before pressure canning.
If it does seal, then be sure to start your time over for your food. It needs to process for the entire time suggested. Depending on the food you might want to just freeze it instead of starting over. The food may be overcooked and mushy.
I hope that helps.
I have a very large pressure canner with no gasket. It has big screw-down nobs all around it. I bought it because I knew in time I would have to replace gaskets that would be hard to find.
It is leaking moisture now. Twice I lost all the water and was left with a carmelly mess to chisel off the bottom of my canner. I did manage to reach the proper pounds for the proper number of minutes. I expect to do some deer meat soon, and I know this isn’t going to work for the hour and half it will take to can it. My canner is made of aluminum. I don’t know what to do. – Laura
Sharon’s Answer:
It sounds as if you have an All American Canner. This link goes to a page about the All American and some reader reviews.
Unfortunately I need to warn you that you may have overheated the canner enough that it warped and would be unsafe to use. I’d be sure and have it checked by someone who knows canners.
For these canners here are some suggestions for next time. Try very lightly greasing the edge of the canner with cooking oil before you place the lid. Be sure you also screw the nuts down evenly, working from opposite sides so the lid sits level.
Try these things first with just water in the canner to see if it works before you process another load. You might try calling the manufacturer.
I was recently given a used pressure canner and was told the gasket that seals it may need to be replaced. It looks okay to me but I don’t know what its suppose to look like. How do I test it? Would I just put some water in it and let the pressure come up with no leaks? I’ll be canning vegetables. Thanks! Kathy
Sharon’s Answer:
Yes, you can just add 3 quarts of water and go ahead and heat it up to the pressure you’d use when canning. This way, you will know if it works before you have a bunch of food waiting to be preserved. The gasket should be rubbery and not stiff or brittle. If you see cracks or areas that look dry, I’ll bet it won’t seal for you.
Remember, if it has a gauge, the gauge will also need to be checked to be sure it is reading correctly.
I do a lot of canning as I have a 3/4 acre+, organic vegetable and fruit and medicinal herb garden. I have asked the question a lot whether it is better/safer to use a pressure canner for ALL canning, low or high pH foods.
I can never get a straight answer. Its always just you don’t need to use a pressure canner for low pH foods such as fruit jams.
I have both water canner u0026 pressure canner, neither one is any more or less time consuming to use. So would it not be safer to use the pressure canner for all canning??
Please let me know if you have the straight answer…Thanks a lot, love your site…Tony
Sharon’s Answer:
Hi Tony,
I can only tell you my opinion. I don’t believe either one is any safer, provided it is used correctly. It is much much much safer for veggies and meats to be pressure canned. For fruits, pickled items, or any high-acid foods, it would be your choice.
If you want to pressure can everything, that is fine, but I can’t really say it is u0022safer.u0022 It certainly won’t hurt anything to use pressure canning, as long as you are using correct pressure and time for your food type.
Finding correct information on how to pressure can high-acid foods is the key. You still need to use appropriate and tested times and pressures for those high-acid foods.
I always use a water bath canner for high-acid foods, so I don’t have pressure canning information for them on Simply Canning. My new pressure canner (a 921 All American) has directions for some jams and fruit.
Another thing to keep in mind is that some foods that are traditionally water bath canned may end up mushy in the pressure canner. Salsa is one that I can think of. Pickles are another. Come to think of it, so would fruits like peaches and apricots.
Mushy foods might just be the reason to keep you using your water bath.
I hope that helps.
Sharon
I’ve always heard that when the pressure canner has done its work, you should let it cool down completely without doing anything to hurry it along, like taking the weight off the steam vent, for example.
I admit that I have done that a few times, and I noticed that when I did, the bubbling sound inside the canner got noticeably louder. I have also noticed that some broth from inside the jars has been pulled out into the canner.
My questions are:
– Why does it matter if I take the weight off the steam vent to hurry cooling?
– Why do I get broth from inside the jars pooling in the canner, even though I left plenty of headspace?
– Are these two things related?
Sharon’s Answer:
Yes, the two things are related. If the jars cool too quickly, they will expand and push the liquid out. Remember things expand and contract with heat. If the pressure in the canner is being released too quickly then the pressure in the jars will push out the contents.
The other reason it is important to let the canner cool by itself is timing. When the USDA tests to see how long foods need to be pressure canned, they include the cool-down time in the total cooking time. So if you cool the canner artificially, you are also shortening the total cooking time.
You should be letting the canner cool all by itself. When the pressure is back to zero, open the vents and wait two minutes. Then you can remove the lid. It will still be hot! Be sure the lid is tilted away so the steam doesn’t hit you in the face.
Sometimes, I notice my jars are really bubbling hard still after I’ve opened the canner. I’ll often leave my jars in the canner for 2 or 3 minutes more when that happens. This allows them to cool more, before removing them from the heat.
Pin This to Find Later
hello Sharon, Thanks for all the wonderful info you provided, as I’m a Newbie and this helped so much. One question: I just checked my 4 pints of canned green beans this morning and all 4 of them had the bands that seemed to loosen, so I tightened them down more. Is this normal in the processing ?? I hand tightened them before putting them in the canner, but they appeared to have loosened.
That happens sometimes. As long as the lids are sealed it is fine. The bands are there just to hold the lids in place during processing. You might tighten just a little more next time. :).
The new vacuum mason jar sealer…does it work and will it work as a pressure canner?
Hi Cindy, I’m not sure which vacuum sealer you mean so I can’t reply to that. But I can say that a vacuum mason jar sealer is not the same as a pressure canner. So that part of you question is for sure no. A pressure canner is a totally different tool.
Can you pressure can 8 ounce jars, like for vegetables. Canning for 2 people.
Yes, you can use smaller jars. However you do not reduce the processing time. Process for the smallest tested size. All vegetables have tested times for quart and pint jars. So for instance, if you are canning green beans, the smallest jar size available is pints so you will process for pint size. The potential is for softer food than you like. You’d have to just try a small batch and see if you are ok with the texture. Many foods will be fine.
Presto brand has an electric Digital Pressure Canner (NOT a pressure cooker). It says it automatically adjusts the pressure so the temperature for processing is always 240°F whether you live at 1,000 or 7,000 feet.
Just curious about your thoughts on this canner.
Hi, Paula, I have not tried the presto electric canner. I’ve got more of my thoughts on this here. Presto Electric Pressure Canner
I have the electric canner and I love it! Makes canning so much easier. Only drawback is, you can do 4 pints or 3 quarts at a time which is fine for me.
[…] low acid foods require pressure canning. This includes meat and […]
Good afternoon
I am a first timer as well. I have precooked hot spaghetti and I am going to put my hot jars in my pressure canner. Should the water in my pressure canner be warm as well?
Hi Lesley, I’m going to link you to my directions on how to can spaghetti sauce. I don’t recommend experimenting with a recipe like this using a homemade recipe. The combination of ingredients makes a difference.
Plus, you say you have precooked hot spaghetti, do you mean the noodles or the sauce? The noodles are not recommended for home canning. Remember home canning equipment is completely different than commercial equipment. You can buy canned noodles at the store but canning noodles at home is not tested or recommended.
Hi there, I am new at canning and I made a spaghetti sauce with meat and now I am going to put in mason jars and put them in a pressure canner. I am at 600ft, should I pressure at 11lbs for how long? Where food is cooked, would 15 minutes be ok?
Hi Lesley Each food type/recipe will have different instructions. And unfortunately, not all regular cooking recipes are suitable for home canning. Recommended recipes are all specifically tested for density, ph levels, and heat penetration among other things to be sure they are safe for home canning. I linked to a spaghetti sauce in your other comment but you should also look at this page about canning safely. And you might also be interested in this Canning Quick Start Series. Your best bet is to freeze this batch of sauce, learn more about home canning and then have a go with… Read more »
What do I do if my timer stopped in the middle of pressure canning chicken stock. I am not positive of time, so I assume I just start time over? I don’t want to under process.
If you maintained pressure the whole time and you know how much time you had processed before the timer quit, I’d just finish the time out. It might be processed a little long, but as long as you don’t shorten your processing time it is fine. However, if you lose pressure you would need to start over. Stock will handle processing long just fine. If it was a vegetable like green beans they might end up mushy.
when double stacking pint jars do you need the change the pressure and time or does it remain the same
It remains the same. 🙂 You can read more about double stacking jars here: https://www.simplycanning.com/boiling-water-bath-canning/
-Rachel (Sharon’s assistant)
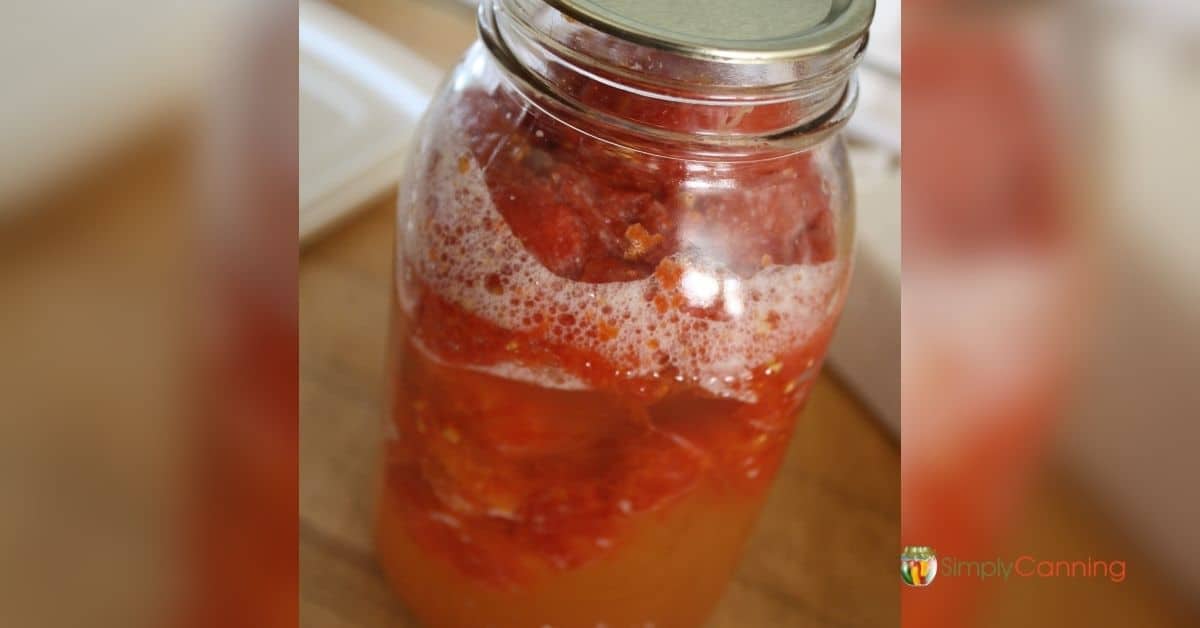
First time canner here. Can you tell me if I did anything wrong? I blanched tomatoes, cooled them in cold water. Peeled and cored them. Cut them in quarters and added them to a pot smashing with a potato masher as I went. I cooked them about 25 minutes. I added warm smashed tomatoes to warm jars, with 1/2 in of head space. I added lemon juice and salt and placed limes and rings on. I pressure canned them at 12lbs (per my altitude) for 25 minutes. When the pressure valves went down, I opened the canner and moved the… Read more »
Liquid loss does happen! As long as it’s not extreme (i.e., more than half of the way empty of liquid), they should be fine. https://www.simplycanning.com/liquid-loss-in-home-canning/ May I ask where you got the 25-minute processing time from? I was looking at Sharon’s tomato sauce recipe, and it says 15 minutes. It’s safe to overprocess, of course, but could that explain the liquid loss?
The separation is normal, however. That happens with tomatoes sometimes and isn’t anything to worry about. 🙂
-Rachel (Sharon’s assistant)
Canning beef stock – does the stock have to be hot to pressure can or can I start out with it cold?
The stock needs to be hot going into the jars. Here is a link to complete instructions for canning homemade chicken stock. Beef will be done the same.
Okay can you give me a reason why? I did mine cold, so I want to be sure that it’s safe to use. All of the jars are sealed.
The reason is that the testing that was done was done with hot broth going into hot jars. The timing might be off if the broth was cold to start. It seems like such a small thing… I always err on the side of caution. Another reason to have things hot is that the jars might break if you start cold. But apparently, you didn’t have issues with this so that is good!
Hi, I have my Grandma’s old 1975 Presto 16QT that only has a 15lb rocker that basically acts as a safety valve – so no steam really comes out. It has a gauge for pressure. The manual says to use 2qts water. My mom has a newer Presto 16QT that doesn’t have a gauge, but has the appropriate 10lb rocker. Her manual says 3QTs, like you said. I just bought a Buffalo QCP435 which is a large 37QT canner. It has both a weighted rocker and a gauge. BUT the manual doesn’t tell how much water to use. Not wanting… Read more »
Hi David. I had never heard of a Buffalo canner so I searched it out. Wow! What a beautiful piece of equipment. Stainless steel too! It appears this is made in Taiwan and has a “Safety Goods (SG) Certificate from Japan”. Link for anyone else who never heard of this! Buffalo QCP435 (opens at amazon. If you order through this link I’ll get a small commision) Since I do not know how this would compare to US standards or how it would relate to the testing that our NCFHFP has done. I don’t think I can help you with these… Read more »
Hello. I’m new to pressure canning. Have water bath canned in the past. My husband bought me a Barton 22 qt pressure canner with a weight for the vent pipe and it also has a pressure gauge. I live at 1880 ft above sea level. As long as I have 11 lbs of pressure for a canning session, am I canning food safely?
Hi, Amanda! That’s a great question! The pressure required actually varies somewhat depending on what food you’re canning, as well as your elevation (as you mentioned). You’ll need to look at each recipe individually to make sure you have the safe processing instructions for that particular food.
-Rachel (Sharon’s assistant)
Ok, thank you. I’m going to return it. I did a “water test” with it and it will only get up to 12lbs of pressure. I just don’t feel safe processing low acid foods for mine and my family’s consumption. *sad*.
First time canning beef tonight. I did a raw pack in quart jars, chopped up pretty small, with a teaspoon of salt and about half teaspoon dried onion each. Reread the instructions for using the canner (it’s an All American 21). I forgot to do the 10 minute steam release at the beginning prior to putting on the weight!! Argh. I didn’t even think of it until I was reading this great page you have. I’m looking at my mostly cooled jars on the counter right now. Should I start over tomorrow? What happens if you forget to do that?… Read more »
Well, the good news is you realized your mistake right away.:) If you tried to pressure can it again it would be pretty overcooked and I don’t think the quality would be very good. I would suggest you go ahead and freeze this load. Any freezer container would work. Personally, I’d drain the jars and put the loose meat into freezer bags. Then you can take out as much as you need when you are making dinner.
You might be interested to read this page. Canning Mistakes… what do I do now?
Thanks so much for the quick response, Sharon. I will put it in the fridge now and freeze it tomorrow. So much to pay attention to when you’re starting out! Glad I did this as a dry run before we get venison and I’m processing lbs and lbs!
Hi. This is my first time pressure canning. We are doing venison. Is it dangerous to move the canner while canning. Like when opening the microwave up and the pressure gauge hits the door. Can you slid it out of the way. Will it explode.
You should not move the canner while it is processing. I don’t think the canner would explode but it could cause other issues. If the canner is under pressure the weight will be jostled if you try to move it. This would impact the pressure inside the canner as it will release pressure quickly. This could cause issues with the jars. Try to plan ahead and not use the microwave during a canning project.