How to Dehydrate Peppers: A Quick Guide to Preserving Peppers
This page may contain affiliate links. More Information.
How to Dehydrate Peppers: A Guide to Preserving Peppers for Quick and Flavorful Cooking”
Dehydrating peppers is a fantastic way to preserve their vibrant flavors and intense heat for recipes. If you use peppers in soups, stew, and especially chili, having the dehydrated version on hand makes for easy quick ingredients. Just toss it in and let it cook with your dish. You can also rehydrated peppers to have on hand for faster cooking things like eggs in the morning!
How to Dehydrate peppers. Wash and dry the peppers, slice them into uniform pieces, and arrange on dehydrator trays. Dehydrate at around 125°F or 52°C until brittle dry. This may take from 4-12 hours depending on the size of the peppers and humidity levels.
Lots and lots of helpful details and tips below!
Equipment Needed
These are some things you might need depending on the method of drying you choose to use. I’ll go over each method so you can choose the best for your situation. (and tell you my favorite too.)
- food dehydrator – this is my dehydrator
- strong string or thread (for air drying) I found some upholstery thread that is very strong and thin.
- airtight containers or vacuum-sealed bags for storage.
- gloves (to protect your hands from the hot pepper oils)
- cutting board and knife
- food chopper (Optional, for fast chopping of your peppers)
How to Dehydrate Peppers with a Food Dehydrator
Using a food dehydrator is one of the most efficient methods of drying peppers. It is quick and consistent. And my favorite way to do it. Follow these steps:
Wash peppers:
You don’t want dirt from the garden or germs from others handling the peppers. I just wash it with clean water since my peppers just come from our garden. You could use a vinegar water rinse if you desire. I might do that if I had purchased fresh peppers from a store.
Slice the peppers into uniform pieces:
The key here is to get uniform pieces. The more evenly they are cut the more evenly they will dry. But you also want to balance the time needed to be too precise. You can chop the peppers or create rings.
Chop the peppers
Dicing or slicing can be done with a food processor if you have one. This is my usual method.

This is good if you want really tiny pieces. The chopper can quickly cut the peppers up pretty small.
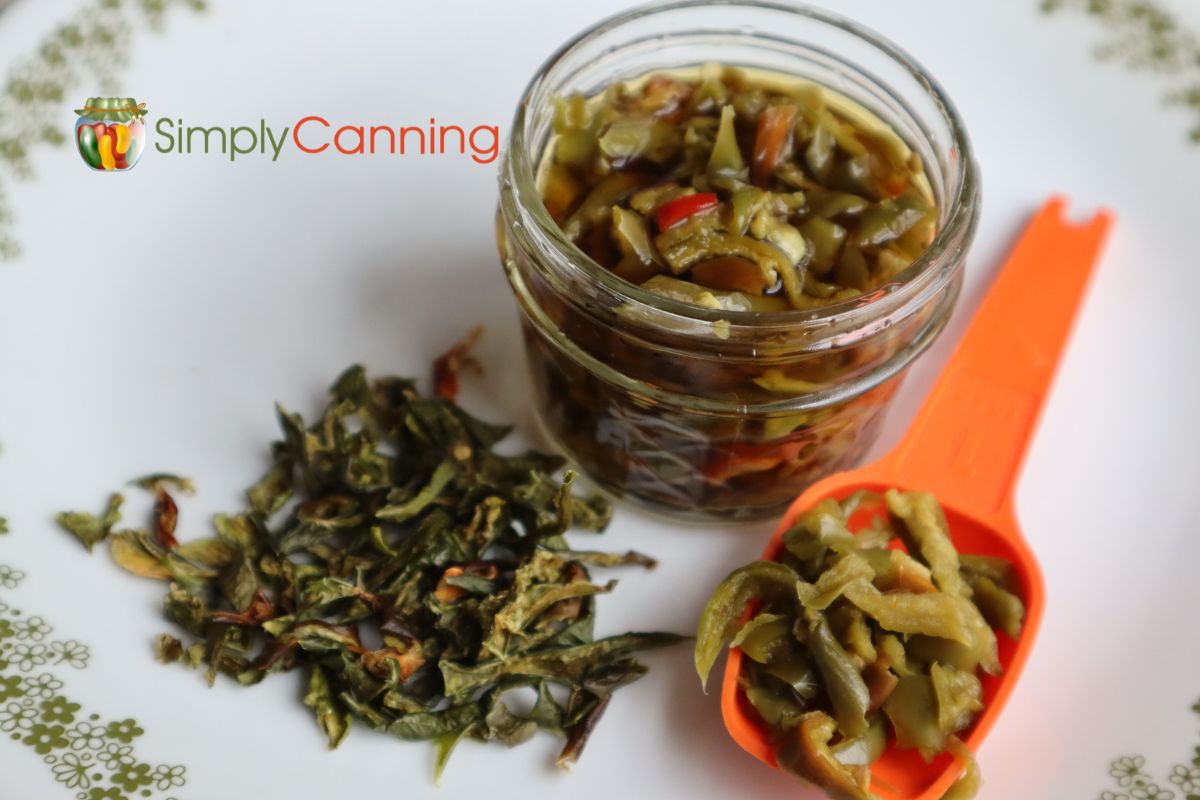
Expert tip! – Use your French fry blade for slightly bigger pieces. I’m leaning more and more on my French fry blade to chop things. I’ll usually do some bigger chunks as well as smaller diced pieces. Then I have choices for later recipes. Try it and see if you like the size. If you don’t like the sizes, just chop them with a knife. What you see in the picture… is done with a French fry blade.
Or you can just do it the old-fashioned way with a sharp knife. First, cut the top of the pepper off. Then pull out the inside seeds and membranes, and chop. Some seeds stay and that’s fine. Don’t forget the tops of the peppers! Depending on the type of pepper you can chop and slice around the ‘lid’ if you’ve got some excess there.
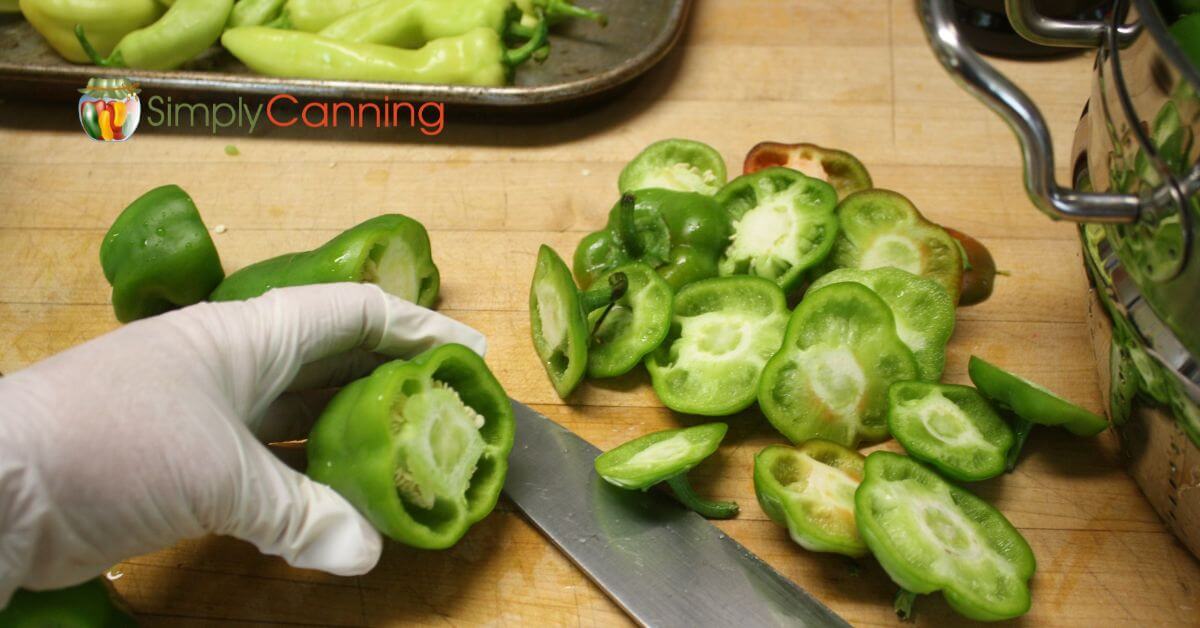
The size is really up to you. Smaller pieces will dehydrate quicker. The more evenly you make the pieces the more even the peppers will dry. If you’ve got a big difference in size the smaller pieces will be dried first, and you’ll have larger chunks still not finished. It can be difficult to get them exact… but strive for close in size.
I almost always dice mine fairly small. Just like I would if I were using it in a recipe. They can be easily measured and added to dishes without further chopping, saving you time in meal preparation. Diced peppers also take up less space in storage containers compared to larger rings. This can be especially useful if you have limited storage space.
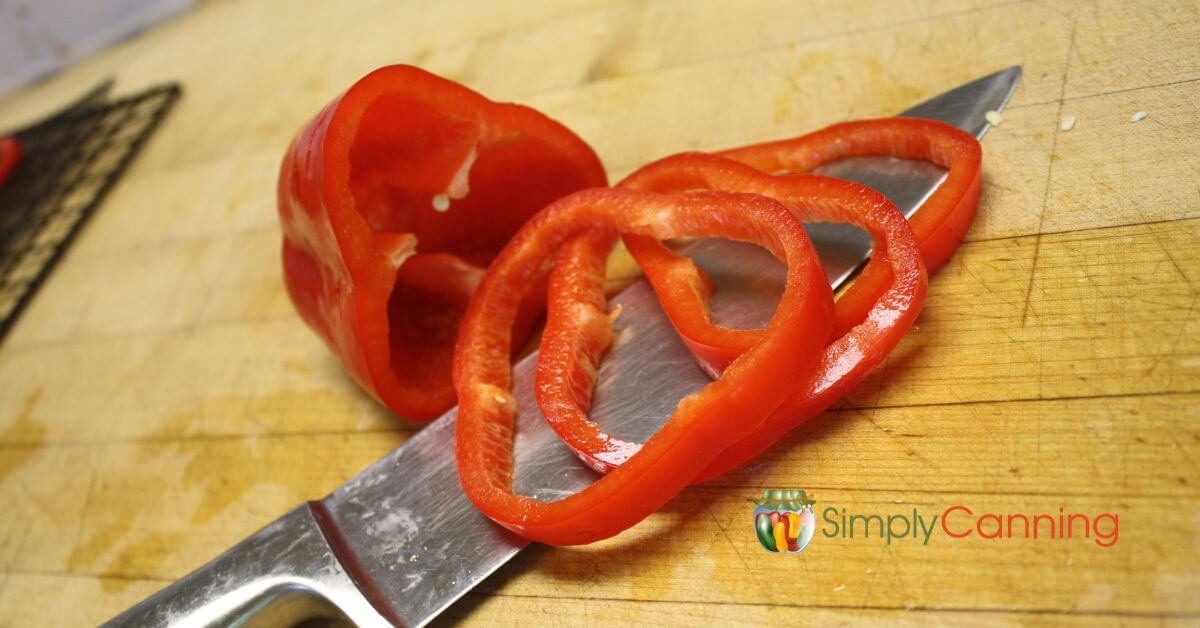
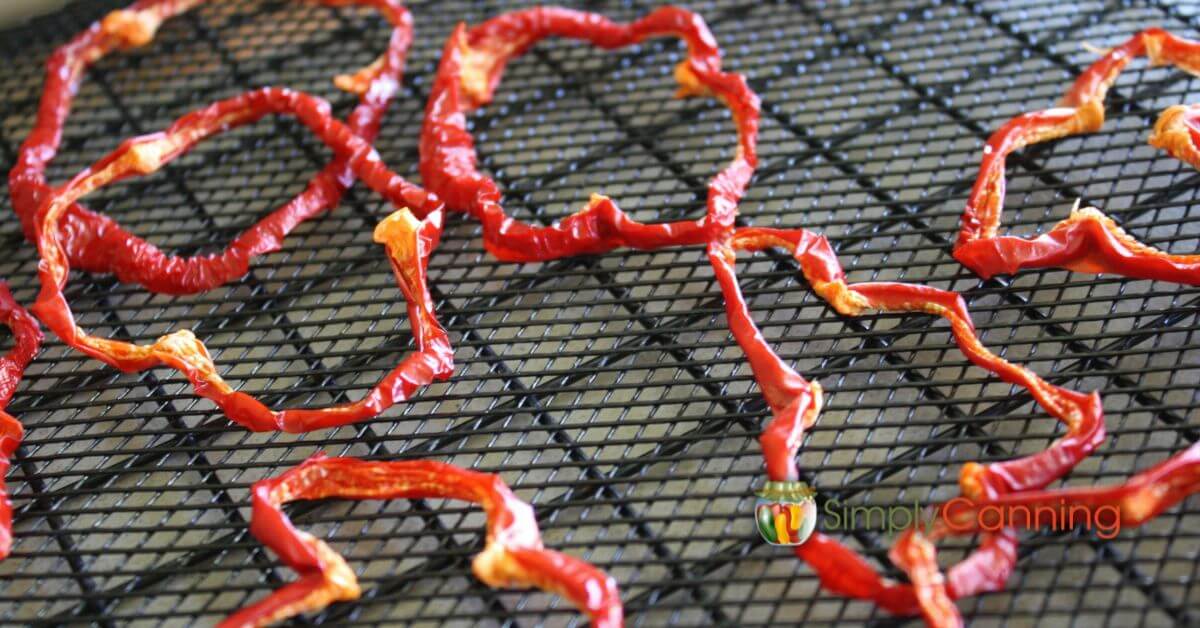
Cut the peppers into thin rings or strips.
Pepper rings or strips can add visual appeal to your dishes. They can enhance the presentation of salads, appetizers, and other dishes. Place them on top of a casserole for example and the finished meal will have pepper decorations on top. You’ll look like a fancy chef. (Trust me I’m not a fancy chef! But I’d like to look like one!)
Dry in Dehydrator
Arrange the slices on the dehydrator trays, leaving space for air circulation. They will shrink, so it’s okay if they are touching or more than one layer. But don’t pile them too high.

Set the dehydrator to a low temperature (around 125°F or 52°C). And if you’ve got a timer, for 4 hours.
Dehydrating Times
Different types of peppers require varying amounts of time to dehydrate fully. Thicker peppers may take longer than smaller, thinner varieties. Dehydrating time can also depend on humidity. As a general guideline, most peppers will take between 6 to 12 hours to dry completely.
Check the peppers periodically. You want to start checking the peppers at about 6 hours in. Rotate the trays if needed. Spread things around if there are some places that are not drying.
Add dry time as needed. I’d check every 2 hours after that first 4 hour period.
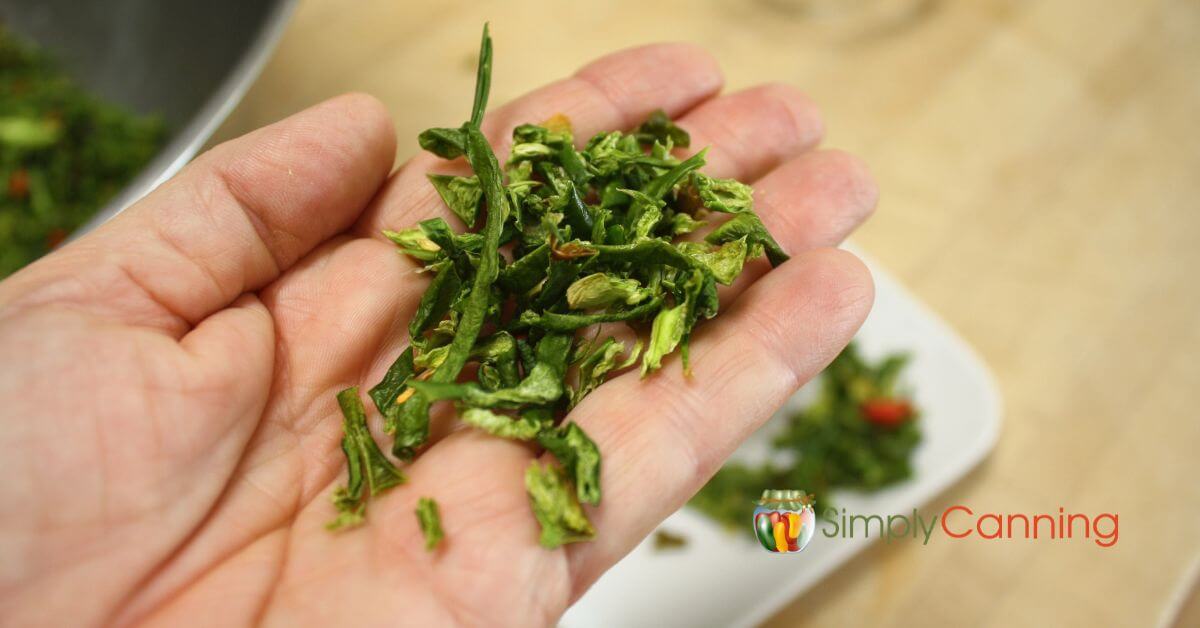
Once they are brittle, they are ready.
Dry Peppers in the Oven
If you don’t have a dehydrator, your oven can also do the trick. I want to add that I have never dried things in my oven. In my opinion, it would not be very efficient. Since I have a dehydrator that is my go to. But, having said that. If you have no other option, an oven will work. Here are instructions.
- Preheat the oven to its lowest setting (usually around 170°F or 77°C).
- Prepare the peppers just like I described for a dehydrator.
- Place them on a baking sheet. If you’ve got a rack that will fit on the baking sheet that will be helpful too. You need the baking sheet so you don’t end up with peppers in the bottom of the oven.
- Keep the oven door slightly ajar to allow moisture to escape. (This is where my efficiency alarm bells go off because heat will be escaping too!)
- Check and rotate the peppers every 30 minutes.
- Once dried, let them cool in the oven.
- Check for dryness add time if needed. Prep for storage.
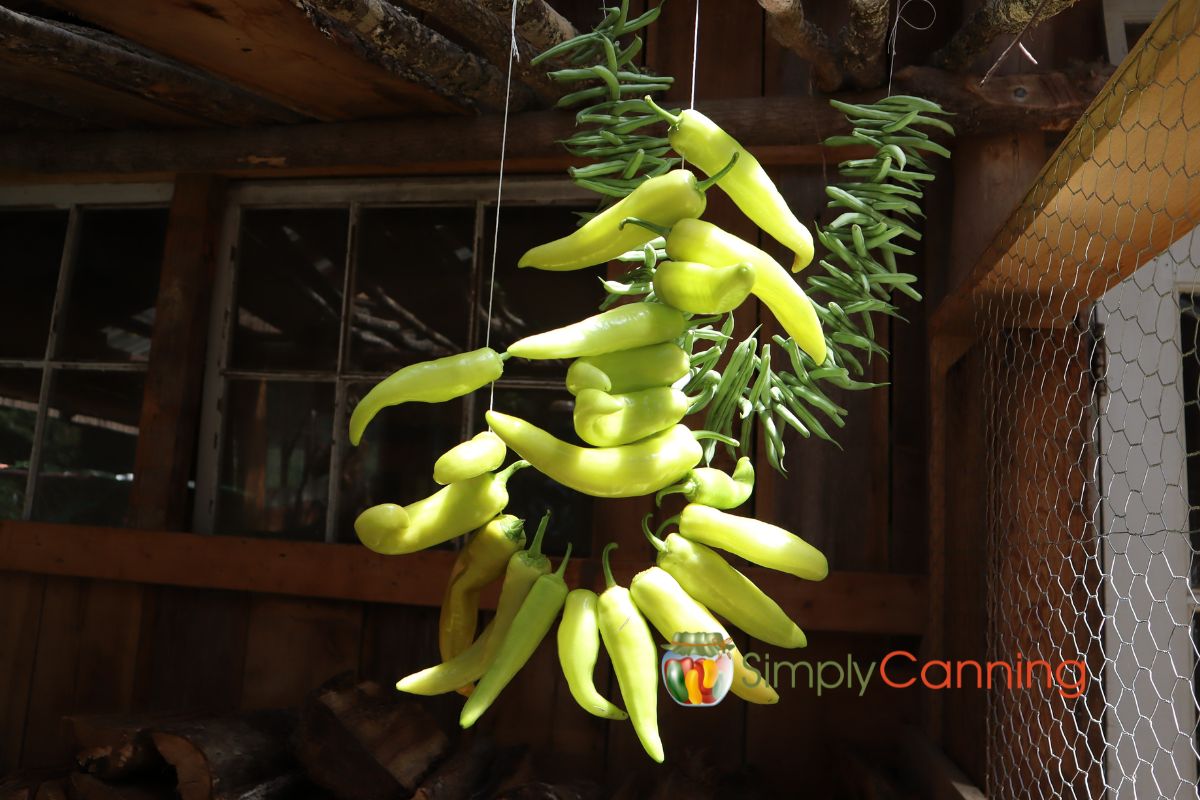
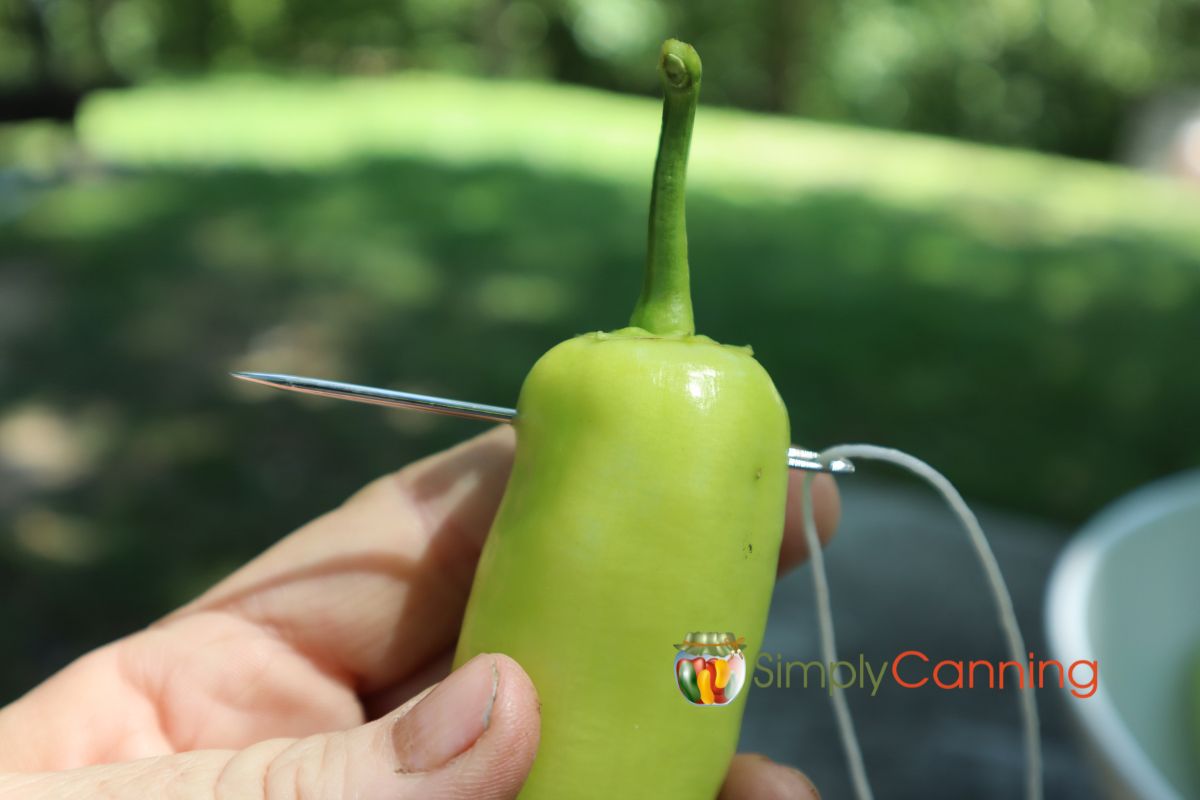
Air Drying Chili Peppers
Air-drying peppers is an age-old method. And my second choice when dehydrating. You’ll usually see this method with long red hot peppers. This is great for most whole peppers. You’ll string them and dry them whole, and then grind up or just break apart later for use.
- Thread a needle with string or thread.
- Pierce the stems of the peppers with the needle, creating a string of peppers.
- Hang the string in a warm, dry, and well-ventilated area.
The peppers may take a few weeks to fully dry.
Warning: Watch air dried peppers closely.
Humidity matters!
A benefit of air drying, is that it takes no energy source to dry the peppers. But you’ll have to keep in mind your climate. Is it super humid? It will take longer to dry the peppers. Do you have a dry area to hang these? Do you have a clean area to hang these? You don’t want the peppers getting rained on or full of dust or bugs.
See those pretty green peppers hanging in the picture above? Well, it didn’t work out so hot. I’ve used this method many many times back in Colorado. However, I am not in Colorado any more. I’m in Tennessee. Apparently the humidity difference in the different locations is enough to cause issues. These peppers molded and started to rot where the peppers were touching. I ended up removing them from the strings and laying them out in a single layer on a mesh tray to finish drying.
I’d like to try this method again sometime, but I think I’ll need a fan or some way to keep the air moving to avoid the mold. So keep in that in mind, and watch your peppers closely.
(Since they were ruined for our consumption, I’ll be chopping them up for my chickens. They are not too far gone for chickens. Did you know that giving chickens hot peppers in the winter helps them stay warm?)
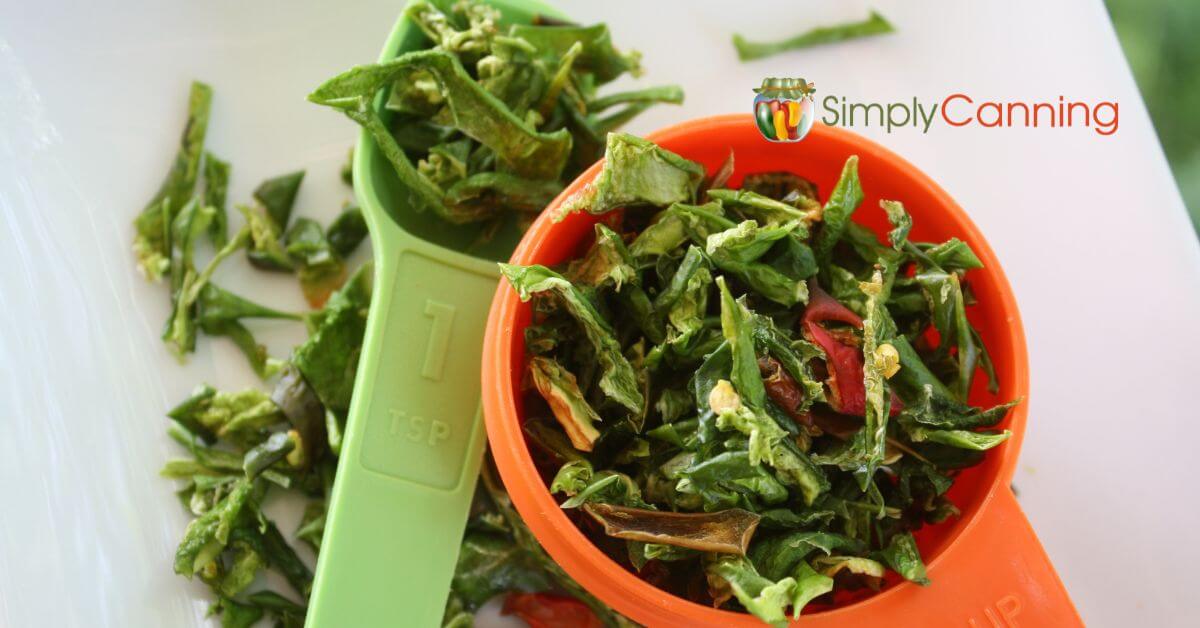
When Are They Done?
Dried peppers should be crisp, or brittle to the touch. They shouldn’t feel soft or have any moisture left. If you are uncertain just add more dry time and keep going. The total time will vary and depends on many variables. Size if your pepper pieces, humidity levels, strength of your dehydrator, temperatures.
Conditioning Before Storage
Conditioning is an inspection time for the dehydrated food before you put it away for storage. You’ll check your jar occasionally to watch for any moisture that may accumulate.
Place the peppers in an airtight jar with a sealed lid. This does not have to be the smaller jars you use for storage although it can be. You can also just use a larger jar for the entire batch and then move to smaller jars at the end of the conditioning time.

Leave that jar on your counter where you can check them each day for about a week. Watch for any moisture that may appear on the glass or clumping of the peppers that might indicate there is still moisture. Don’t open the jar just look and turn it over for inspection. If you find the moisture right away you’ve got a couple of choices. You can just put the peppers back in the dehydrator to dry some more. BUT if there is mold present, you’ll probably need to throw it away. If there is mold that you see, there is likely mold that you don’t see yet in the rest of the jar.
Pasteurization Before Storage
There is another precaution that is suggested for anything that has been dehydrated outside. Since the conditions may allow insects access to the food you need to be concerned about potential eggs. If you’ve air dried or hanged your peppers for drying you’ll want to pasteurize them.
It is easy to kill the insect eggs. Do one of two things.
- Place food in a freezer bag and freeze for 48 hours. – This seems easiest to me!
- Or heat the dried food at 150°F for 30 minutes or 175°F for 15 minutes.
I know it sounds gross! But you’d be surprised what might be lurking in our commercially produced foods too. It is no different with our products at home.
This is something I’ve seen suggested for some pantry items if you live in areas where humidity and bugs are an issue. Freezing flour, oats and other dried goods is common, so it is also good for your air or sun dried peppers too.
How to Store Dried Peppers
After the dehydrated peppers are conditioned and/or pasteurized you can package them up.
Place the dried peppers in airtight containers or vacuum-sealed bags, away from direct sunlight and moisture. Air dried whole peppers can simply be hung in a clean dry area.
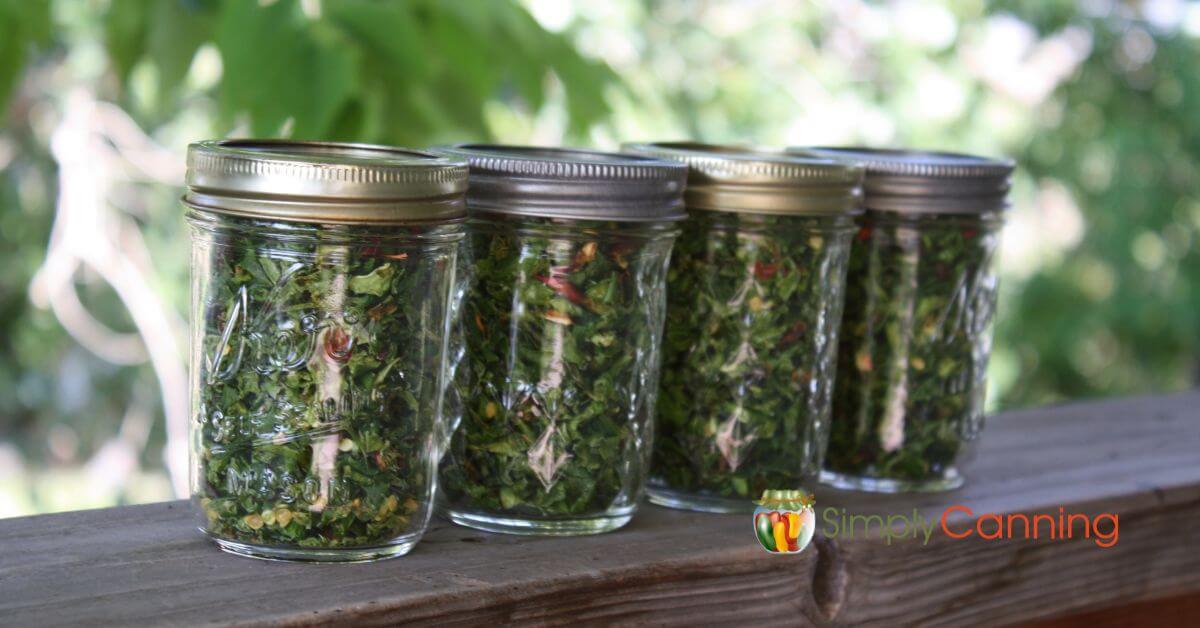
My preference is mason jars. I like to keep the quantity small for each container. Each time you open the jar you expose the contents to the air. The less opening and shutting the less contact the dried peppers will have and I feel like it maintains better quality.
What Kinds of Hot Peppers Are Best for Drying?
I’ve successfully dried all types of peppers in the dehydrator. Even sweet bell peppers dry nicely in a dehydrator.
Not all peppers are suitable for hanging or air drying. The hanging method works better with thin walled peppers. I’ve never tried to hang bell peppers for example. But I’ve hung both Anaheim and banana peppers with success. (In Colorado! Still working on TN!)
Should You Remove the Seeds?
You get to choose if you want seeds or not. A lot of the heat is in the seeds so if you want a milder flavor you might remove them. I do remove seeds from bell peppers. But a few always remain and it’s just fine. Remove or keep the seeds based on your preference for heat.
Quantity Fresh to Dried Yield
A rough estimate of fresh to dried peppers is 1 pound of fresh peppers yielding about 4 ounces of dried peppers.
What to Do with Dehydrated Peppers
How to Make Crushed Red Pepper Flakes
I use crushed red pepper flakes in chili mostly. But there are many other dishes that use red pepper flakes. The good news is you can make your own. You’ll just want to roughly grind the pepper until you get the desired texture. It might not be identical to a commercial product. But it works!
A benefit is you can make this with either super hot peppers for super hot flakes, or even a milder pepper for just a bit of spice. Grind the dried peppers into flakes using a mortar and pestle or a spice grinder. Or you can give it a whirl in a blender.
How to Make Chile Powder
Create your own chile powder by grinding dried peppers into a fine powder. It is basically just a further grinding of the red pepper flakes. Likely you’ll want a powered method to do this. A mortar and pestle might take quite a bit of grinding. (But I’ve never tried it so let me know if you have done it successfully!)
Dried Peppers to Slow Cooker Recipes
Drop a dried pepper or two into your slow cooker to add a bit of heat and flavor. Measure out chopped dried peppers into soup, stew or chili. The peppers will rehydrate and cook right with the meal.
Rehydrate and Use in Recipes
Rehydrate dried peppers by soaking them in warm water for about 20 minutes. Use them in recipes, like adding rehydrated chili peppers to scrambled eggs for a zesty kick.
Expert tip: We have eggs most mornings. We love peppers and onions in our eggs. Who wants to chop peppers and onions every morning?? Not me! So I rehydrate some and keep them in a baggie in our freezer. Ready to just remove what we need and pop in the pan with the eggs.
Questions People Ask
This is personal choice. You can chop them small, create rings, you can even cut into strips. The key is to get them cut as consistent as possible for even drying time.
Bell peppers do not need to be blanched before dehydrating. You can simply wash, cut, and dehydrate them according to your preferred method. No peppers need to be blanched for dehydrating.
Dehydrated peppers can last up to a year with proper storage. You’ll get different opinions on that length of time. Main considerations are air tight container, no sunlight and no moisture.
That is personal opinion… mine is using a food dehydrator. It provides consistent results. Alternatively, you can also air dry them or use an oven at a low temperature if you don’t have a dehydrator.
Other ways of Preserving Peppers
Canning Peppers: https://www.simplycanning.com/canning-peppers/
Pickled Pepper Recipes: https://www.simplycanning.com/pickled-peppers-rings/
Freezing Peppers: https://www.simplycanning.com/freezing-peppers/
Sources:
https://nchfp.uga.edu/publications/uga/uga_dry_fruit.pdf
https://ohioline.osu.edu/factsheet/HYG-5347
https://ucanr.edu/blogs/blogcore/postdetail.cfm?postnum=43657
https://hortnews.extension.iastate.edu/1999/7-16-1999/dryhotpep.html
https://extension.missouri.edu/publications/gh1562