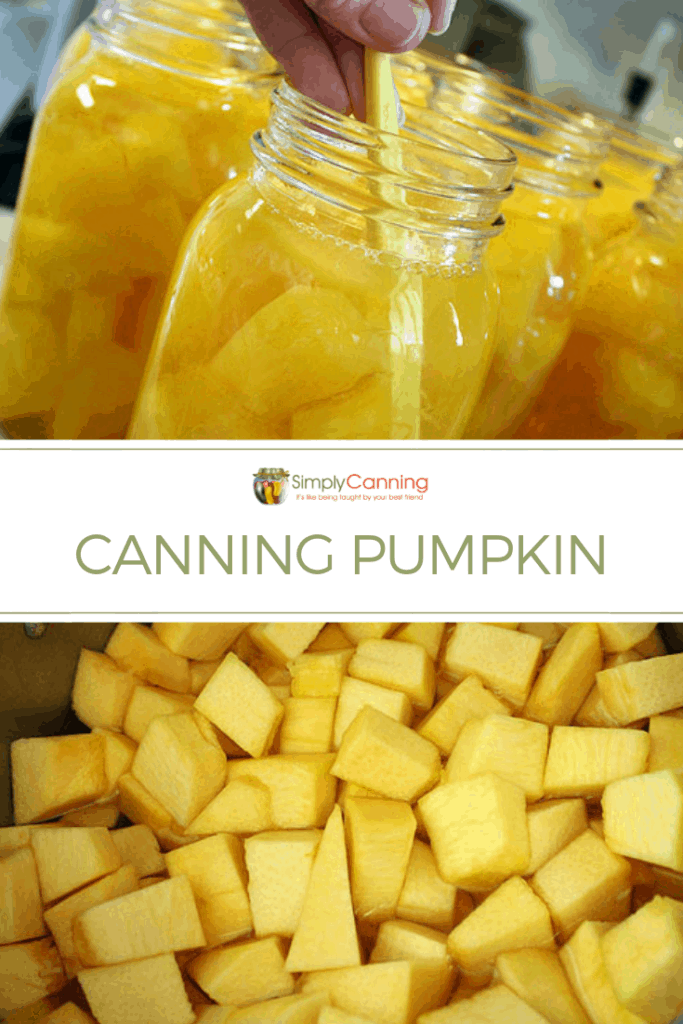
Canning Pumpkin
This page may contain affiliate links. More Information.
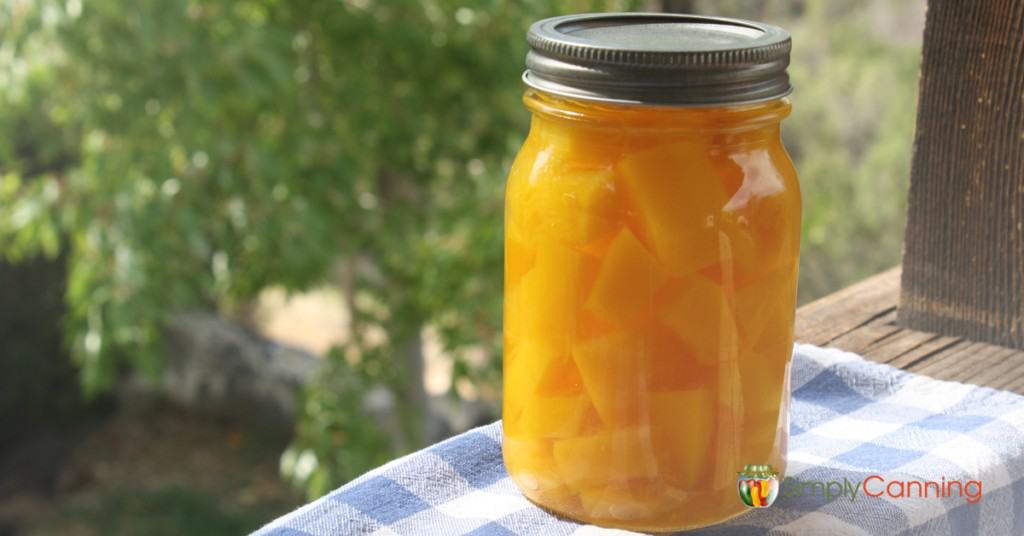
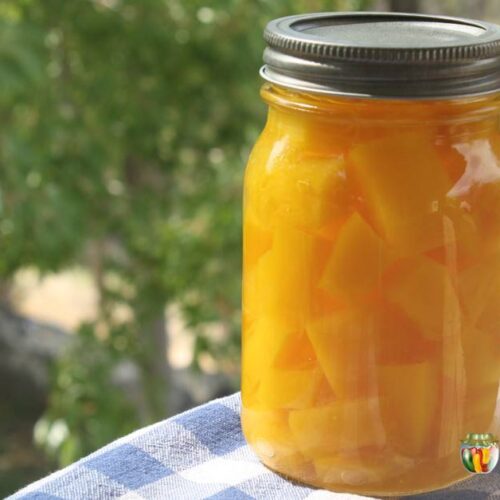
Canning pumpkin in the pressure canner makes it safe to store and quick to use later in pumpkin butter, pies, muffins, or other pumpkin recipes.
The procedure for canning pumpkin is actually very straightforward. Seed it, skin it, cube it up, and place the cubes in jars. Honestly, the cutting up and prep is the hardest part.
I get questions on how to can pumpkin puree or pumpkin butter. My best advice is to can it in cubes. Puree it when you want to use it in your recipes. Easy! And more importantly, it’s safe too.
Butternut Squash is another winter squash that can be canned.

Extended directions and tips How to Can Pumpkin
Quantity
You’ll need about 2¼ pounds of squash per quart canning jar. This is a close estimate.
- 7 quart jars = 16 lbs of squash
- 9 pints = 10 lbs of squash
Know Your Canner
Before you start this project, know how to operate your pressure canner. If you need help, I recommend reading this: How to use a pressure canner. It will teach you how your canner works.. Using a pressure canner is important because squash is a low-acid vegetable.
Prepare your pumpkin
Watch those fingers and sharp knives! Pumpkins tend to roll.
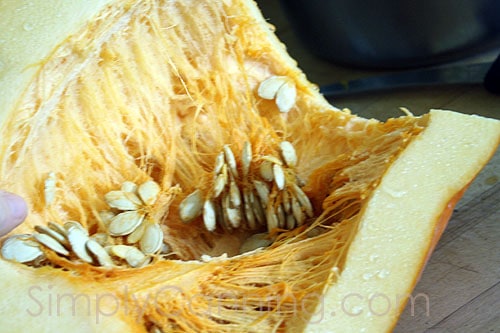
The first step is seeding the pumpkin. Your best bet is to chop off the top of your pumpkin, removing the stem and top portion. Slice down the center to cut the pumpkin in half. This gives you better access to the seeds and strings. You are not carving this as a decoration on your front step so just open it up and get to the seeds. Then use a large spoon to scoop out the seeds. Save them for roasting or replanting in the spring if you have heirloom pumpkins.
How to Peel a Pumpkin (without chopping off your fingers!)
Next, you need to peel the pumpkin. This is where it gets tricky. I tried several things. A regular vegetable peeler was useless, as the rind is far too tough. I tried using a knife to peel the rind of each half. This was awkward. I had sharp knives slipping, and I was destined to chop off a finger. I knew I had to find a better way or I’d be there for HOURS (not to mention ending up fingertipless)!
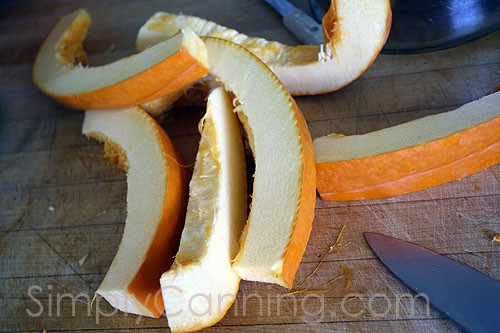
Finally, I found the best way was to slice my pumpkin into strips.
Then use a knife to slice off the rind. This was much more manageable. The pumpkin did not roll around on me. I was able to slice down into my butcher block and my fingers were safe!
I was still there quite a while slicing and peeling pumpkin, but it worked.
Fill your canning jars:
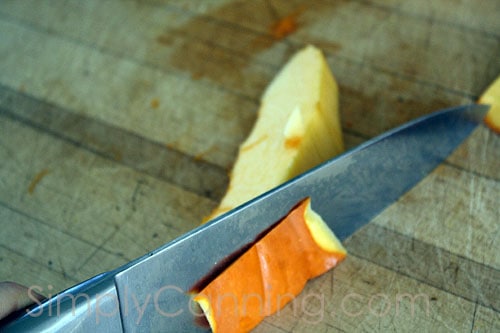
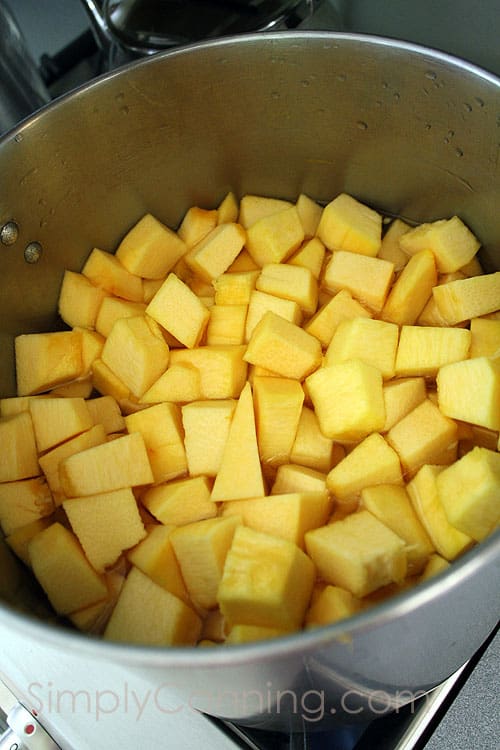
Next you need to cut your pumpkin into about 1-inch cubes. (Remember, no pureeing!)
Place in a large stock pot. Add water and bring to a boil. Boil 2 minutes. You don’t need to cook thoroughly, just 2 minutes. This will warm the pumpkin up. Pumpkin must be a hot pack. Do not put raw cubes in your jar. Next fill your hot jars leaving a 1 inch headspace.
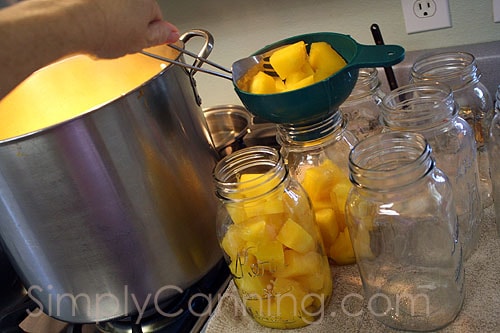
Using a slotted spoon, I scooped out the pumpkin and placed in jars. If you want salt, add 1 teaspoon per quart or 1/2 tsp per pint. Then fill each jar with the cooking water, leaving 1-inch of headspace.
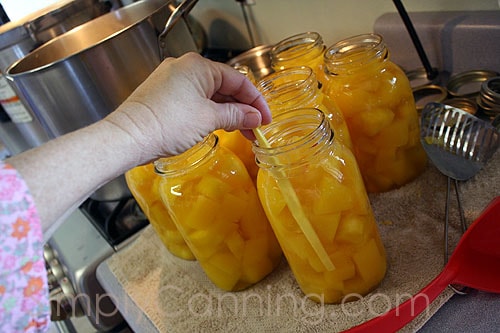
Using a plastic spatula or other small tool, release any air bubbles. There is a tool you can buy for this step, but I find my orange peeler works perfectly.

Wipe the rim of the jar clean so there are no food particles to interfere with the seal. Place your canning lids. Here I was using traditional metal lids that I needed to use up.
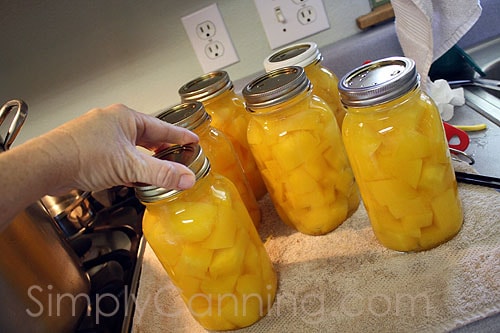
Place your jars in your preheated canner and process as directed below. For more information on how to use your pressure canner, click here.
Processing Instructions for Canning Pumpkin
- Pints – 55 minutes.
- Quarts – 1 hour 30 minutes.
Be sure and use the proper pressure for your altitude. Check the altitude chart in the recipe card below.

Tips and Frequently Asked Questions.
The good news is, Yes! Canning Squash is possible with the right canning methods. Check this post – How to can both summer and winter squash. Recipes for both summer and winter squash.
When you are canning pumpkin or any other winter squash you must can it in cubes. You should not puree it, then try to preserve it in jars. The concern with pureeing it is that the density of the puree will be thick. The heat achieved in the pressure canner must reach all the way to the center of your jars.
If your pumpkin is cubed, the heat will penetrate much better. Cubed is safer and is the only way this process has been tested. I recommend that you do NOT follow online instruction you may find for how to can pumpkin puree.
If you need a pumpkin puree, mash it up when you open the jar. You will need to drain the pumpkin very well. I’ve found even then it will be thinner than commercially canned pumpkin. If you are using it for a soup base, you can just puree it with the liquid from your jar. It all depends on what you are making. It will not get thick like fresh pumpkin, but it works.
Pumpkin is a low-acid food, so it MUST be processed in a pressure canner. There is no way around those recommendations. (Except, of course, to ignore them…which I don’t suggest.) I do not teach how to can pumpkin in a water bath.
No, pumpkin must be processed in a pressure canner.
If these are your carved jack-o-lantern pumpkins do not preserve them. (they make great chicken or goat treats!) These types of pumpkins may be canned… but not if they have been on your step for days or weeks. They may not have as sweet a flavor as say a small pie pumpkin, but they work just great. I’ve canned them before. Just be sure you are using a fresh pumpkin.
Recipe Card
This is a printable version of the recipe with short sweet instruction. If you skipped here don’t forget to check above for peeling tips and specifics on directions.
Canning Pumpkin & Winter Squash
Equipment
Ingredients
- Pumpkin
- Canning Salt optional
- Water
Instructions
- Start by preparing your jars and getting water in the canner heating. You want the canner hot, but not boiling, when the jars are ready to be processed. If you are new to using a pressure canner, see this article for full pressure canning instructions. This includes more detailed information and step-by-step instructions on how a pressure canner works.
Hot pack only
- Seed and peel pumpkin, then cut into 1” cubes.
- Place cubes in large stockpot, add water and bring to a boil for 2 minutes.
- Fill jar with pumpkin cubes.
- Add salt (1/2 tsp. per pint or 1 tsp. per quart) if desired.
- Fill jar with cooking water, leaving 1”headspace.
- Remove bubbles, wipe the rim clean, and place on your seal and ring.Place the jar in the warm canner. Proceed to fill all jars.
- Process in a pressure canner according to the directions below.
Notes
Adapted from: The National Center for Home Food Preservation
Canning Pumpkin Source: The National Center for Home Food Preservation
Pin for later.
Do you have any recipes for using canned pumpkin cubes? Or- do you just puree the pumpkin cubes and then measure for baking? Does it get watery in the jars? Just curious if this works well for you or if quality is compromised in your opinion?
I don’t have any specific recipes. You’ll want to just drain well, puree or mash and use as any pumpkin puree. The flavor is good, but the texture is thinner than a commercially canned pumpkin puree. So be sure that you allow the cubes to drain well. I’m sure that will depend on your pumpkin as well.
PEELING MADE EASIER! Yay. I haven’t done the recipe yet it sounds good. But the main reason I have never tried was because the squash or pumpkin skin was too tough.
I found a good solution sitting in my husbands tool box. It’s called a SURFORM SHAVER. Works great and is a lot safer then anything I’ve ever tried. Yes, it’s a tool. It doesn’t rust. Easy clean. Plus the shreds will go to the chickens.
I had to google what a surform shaver is. https://amzn.to/3v5diTW. It looks like it might work. :). Another great idea.
I have to share this info for peeling the pumpkin. I have physical issues that make it hard to peel in general. Try this it’s amazing use a surform shaver. Yes, it really turns a time consuming and finger fearing task into an easier and for the most part safer job. The rasp shaves shreds of the skin leaving the flesh.
The shreds are something the chickens will love.
I realized the kids pumpkin carving kit was an asset. So I’ve purchased a simple set to clean the pumpkin out. Possibly to cut up.
Oh a pumpkin carving kit is a great idea!
I had an idea to use my old fashioned french fry cutter to cut the cubes. It’s only half inch cubes. Is that too small for safe canning?
I believe the pumpkin pieces would be too small and might get overcooked so I would not recommend it. It’s a great idea though for beets! I use my bosch mixer french fry attachment when I’m cutting beets for pickling. It works for Canning Beets as well since the recomendations are for smaller pieces.
A practical note: if you have pureed your pumpkin immediately after cooking/steaming it, it will be…hot. Heated through, the puree will be perfectly safe to can, store, and eat later. Why is the obvious so difficult to see?
Yes, hot pumpkin puree will be hot, but the texture/denseness will be completely different than hot pumpkin cubes. Remember it is not just the heat, it is the penetration to the center of the jars. The denseness or texture of the food will make a difference. Pureed pumpkin has not been tested.