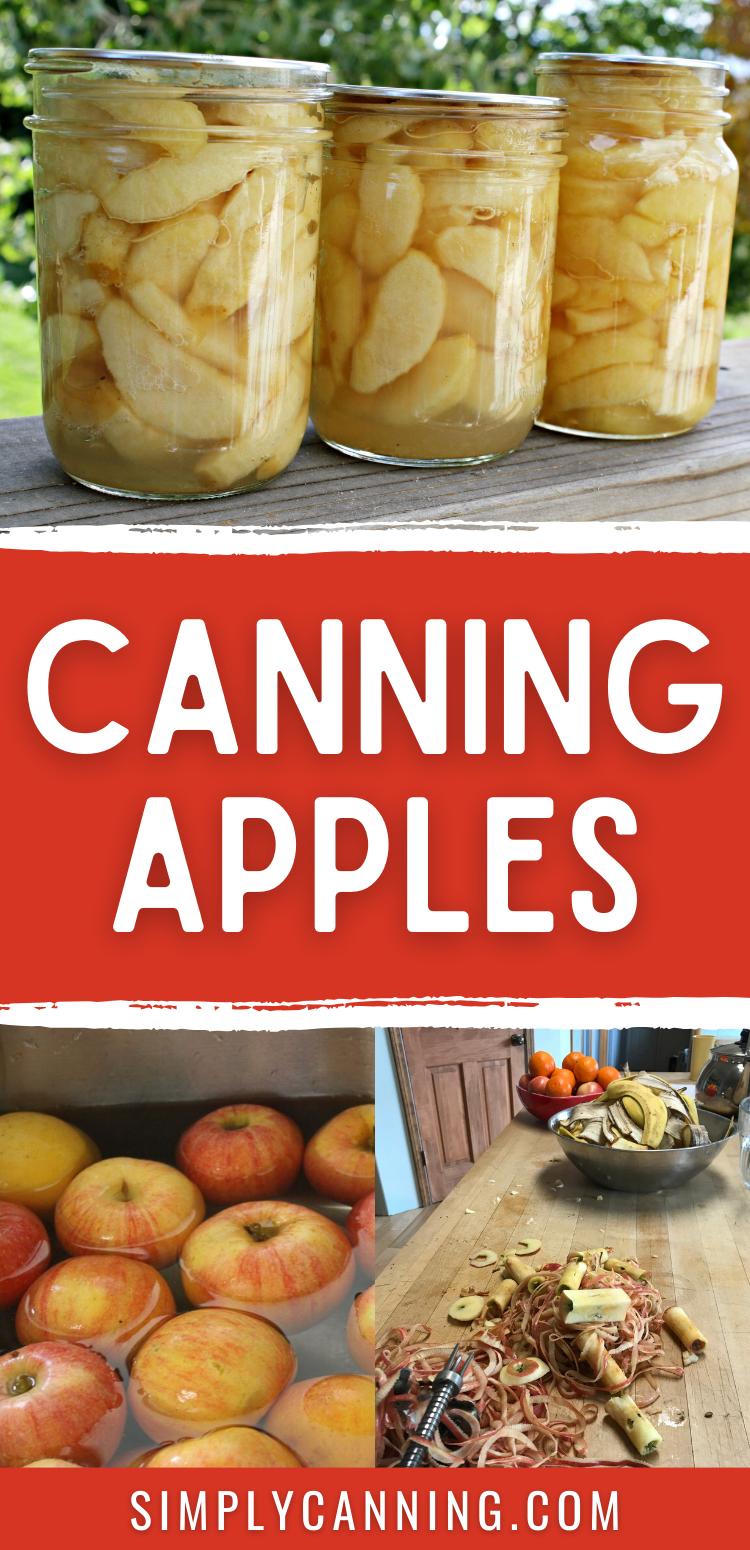
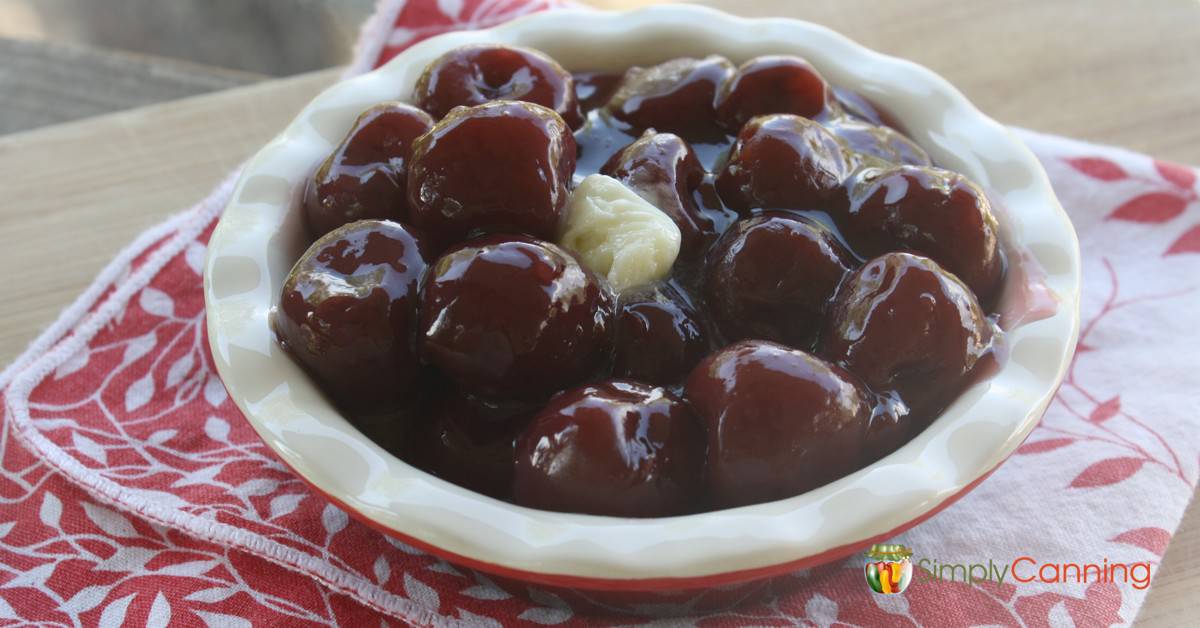
Canning Apples
This page may contain affiliate links. More Information.
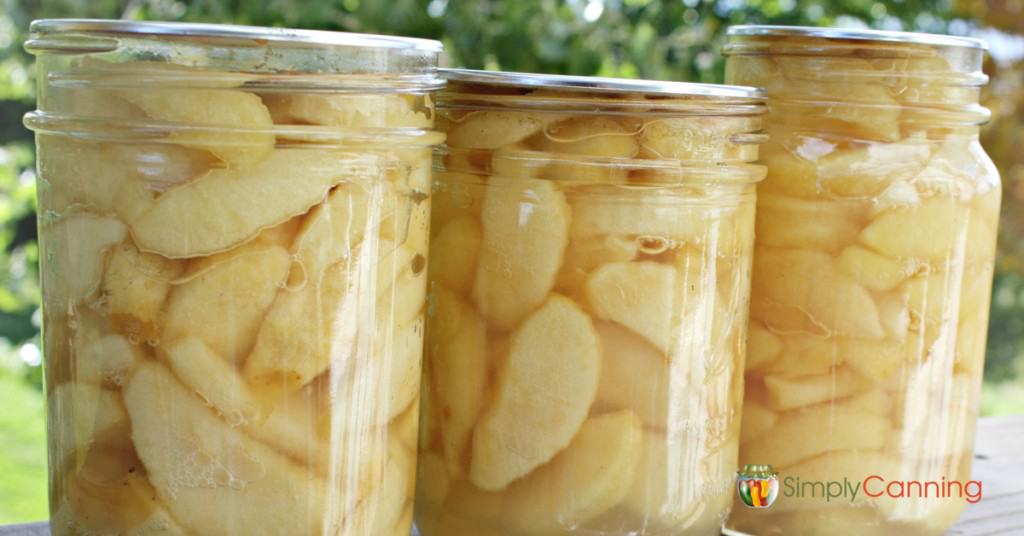
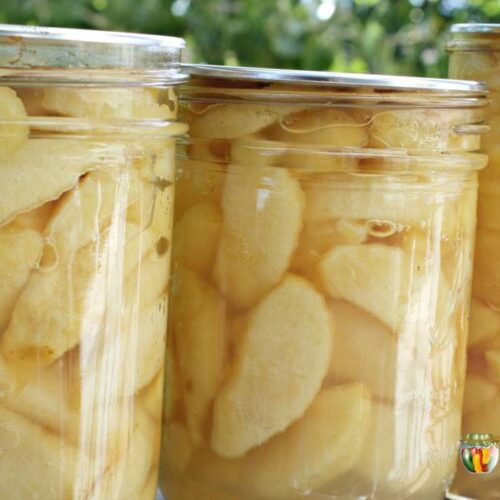
Canning apples: Learn how to can apple slices to use for oatmeal, baking, or pouring over ice cream. YOU control the sugar. Light sugar options included!
Apples are a high-acid food and can be safely processed in a water bath canner. You will need about 2 1/2 to 3 pounds of apples for a quart jar.

If you want other ways preserving your apple harvest, visit our full list of recipes and tutorials. Canning, dehydrating, freezing, jelly-making, and the tools that make it all easier.
Canning Apples: Extended, Step-By-Step Directions
Supplies:
- water bath canner
- canning jars
- canning seals and rings
- jar lifter and canning funnel
- large pot or blancher
- bowls
- large spoons
- sharp knife
- towels and dishcloths
Ingredients:
- apples (you will need about 19 pounds for one canner load of 7 quarts)
- sugar (to taste)
How to Make Your Syrup
Prepare light or medium syrup. (I prefer light syrup.) Simply heat water and sugar in a saucepan until sugar dissolves. The best way to do this is in a tea kettle. Then, you can just pour your syrup over the apples in the jar. Super easy and way less mess. And I’m all for less mess.
- Light – 2 cups sugar to 1 quart water
- Medium – 3 cups sugar to 1 quart water
You can also make a syrup with honey if you don’t want to use processed sugar.
- Light – 1 1/2 cups honey to 4 cups water
- Medium – 2 cups honey to 4 cups water
A third option is to use apple juice to can your apples. I will give the apples a nice natural sweetness. Read more about canning apples without sugar here.
How to Can Apples
Peel, core, and slice your apples. Use an apple peeler or just a knife.
How Do You Keep Apples from Turning Brown When Canned?
You’ll be peeling all your apples at once, then doing a hot pack. (heating before packing in jars) While you are peeling it is good to pretreat the apples by holding them in your choice of the below options.
My preferred methods.
I prefer one of these two choices because the liquid you hold your apples in can also be the same liquid you do the precooking portion. (next step)
- Syrup Soak: Or peel and slice and drop them right into your sugar syrup. Which you can then use to fill your jars.
- Apple Juice: You can also hold your slices in apple juice instead of water or syrup. Then use that juice to fill your jars.
A few other options.
I don’t prefer these methods… but they will work. These help prevent initial browning but you’ll still need to boil the apples and you don’t want to boil them in this. You’ll drain then boil. (see next step for clarity)
- Ascorbic acid or citric acid. This should be available at the grocery store. Follow the instructions on the package. Drain well before packing jars.
- Lemon Water: Drop slices right into a bowl or pot with lemon water. A cup of lemon juice in a pot is fine. It doesn’t need to be an exact measurement. Drain well before packing jars.
- Salt water: I was surprised at how well this worked. Mix 1 Tablespoon of salt in a quart of water. Soak your slices a few minutes then drain well before jarring.
Hot Pack Method
Apples are done as a hot pack. This means they are heated through before packing into the jars and processed.
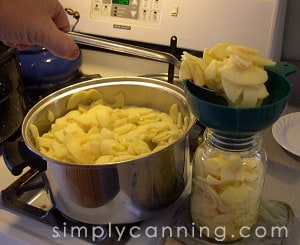
After peeling, coring, and slicing apples, place in a large pot with a light syrup (or apple juice) and bring to a boil. Simmer 5 minutes. Apples need to be processed as a hot pack, so this step is necessary. Apples, jars, and syrup should be hot going into the hot canner.
Fill jars with hot apple slices and cooking liquid, leaving 1/2-inch headspace.
When each jar is full, remove air bubbles by using a small tool to run down in the jar (like the picture shows). They sell a canning bubble remover tool for this purpose, but I like using my orange peeler. Works perfectly.

Adjust your headspace and add more liquid if needed to maintain that headspace.
Next clean the rim with a wet paper towel to be sure any syrup will not interfere with the seal, and put the lid on.
Place jar in the rack above the hot water in the canner to keep warm while you are preparing your next jar. Continue until all jars are packed and ready to be lowered into your canner.
Lower jars into canner, heat water to boiling, and process.
For more details on how to use a water bath canner, follow these instructions.
How to Can Apples: Processing Times
Either pints or quarts are both processed for 20 minutes, adjusting for altitude. For more information on why this is important, see this altitude adjustments page.
Recipe Card
Canning Apples
Equipment
- Vegetable Peeler or sharp knife
Ingredients
- Apples
- Sugar or honey (for syrup)
Instructions
- Start by preparing jars and getting water in the canner heating. You want the canner hot, but not boiling, when the jars are ready to be processed. See full water bath canning instructions here.
For a Hot Pack
- Make a light or medium syrup.
- Peel, core, and slice or cut apples into quarters or smaller slices.
- Place the apples directly into a large pot with the syrup.
- Bring to a boil, reduce heat, and simmer 5 minutes.
- Pack hot apples into hot jars, leaving 1/2" headspace.
- Cover with boiling syrup, leaving 1/2" headspace.
- Remove air bubbles. Wipe the rim clean and place on your seal and ring. Place the jar in the canner. Proceed to fill all jars. Process according to the chart below.
Notes
Adapted from: The National Center for Home Food Preservation
Canning Apples FAQs
What is the Best Apple for Canning?
Jona-Golds are what we use for canning apples. But there are MANY varieties that will work: Gala, Granny Smith, Honey Crisp…mmmmm. Mixing a tart apple with a sweeter variety works great. But honestly…I use what I can get.
Can You Can Apples Without Sugar?
It’s possible to can apples with just water, but as mentioned above, I wouldn’t recommend it. Apples tend to get very watery if they’re preserved without sugar syrup. You’ll end up with a poor result.
Best Apple Peeler-Corer-Slicer
An apple peeler-corer-slicer is a great tool when you are working with apples. However, you might want to consider what you intend to do with your apples. I have noticed that with the slices so thin, the slices tend to get very soft after processing. If you are going to use these apples for apple pie, you may want your pieces to be a bit thicker than the slicer will make. But it works fine for making apple crisps or just heating with a sprinkle of some cinnamon-sugar.
I still highly recommend the slicer. It is an incredible time-saving tool. But using a knife the old-fashioned way may just suit your needs better. I have a full video review and demonstration on this page.
Can I Make Apple Butter from My Home Canned Apples?
Yes, just pour your apples into a Crockpot and cook and whisk until it is the texture of apple butter. You might want to drain out the juice from your apples. Watch it as it cooks and add a bit back in if it looks like they will need it. Then just continue cooking and whisk until it is the texture of apple butter. You could add in cinnamon or other seasonings to taste.
If you used sugar in your apples, you may not need to add sugar to the apple butter. You’ll just have to do a taste test to check. Then, use the processing directions from this page: Canning Apple Butter.
How Long Do Home Canned Apples Last?
Canned apples are like any other canned good, lasting for at least 12 months when stored in optimal conditions (cool, dark, and dry). This recommendation is because, after a year, the food quality will start to decline more rapidly. Some people will keep it longer. However, most fruits are likely to become soft and not as appealing after a year has passed, hence the recommendation.
Related Pages
Canning Applesauce – The basic idea behind how to make applesauce is to cook the apples, mush them up, and add sweetener if desired, getting rid of the skins and cores somewhere along the way.
Canning Apple Pie Filling – By canning apple pie filling, you will have a dessert already half prepared!
Apple Peeler Demo – An apple slicer called an Apple Peeler-Corer-Slicer (say that five times fast!) is a handy tool that is worth every penny. Personally, I think they’re worth their weight in gold, and I use mine constantly during apple season.
How to make crabapple jelly – Got Crabapples? If you have crabapples I recommend making jelly instead.

My peeler does apple rings..Can I can those instead of slices or quarters?
Yes you can. But be aware that the apples may be a bit soft. I find that I prefer to use the peeler for dehydrating. For apples I like them chunkier.
Cortland & maccoon are great for canning slices too, Macintosh, Johnna Mac, blondies, fuji, empires are good for pie filling & sauce. I’ve been canning for at least 10 years but I grew up with my mom and my grandma canning as well we love to do applesauce and canned corn and canned green beans, crab apple jelly corn cob jelly and many many other things. Just my two cents on the discussion
Whenever I can something sweet or greasy, I wipe the rim with a vinegar soaked paper towel. I feel like it works the best.
That is a great idea.
So, how do you pour syrup from tea kettle over apples in jar if you have to boil the apples in syrup first?
Great question! What I do is just boil in plain water. Then add the hot syrup to the jars.
Canning apples by Sharon Peterson! Fabulous, no-nonsense instructions. I can and freeze quite a lot. Had a banner crop of tomatoes this year and I think I canned for 2 months straight. It’s amazing that so many people have no interest even when they can have the vegetable, sometimes already picked. I do have an elderly lady friend that we pick and take the veggies to her. I had never canned apples so I tried it and I have 5 pints on my counter now, I will now make plans on purchasing more apples and maybe can quarts. Really enjoyed… Read more »
Thanks! and yep… laughing at oneself helps to maintain sanity. :).
I’m a novice…been canning for 3 years, started at age 65. I have all the steps down fairly well and read directions 100x. I’ve yet to mess up royally, but also disappointed sometimes. For this recipe, would apple cider work for the syrup. OR maple syrup added to the water instead of sugar or honey? I put my apples directly into the pan with the syrup while it was heating up. I learned they needed to release air or they would float. Hope this works.
Yes you can sweeten it with other sweeteners too. And a hot pack is better than raw packing the jars because apples do tend to float.
Well, not only did I get ‘floating slices’, but I also got some mush: I found out I used the wrong kind of apple, BUT they are SO delicious! My dad is thrilled & asked me to make more. I am going to try again using Jonagolds, which I know are firmer & will stand up to the heat. Overall, I am pleased with the ease of your recipe!
Are you aware that Granny Smith apples that you recommended for canning apples cook up to MUSH when cooked ? Enjoy your day because you just ruined mine and all the Granny Smith apples that I worked on all day. At least know what you are talking about before you post it !
Normanda. No, actually I’m not aware that Granny Smith turns to mush when cooked. I’ve had good luck with them and I’ve read many articles about others having good luck as well. Thanks for letting me know that you did not like them. I’m sure others can keep it in mind as well. I certainly didn’t intend to mislead you. If they are mushy perhaps you can recover your losses and turn this into applesauce. I hope the rest of your day gets better.
Hi ladies, I think the age of Granny Smith apples might be the issue: where I live, they aren’t grown locally, so they came from cold storage=they could be older/riper then they look. I used Kendall apples and mine turned out mushy too…but a local apple farmer assisted me to find another choice for my canning. Good luck & please don’t give up on those Grannies: I bet your applesauce will make perfect Christmas gifts!
My grandmother use to can sliced apples but never had syrup on them
I wish I knew how to do that!! I was all set to can and now read I need syrup to can apples?? I do t want syrup!! I’m
Sooo disheartened~ and these directions assume ppl know a few things about canning already; which isn’t good, cuz I know Nothing about this process & im
Afraid of my jars getting botulism!
And I thought canned foods last 10 yrs!!??
Oh I’m sorry I don’t want to frustrate you. As far as the syrup, you don’t have to add sugar to your apples. You are perfectly safe just using water, or you can use apple juice if you like. I do mention that lower on the page but you may have missed that. I’ll update the post and see if I can clarify things better. The thing with water is that it tends to wash the flavor out of the apples and it will be less flavorful. But it might suit you just fine. You should try it and see… Read more »
Hi, Love your site. Odd, just put up 14 quarts of Apple Pie apples today. Made them last year too. Wonderful. Thanks so much for all the wonderful hints. Still have 25 lbs of them left, think I will make them as written here.
Shirley
Hii Shirley,
I’m also trying to make apple pie apples, only this is my first rodeo, so im nervous
Any chance you can post a recipe for them? Thank you
Sure – here is a recipe for canning apple pie filling. . But, I would suggest just canning apples to start. Pie filling can be tricky. It tends to expand in the jar and leak out. You’d be better off getting comfortable with plain apples first. Then tackle apple pie filling later. You can make pie with plain canned apples by thickening when you open the jar and making your filling then.
Hi Sharon I just canned apples with light s yrup but my apples are floating to the top and syrup is at the bottom. What did I do wrong and are they still ok to use. The jars sealed.
This happens with other fruits too but Apples are notorious for floating. It is not unsafe so as long as you followed proper instructions your apples are fine. If you do a hot pack you will get much less floating. Apples have air in the flesh of the fruit. Heating them first breaks the flesh down and less air will end up causing the fruit to float.