Canning Smoked Fish
This page may contain affiliate links. More Information.
Canning smoked fish starts with the smoking process.
First, I’ll share suggestions for smoking your fish, then I get into the canning instructions below.
Here is a recipe for canning fresh (unsmoked) fish. The procedures are slightly different.
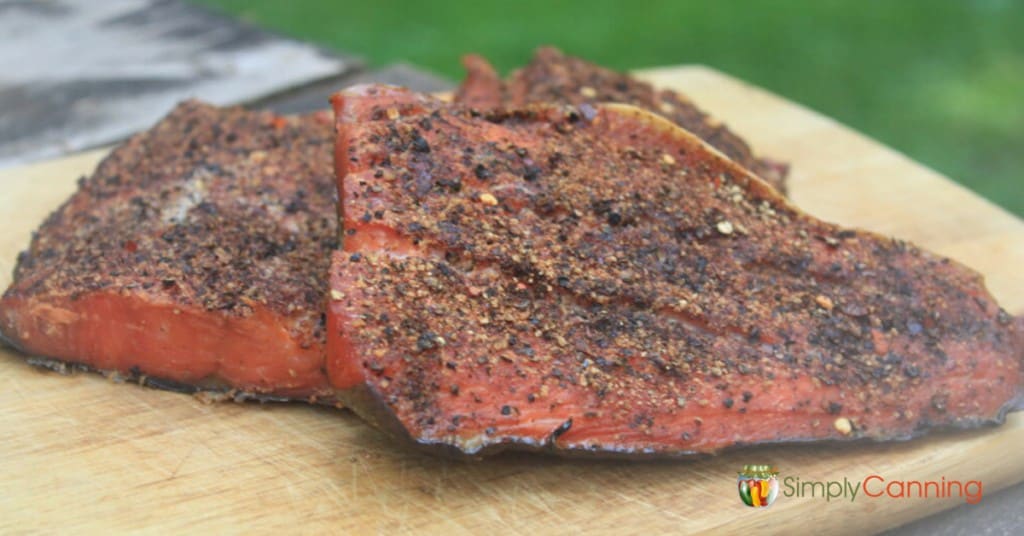
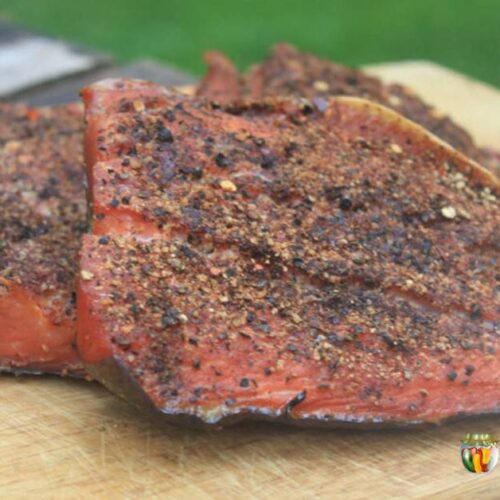
The images on this page are of salmon, but the recipe works for other fish as well. Salmon, rockfish and flatfish (sole, cod, flounder) and other fish.

How to Smoke Fish for Canning
For the smoking part of this process I get some help from expert Smoker of Smokercooking.com.
When you are canning smoked fish, the process is different than when you are making ready to eat smoked fish. Fish that are smoked in preparation for the canner are only partially cooked. Heat from the canning process brings the fish to the desired stage of doneness.
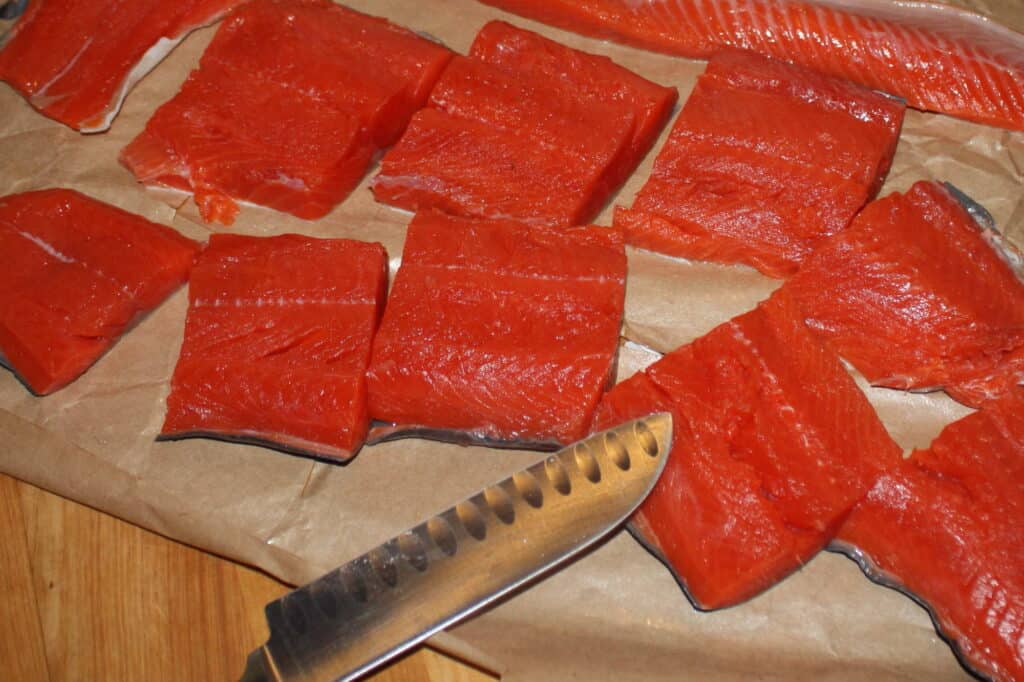
Use only fresh, good quality fish for the canner. Clean the fish, removing all traces of blood. Remove the scales, or skin the fish if desired.
Fillet the sides of the fish from the backbone. Small bones can be left in or removed as desired.
Using a pint jar as a guide, cut the fillet into pieces that will fit vertically into the canning jars, but about an inch shorter than the jar height. Try to keep the pieces close to the same thickness so they’ll cook evenly when smoked.
Brining the Fish
Before smoking the fish, it needs to be brined in salt water. Use a concentration of 1 cup salt in 7 cups of water per each 3 to 4 pounds of fish pieces. Thinner pieces, up to 1/2 inch thick stay in the brine 5 to 10 minutes. Over 1/2 inch get 30 to 45 minute of brining time. The salt water brining is important because it prevents spoilage.
Remove the fish from the brine, pat dry with clean towels, and allow to air dry on a cooling rack until the outer surface dries a bit. When it feels just barely tacky, it’s ready for the smoker.
Smoking the Fish
The smoker temperature needs to be low enough that the fish can be in the smoker long enough to get the desired flavor, while being minimally cooked. A temperature in the range of 140 to 160 degrees Fahrenheit is ideal fish going into the canner.
The popular Big Chief and Little Chief smokers operate at about 170 degrees on a calm day of 70 degrees or so, which would be fine for smoking fish for canning. If it’s colder outside and the smoker runs cooler, that’s okay too. Smoking time will be a bit longer.
Fill the pan with the desired amount of your favorite wood. Follow the smoker manufacturers’ recommendation for amount of wood for best results. A favorite wood for smoking salmon is alder. Smoke the fish until it’s ready for the canner.
How do you know when your smoked fish is ready for the canner? Instead of going by internal temperature, as you would for ready to eat smoked fish, it’s determined by weight loss.
Weight loss is moisture loss, and as the fish dries, its texture becomes more suitable for canning. For good quality, moist canned smoked fish, a 10% loss of weight is what you’re looking for. If a drier fish is preferred, shoot for a weight loss closer to 12.5%.
To determine the percentage of weight loss, start by weighing the fish right before smoking fish. Small kitchen scales are fine to use. Steps to determine weight loss percentage are:
- Weigh a piece of fish before it’s smoked and record the weight.
- After a time in the smoker, remove the piece and weight it again.
- Subtract Step 2 weight from Step 1 weight. This is the weight loss.
- Divide the lost weight by the starting weight.
- Multiply by 100 to get the percentage of weight loss.
Here’s an example.
- 8 ounces – (pre-smoked fish weight)
- 7 ounces – (weight after smoking)
- 8 minus 7 = 1 ounce (weight loss)
- 1 ounce divided by 8 ounces = 0.125
- 0.125 x 100 = 12.5% (total weight loss)
This smoked fish would be slightly dry after canning.
One thing to remember about canning smoked fish is that the oilier the fish, the more moist it will be. An oily fish, like good salmon, will be more moist when dried to 12.5% weight loss than a less oily fish would be. Fish that have a lower oil content are generally drier in texture after canning.
Canning Smoked Fish
Now back to Sharon… and lets get to the canning process.
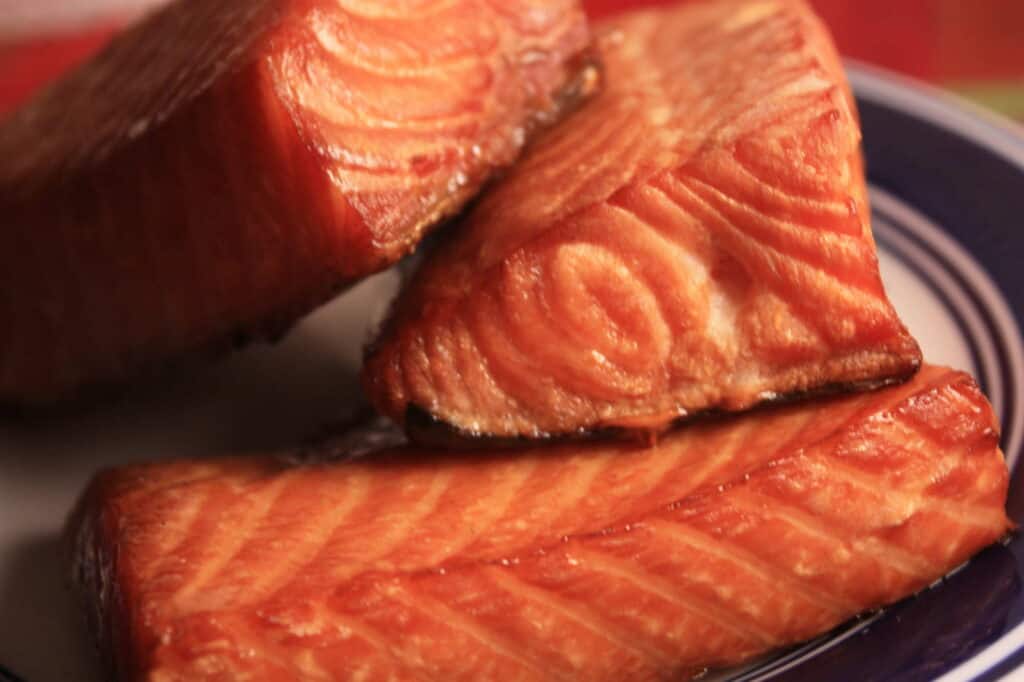
After your fish has been smoked it is ready to go into the jars. Remember since this fish is only partially smoked it needs to be processed soon. Do not delay assuming that the fish is preserved by the smoking process. It is not, it is still somewhat raw.
Freeze the fish for later if you don’t have time to process them right away. If you freeze them simply thaw fish completely before canning.
Gather your canning supplies:
- pressure canner
- canning jars
- canning seals and rings
- jar lifter and canning funnel
- towels and dish cloths
Two things that deviate from usual Canning Methods.
This is according to the National Center for Home Food Preservation. These are tested method of canning specific to smoked fish.
- Use more water in your pressure canner than normal. Add 4 quarts water to the pressure canner. The water level is higher and may reach the screw bands. That is ok.
- Don’t heat the water in the canner prior to processing. Usually, you want the canner hot but not boiling when the jars go in the canner. But NOT for smoked fish. Cool water from the tap is fine.
Packing the jars
- Cut fish into jar-length pieces (leave an inch short for headspace). Pack the jars with the pieces vertical. (or sitting upright)
- Pack fish into jars, leaving 1-inch headspace. Do not add liquid to the jars.
- Wipe rims clean. If there is any oil or residue it may interfere with the seal. You can use a damp paper towel to do this. Or a towel with vinegar works well too.
- Place your canning lids on the jars.
- Put your jars in the canner and process according to pressure canning instructions below.
For more details on how to use your pressure canner check out this post. It includes a step by step checklist you can print out that might be helpful.
This recipe is for pint size jars. To my knowledge there are no tested instructions for quart jars. You can do this in 1/2 pints. Use the same processing time as pints.
Process pints or half pints 1 hour 50 minutes at your required pressure. Don’t forget to adjust your pressure for your altitude using the chart below.
Recipe Card
Canning Smoked Fish
Equipment
Ingredients
- Fish salmon, blue, mackerel, trout
- Salt
Instructions
- Start by preparing your jars and getting water in the canner. Add 4 quarts of water. If you are new to using a pressure canner, see this article for full pressure canning instructions. This includes more detailed information and step-by-step instructions on how a pressure canner works.
Smoking the Fish
- Clean fish, removing blood, scales, and skins (if desired).
- Fillet the sides of the fish from the backbone.
- Cut fillet into pieces.
- Brine fish in saltwater (1 cup salt in 7 cups water per 3-4 pounds of fish).
- Let pieces up to 1/2” thick brine for 5-10 minutes and let larger pieces brine for 30-45 minutes.
- Remove fish from brine, patting dry with paper towels.
- Allow to air dry on rack until outer surface is barely tacky.
- Fill smoker pan with favorite wood, following the manufacturer’s recommendations.
- Smoke the fish at about 14-0-160 degrees F until ready for the canner (determined by 10% loss of weight).
Canning Smoked Fish
- Cut fish into jar-length pieces.
- Use 4 quarts cool tap water in the pressure canner. No heating of the water is needed yet. (this is different from many pressure canning recipes.)
- Pack fish into jars, leaving 1” headspace.
- Wipe the rim clean and place on your seal and ring. Place the jar in the canner.
- When all jars are in the canner, start heating canner and process according to the directions below.
Notes
- 0-1,000 ft – 10 pounds
- 1,001-8,000 ft – 15 pounds
- 0-2,000 ft – 11 pounds
- 2,001-4,000 ft – 12 pounds
- 4,001-6,000 ft – 13 pounds
- 6,001-8,000 ft – 14 pounds

I don’t know about weight loss, but any fish cold smoked over two hours then canned will be most likely not edible. Alder or apple wood. Hickory will ruin your fish. Light smoke. Canning will enhance the smoke flavor. Smoke it 6-12 hours you may as well lick the inside of your smoker. That’s what it’s gonna taste like.
Can previously frozen fish be canned? What about smoking and canning.
THANKS
Yes, you’d need to just thaw and then follow canning instruction as usual.
hello. I was wondering why you dont add liquid to smoke salmon during the canning process? plain salmon makes it own juice. but smoked salmon is dry. can i add some liquid to mine?
Hi Rhonda, the way the recipe was tested was with no liquid. I don’t recommend adding liquid. I’m not sure why there is no liquid added. It does seem like smoked fish would be drier. But I would not stray from the way it is proven safe.
Ok. Thank you. I did can it with a tsp of oil and it seemed to be fine. But it is a little dry.