Beef Stew for Canning: Recipe and tips.
This page may contain affiliate links. More Information.
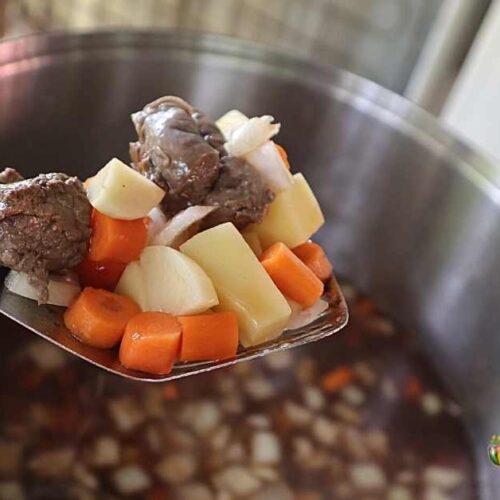
There are many ways to make beef stew. This Stew Recipe For Canning is created to give you the ability to process this for storage on the shelf. Learn to prepare and pack jars, customize ingredients, and achieve perfect consistency.
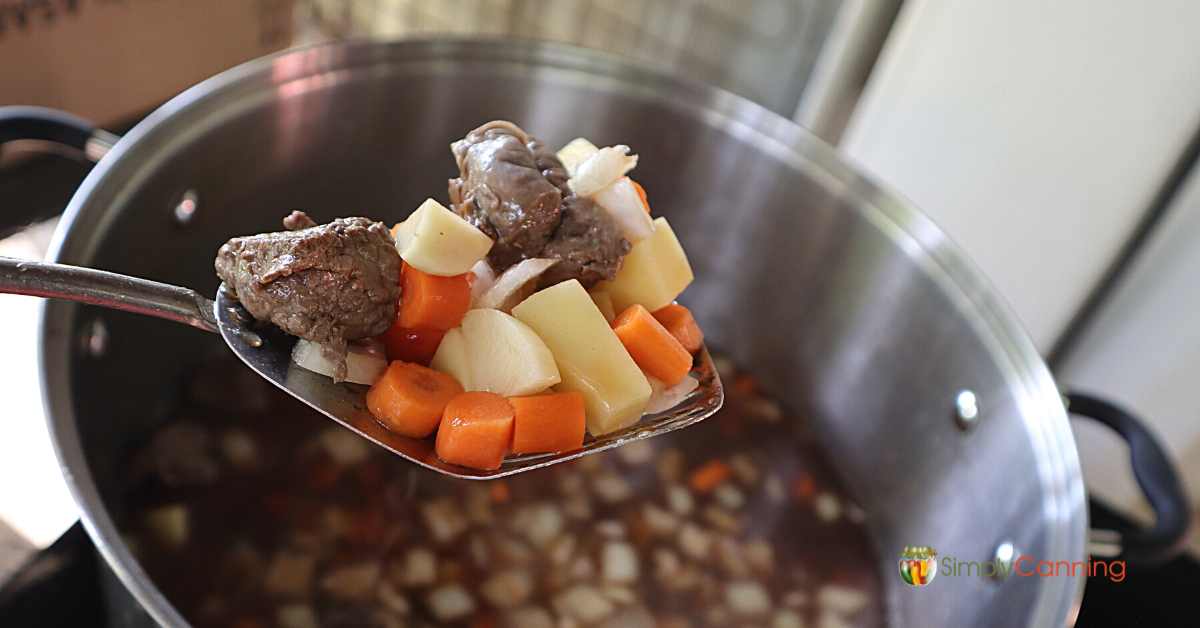
Stew recipe for canning. First, prepare beef, potatoes, carrots, celery, and onions. Brown the meat, chop veggies, and combine in a pot with water and seasonings. Pack hot stew into jars, process In a pressure canner. Once cooled and sealed, store in a cool, dark place for delicious, ready-to-eat meals anytime.

Interesting Links Mentioned
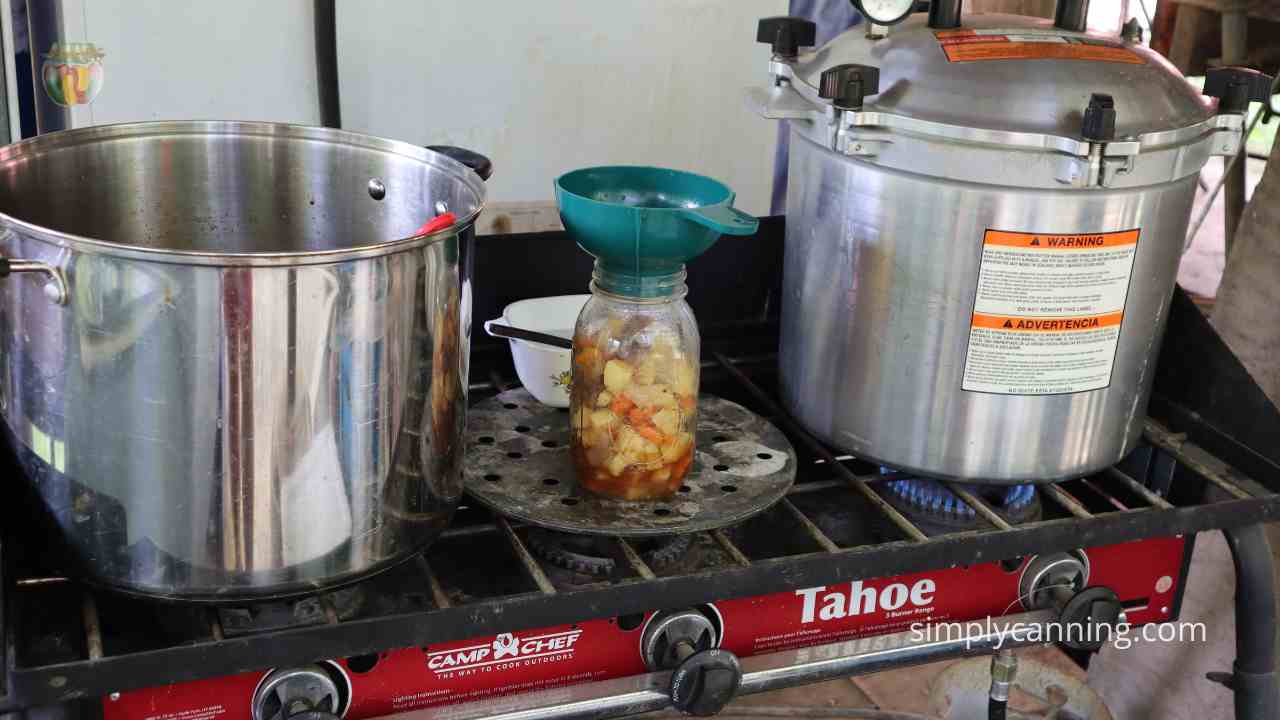
- Newest version of the Camp Chef I use here. (It’s a different color, same burners.) Camp Chef Stove
- The large stock pot is actually this water bath canner.
- All American Pressure Canners.
Quantity
The recipe included below will yield about 7 quarts of beef stew. Or you can use pint jars and make 14 quick easy lunches for yourself!
Know your Canner
Before you start this project, if you are not familiar with pressure canning I recommend reading – How to use a pressure canner. It will familiarize you with how your canner works and what steps to take to get set up for any canning project.
Canning Beef Stew- Directions and Expert Tips
Ingredients
See the adaptations section below for more information on changing ingredients in this recipe. These are the ingredients I used.
- 4 to 5 lb beef stew meat, cut into 1 1/2-inch cubes
- 1 Tbsp vegetable oil to brown the meat
- 12 cups cubed and peeled potatoes
- 8 cups sliced carrots
- 3 cups chopped celery – (I actually left this out, see below)
- 3 cups chopped onion – white or red is fine I use whatever I have on hand.
- 1-1/2 Tbsp salt – optional but highly recommended!
- 1 tsp thyme, optional
- 1/2 tsp black pepper, optional
- beef bouillon, optional – recommended
- Water – enough to cover the ingredients.
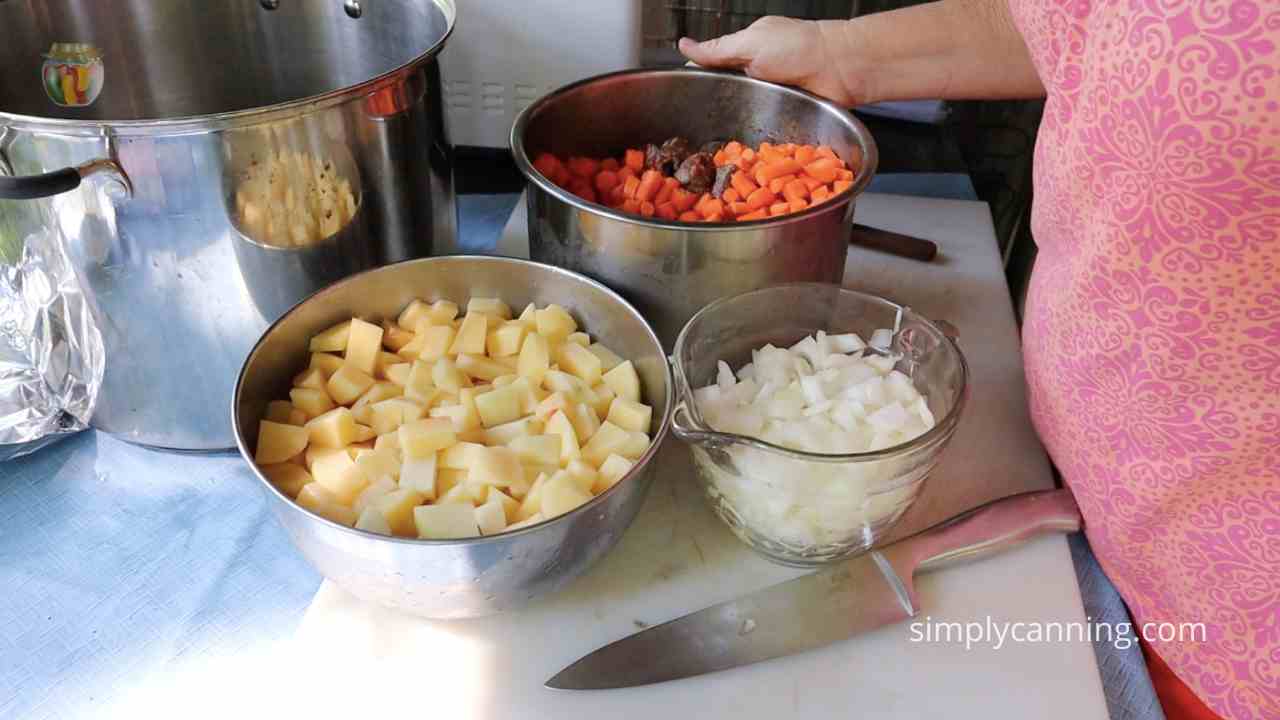
Peel and chop into bite size pieces.
- Cut your meat into cubes about 1 1/2 inches. Then brown them lightly in a small amount of oil.
- Peel and chop potatoes. Yes you really do need to peel the potatoes. There is a bacteria that lives in the soil. If you scrub the potatoes well it does help, but that will still not be as clean as peeled. The testing that was done was with peeled potatoes.
- Peel and chop carrots. And again yes, you really do need to peel your carrots. For the same reason as the potatoes.
- Chop celery. (I did not use celery in my stew.)
Combine meat and veggies in a large stock pot to be heated. Add hot water until the ingredients are fully covered with water. Measure this as you go. I use a measuring bowl (like these) and simply keep track of how much water I added. You’ll need this to determine how much bouillon you will need.
Add your seasonings of choice. I use just salt and pepper, and bouillon. To add the bouillon just check the directions on your package and use the appropriate amount for the amount of water you added.
Bring all of this to a boil to heat through for a hot pack. Note that you do not thicken this before you put it in the jars. Usually stew is thickened a bit with flour or some other thickener. But for canning purposes you’ll thicken it when you open the jar to serve it.
Now you are ready to start filling jars!
Packing the Jars
Fill jars with stew, make sure solid ingredients are covered with broth. Leave 1 inch headspace. I like to use a slotted spoon and add the solid ingredients, then top it off with broth.
If you get to the last jars and find you are short on liquid you can just add water, or simply make a bit more broth to add to the jar.
Remove air bubbles with a plastic bubble tool. Then check your headspace again. Adjust if needed. There are rarely going to be any bubbles in your jars with stew but check it just in case.
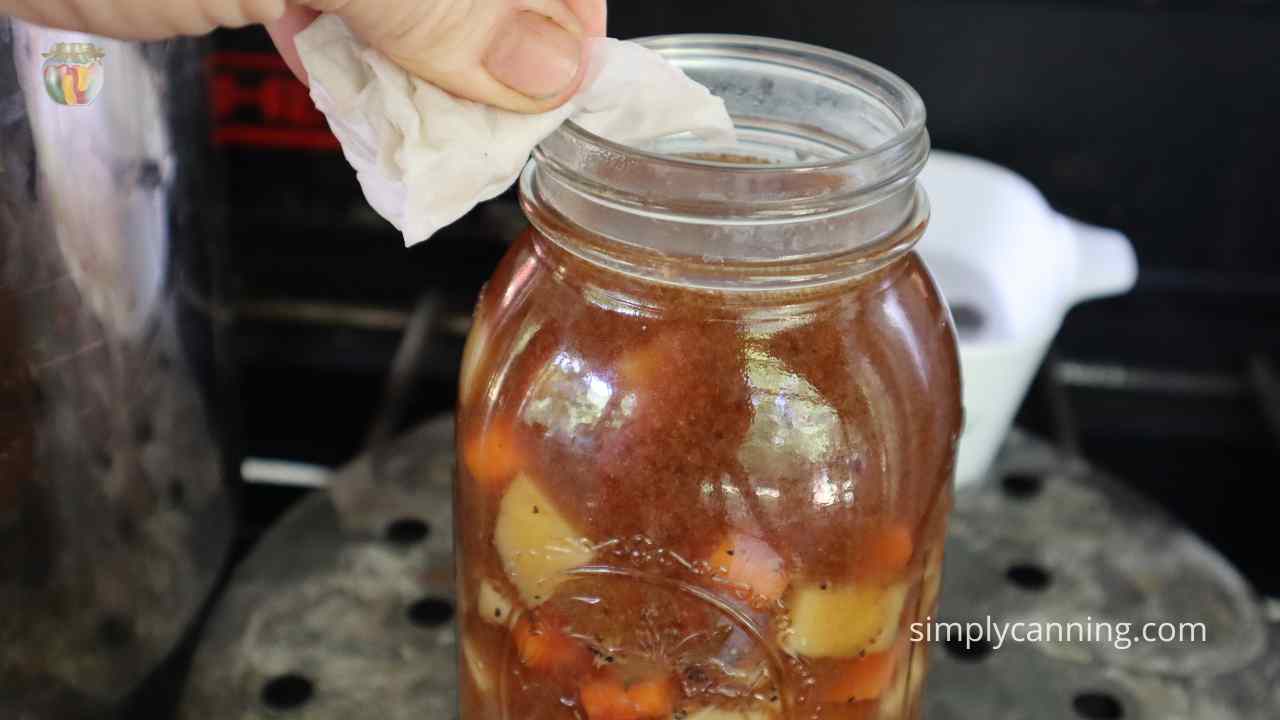
Wipe rims of jar clean with damp towel or paper towel so any food will not interfere with the seal.
Add your canning lids and rings, finger tight.
Place jar in the canner.
When all jars are filled, process according to the instructions and chart in the recipe card below.

Adaptations.
- This recipe can be made with beef or venison.
- You can add other spices if you’d like. Just make sure they are dried spices. And be careful with bay. If you add a bay leaf you’ll need to remove it so it doesn’t end up in one jar… that jar will have a really strong flavor.
- I love to add beef bouillon but it is optional.
- I left out the celery. We just don’t care for it. If you leave out a vegetable ingredient don’t increase any of the other ingredients. Simply leave it out.
Details on filling the jars.
Since this recipe has been tested, with the ingredients as written you can follow the instructions as they are written to fill your jars. You may want to make changes other than what I’ve mentioned. For instance maybe you’d like to use green beans instead of onions or You want to add or adjust other ingredient quantities.
If you want to add new ingredients you’ll want to use different processing instructions. For these types of changes I suggest you follow the soup canning directions to customize the recipe. This allows flexibility for various ingredient modifications. You can learn about canning soup here.
The reason is this: During the soup canning process, you’ll pack the jars differently. You fill the jar halfway with solids and then top it off with liquid. This approach allows for some flexibility in case the density of the soup varies due to ingredient modifications.
How to Thicken
You will thicken your stew when you open the jar to serve it. You can use any thickener you’d like. Flour, or cornstarch is common. I stir 1 heaping tablespoon into a small cup of water to make a slurry, then stir this into the stew. As the stew boils the slurry will thicken it up nicely.
Here’s the Recipe!
This printable recipe card is the recipe in brief! I’ve got more details, explanations and tips in the article above. If you skipped here, you might want to take a look at the other details included above too.
Video
Equipment
Ingredients
- 4 to 5 lb beef stew meat cut into 1 1/2-inch cubes
- 1 Tbsp Vegetable Oil
- 12 cups cubed and peeled potatoes
- 8 cups sliced carrots
- 3 cups chopped celery
- 3 cups chopped onion white or red is fine
- 1-1/2 Tbsp salt optional
- 1 tsp Thyme optional
- ½ tsp pepper optional
- beef bouillon optional
- Water
Instructions
- Cut your meat into cubes and brown. A small amount of oil is fine for this step.4 to 5 lb beef stew meat
- Prepare all your vegetables as needed. Peel and chop into bit size pieces.12 cups cubed and peeled potatoes, 8 cups sliced carrots, 3 cups chopped celery, 3 cups chopped onion
- Combine meat and veggies in a large stock pot.
- Cover with water. Measure quantity of water as you add it if you will be using bouillon.
- Add your choice of seasonings. If you are adding bouillon use the directions on your package.1-1/2 Tbsp salt, 1 tsp Thyme, 1/2 tsp pepper, Water, beef bouillon
- Bring stew to a boil.
Packing the Jars
- Fill jars with stew, making sure solid ingredients are covered with broth. Leave 1 inch headspace.
- Remove air bubbles and check your headspace again. Adjust if needed.
- Wipe rims of jar clean with damp towel or paper towel so any food will not interfere with the seal.
- Add your canning lids and rings, finger tight. Place jar in the canner.
- When all jars are filled, process according to the instructions and chart in the notes area below.
Processing with a Pressure Canner
- Put the lid on the canner leaving the weights off. Bring to a boil. Watch for steam to start coming out the vent pipe in the lid.
- Allow the steam to ‘vent’ for 10 minutes then put the weights on. Use the proper weight for your altitude (check the chart) This is when pressure will start to build.
- When the pressure reaches your requirements, start your time. Process for the full time indicated, adjusting the heat as needed to maintain the correct pressure for the entire time.
- When processing time is completed turn off the heat. Do not remove weights yet.
Cool Down Time
- Let the canner sit undisturbed until pressure comes back to zero. Do not try to speed up the cooling process.
- Remove the weight and wait 5 minutes.
- Open the lid to allow steam to escape. (carefully don’t let it hit your face or arms!) Leave the lid setting on top of the canner slightly ajar and wait 5 minutes again.
- Take the lid off the canner and remove your jars. Some bubbling still is normal. But you can wait longer if the contents appear to be bubbling so hard it is coming out of the jars.
- Put the jars a few inches apart on a thick towel and allow them to cool to room temperature undisturbed. 12 hours is suggested.
- When the jars are cool, remove the metal bands, check the seals, wash jars, dry completely, and store in a cool dark place.
Notes
- Pints are processed for 1 hour 15 minutes.
- Quarts are processed for 1 hour 30 minutes.
- Step one – use the chart for the style of pressure canner you are using.
- Step two – check the altitude adjustments for your altitude.
- Altitude Weight (pounds pressure)
- 0-2000 11 lbs
- 2001-4,000 12 lbs
- 4,001-6,000 13 lbs
- 6,001-8,000 14 lbs
- Altitude Weight (pounds pressure)
- 0-1000 ft 10 lbs
- Above 1000 15 lbs
Sources
Ball Blue Book Guide to Preserving
Can frozen vegetables be used in this recipe?
Yes but texture might be softer. I’ve got more on canning with frozen foods here…
Thank you.
can tomato sauce be used with the broth
Yes as long as it is a thin sauce. It should not be anything that will thicken the liquid.
Hi, Sharon – If I have my own homemade beef stock, can I use that instead of the water and bouillon? Thank you!
Yes, as long as you are not adding any fillers or thickeners like flour, cornstarch, etc. Homemade beef stock is fine.
Thank you, Sharon!
Is it safe to add different herbs? Thyme tastes like dirt to me. I love basil & marjoram in a beef stew though.
You can add dried herbs as you like. But remember some of them will change in the canning process. From what I understand they become more bitter. Sage is one in particular that is not suggested. I have no experience personally with basil or marjoram. You can add fresh herbs when you open the jar.