Pressure Canning: How to Can with a Pressure Canner
This page may contain affiliate links. More Information.
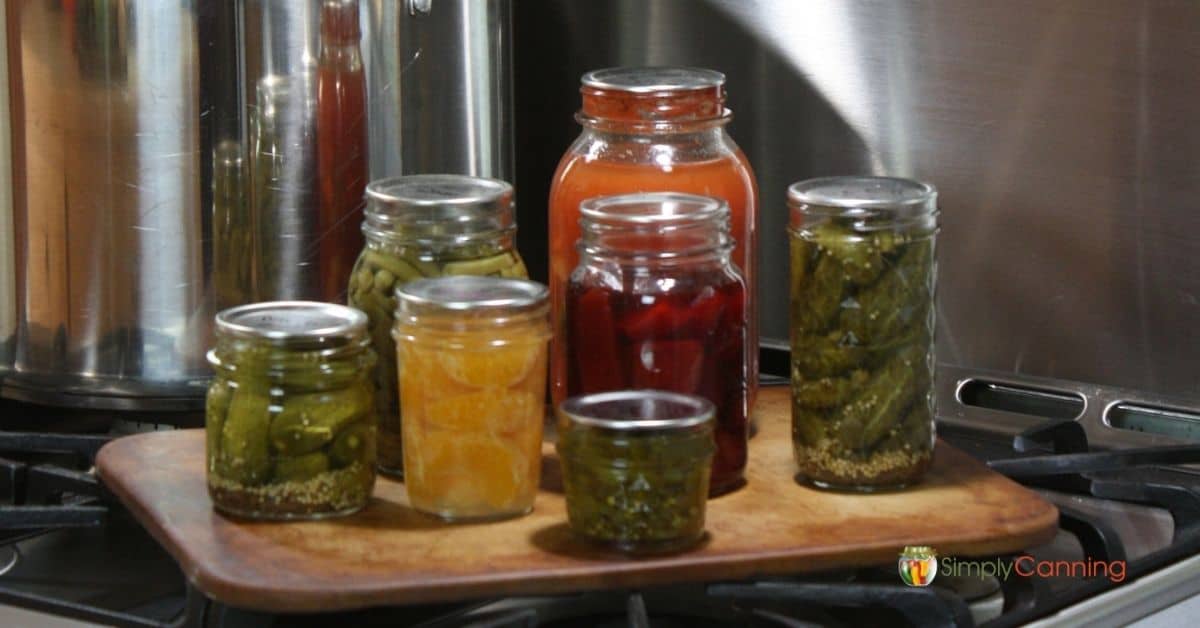
What foods DO require pressure canning? These directions are for pressure canning low-acid foods. This includes any meat and most vegetables, all of which must be pressure canned.
What foods DON’T require pressure canning? Pickles, jam jelly, or fruits are all high-acid foods. If you are preserving these foods, you need to be on my water bath canning page.
Tomatoes are a special case. Check out this page to learn more about when to use a pressure canner or a water bath canner.

Pressure Canning video Workshop
For those of you who are terrified of your pressure canner, go check out this pressure canning confidence workshop. 3 easy sessions, and you’ll have the canner off the shelf and practicing. Next step your friends will call you the “canning lady”. You could probably start today.
Just below, you’ll find detailed instruction on how to use your pressure canner. Each food will have different steps to preparing your food, filling jars, and processing time. To get started you’ll want to do two things….
- Check your specific food packing and processing time instructions. (There are links below if you need them.)
- Follow the instructions from this page for using your pressure canner. Refer back to this page if needed.
Pressure Canning Step-By-Step Directions for beginners
Gather all your pressure canning supplies:
- pressure canner
- canning jars
- canning lids and rings
- jar lifter and canning funnel
- towels and pot holders
- pots and bowls
- spoons, knives, etc.
- food to be canned
- other ingredients
Fill your canner with 3 quarts of water. Yes, that is all the water needed. Check the manual for your particular canner to verify the exact amount. Most need 3 quarts. The water will NOT cover the jars when the canner is full. That’s ok.
Remember, pressure is the key to safety in pressure canning. The pressure buildup is what causes the high heat necessary.
Set the rack on the bottom of the canner and heat water until hot, not boiling. Keep warm. The goal is that the canner and jars will be hot when your jars are being filled. So keep in mind your food preparation time.
Wash and rinse your jars and lids. Jars can be washed by hand or in the dishwasher. You don’t need to sterilize jars in pressure canning. The high temperatures reached in the canner will sterilize everything. You DO need to start with clean jars.
Keep the jars hot until use. My favorite way to do this is to just place the clean jars in the hot water in the canner. I’ve got some other options too that I go over just below.
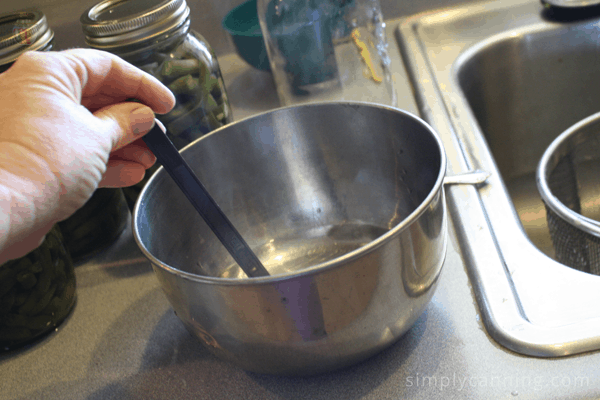
The lids also need to be clean but do not need to be boiled or sterilized. My suggestion is to put them in a bowl of warm water ready to pull out with your lid lifter. This will give you a good rinse, but no boiling needed.
How to keep canning jars hot.
For keeping jars hot, I have three options for you.
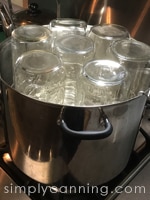
- Place the clean jars upside down in a large pot with 2 or 3 inches of hot water. Bring to a boil and turn off the heat. Leave the jars in the water until ready to be filled.
- You can also wash the jars in the dishwasher and then simply leave them there until ready to fill. Keeping the door to the dishwasher closed keeps in the steam and heat. Remove the jars a couple at a time as needed.
- This third way is my preferred method. Place your jars right in your canner. The water should be warming anyway as you prep your food. With your jars in the canner, they will get heated up at the same time. I put mine upside down, sometimes they tend to tip a little as the water heats up. The water and heat is affecting the air in the jar. (It’ll make more sense when you do it. Not a big deal) I just work with it and tip them back up as needed.
Prepare & Pack Food
This is where you need to check the specific directions for your food. There will be lots of detailed instruction. Pay attention to the following.
- How the food is prepared before you pack your jars. For example, hot pack or raw pack, headspace… there may be other things. Just follow directions.
- Processing time. This will vary according to the type of food, the jar size, and if it is hot packed or raw packed.
- Altitude adjustments. You need to adjust the time according to your elevation where you live. This adjustment should be included with your recipe. Remember, Water boils at different temperatures depending on the altitude, this of course affects the processing time. More details on that can be found here… Altitude Adjustments
Here are some links to lists of food specific pressure canning recipes – Canning Vegetables and Canning Meat. These are all processed in a pressure canner. Then come back here to operate your canner.
Filling your Canning Jars
Fill jar, leaving the recommended headspace. Remove air bubbles by running a non-metallic spatula around the inside of the jar. I like to use a plastic orange peeler for this step. It is small and easily slides down. A small rubber spatula will also work.
Wipe the rim off the jar clean with a damp tea towel or paper towel.
Place seals and rings on jars. Tighten finger tight. You really don’t have to crank down hard. Snug is fine. I’ve been asked just what does finger tight mean? It is hard to describe so… I did a video. Check here if you wonder what is finger tight?
Pressure Canning Process
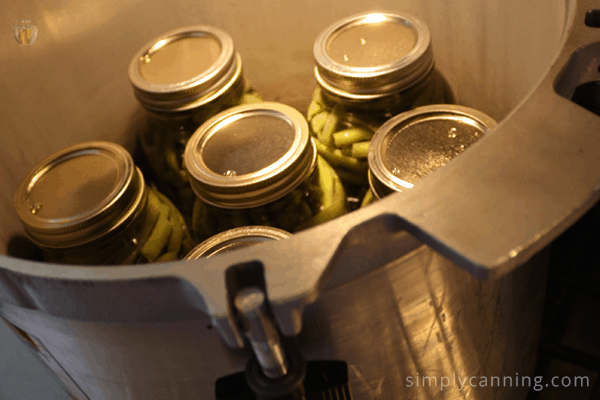
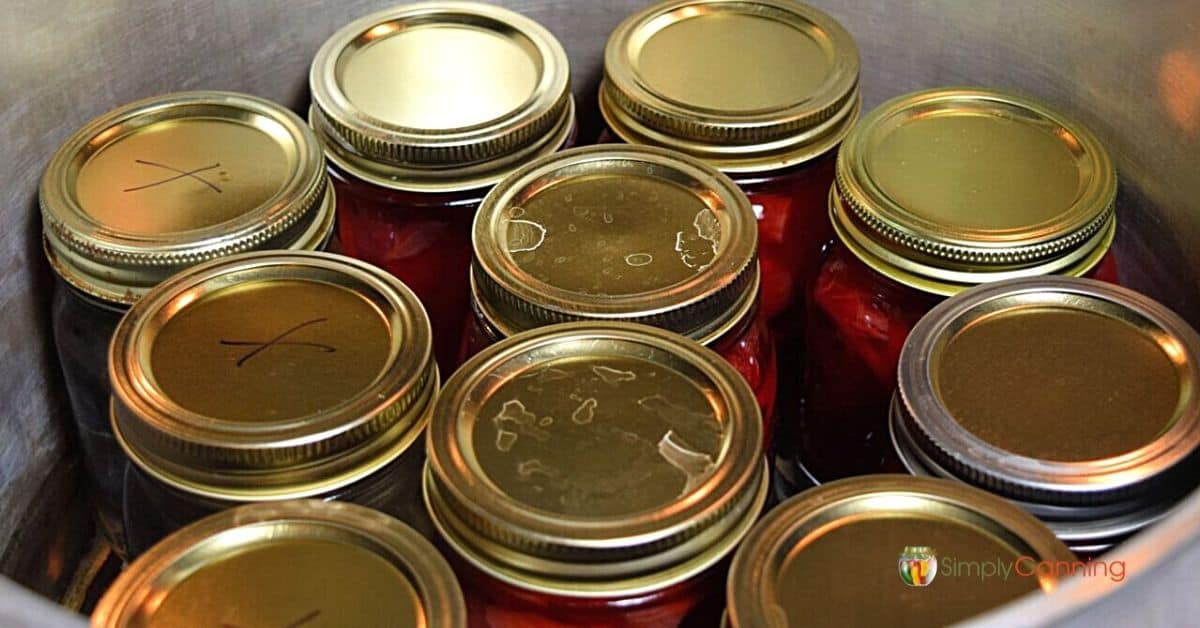
Place your filled jars on the rack in the pressure canner.
- The jars must not sit directly on the bottom of the canner you need to have a rack.
- Try to be sure jars are not touching each other. Steam needs to flow freely around each jar. Sometimes this takes a little maneuvering, twisting the jars so that the flatter sides leave more room. My older canner is a little narrower that my newer one.
Place the canner lid securely on the canner. And be sure the cover locks down. Heat to boiling. Do not place the weights on yet. At this point, steam should be escaping from the vent. This is called venting.
Venting the Pressure Canner
Allow the steam to vent for 10 minutes. Venting means letting steam and air escape from the canner, which is a crucial step—don’t skip it.
As pressure builds inside the canner, the water heats up and turns into steam. This steam forces out any remaining air. Once the vent is closed, the canner traps and pressurizes the steam. Because steam under pressure reaches higher temperatures than boiling water, your jars don’t need to be submerged—the steam does all the heating.
This high heat (240°F) is what makes canning vegetables and meat safe.
After the 10 minutes venting, put your weight on the canner and let the pressure build.
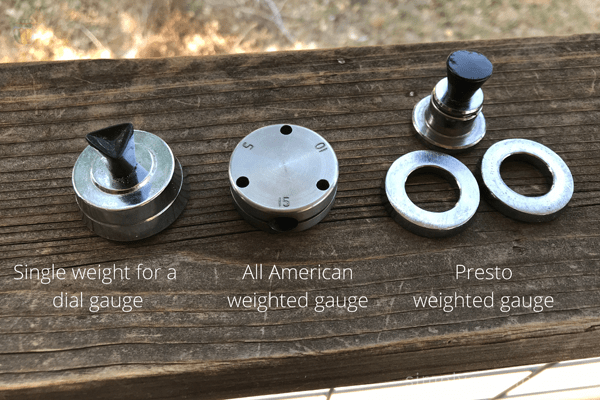
Weighted Gauge or Dial Gauge
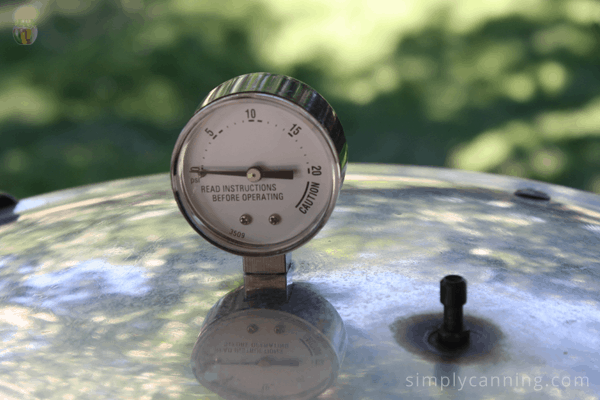
If you’re using a dial gauge canner, you’ll monitor the dial to see when it reaches the correct pressure. The weight on these canners serves only as a counterweight to seal the vent and allow pressure to build. Watch the dial and turn your heat up or down to regulate your pressure.
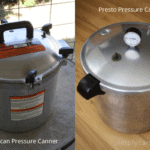
If you’re using a weighted gauge canner, you’ll determine when it reaches pressure by watching or listening to the weights. Be sure to use the correct weight for your altitude. The All American canner has separate holes in the weight for different pressure levels, while the Presto canner uses rings to adjust the weight. Once the canner reaches the correct pressure, the weight will rock and release steam, maintaining the proper pressure level. Turn your heat up or down as needed to maintain the rocking or spinning of your weights.
Adjust heat as needed to keep it at the correct gauge pressure. It is best to keep the pressure as steady as possible. A lot of fluctuation can cause liquid loss. This is where you have to learn your stove. It will get easier to maintain pressure as you get to know your stove and how it reacts as you adjust. Sometimes it is very small adjustments!
NOW Start Timing…
Time needed for your food will be given in the recipe. Again, be sure to adjust for altitude.
Check your gauge often. In pressure canning, you must maintain the correct pressure. If the pressure drops below the recommended level, start your time over. ~ Bummer ~ I hate it when that happens! Yes, I’ve done it.
The best way to avoid this mistake is to make it a point to stay in the kitchen and do other stuff, checking the dial gauge occasionally. If you’ve got a weighted gauge you can listen to the rock and you’ll notice if it changes up or down.
You can be cleaning up or getting your next load ready. Take a break! You deserve it. Have a cup of coffee or tea or ice cold water! Put your feet up. But stay near the canner so you can keep an eye on it.
When time is up, turn off the heat. Do not remove weights. Let the canner rest and cool naturally until pressure comes back to zero.
After Processing; Cooling down and removing Jars
NOW is the time you can leave the kitchen. DO NOT try to speed up the cooling process by pouring cold water over the canner or using some other artificial method. NO fans, no cool cloths. Just let the canner cool and release pressure all by itself.
When the pressure in the canner is at zero, pressure is released, so you may now remove the weight. Then wait about 2- 5 minutes.
I’ll then open the lid but set it loosely on top of the canner and wait another 2- 5 minutes or so. You want the jars to gradually cool down. If you go super fast you might have some liquid loss.
And finally, fully remove the lid. Be careful! CONTENTS ARE STILL HOT AND STEAMY. Tilt the lid so the steam will not hit you in the face. If my jars are still boiling (very common) I’ll wait another 2-5 minutes. Then you want to remove the jars from the canner.
The jars may still be boiling even at this point. But it’s ok. You want this to be gradual so you avoid liquid loss. But you do NOT want to make this a long process. Don’t extend the time in the canner much longer than this.
I’ve read people who allow jars to cool completely in the canner or overnight. I don’t recommend that. You will be keeping the jars hot longer than needed and you’ll risk something called Flat Sour. Flat Sour is not dangerous but it makes your food taste terrible and sour.
Using a jar lifter, carefully remove the jars (again, no tilting) and set upright on a wooden board or a thick towel to cool. Be sure they are in a draft-free area and leave 1-2 inches of space between each jar so air can circulate.
My favorite part… Canning Lid Ping!
Listen…
Did you hear it? This is my favorite part of pressure canning (and water bath canning). As the jars cool, the seals (or flats) will pull down and seal. They make the coolest little pinging sound. For some odd reason, I love that sound. It is so satisfying. It means all my work is…well…working!
Just FYI, they won’t always ping. Sometimes you’ll miss it or the jars may just decide not to make a sound. It doesn’t always mean a seal failure. Learn more about what missing that ping means.
Resist the temptation to press the lids. If your kids are like mine, keep them away too! Just leave the jars alone until completely cool.
How Long Does It Take Canning Jars to Seal?
This may take 12-24 hours. I leave mine on the counter overnight. I love waking up in the morning to the jars sitting out on the counter with the morning sun shining off of them!

After Jars are Cool, You May Press on the Lid to Check the Seal
The seal should be sucked down and not pop up. Another way to check the seal is to remove the screw cap and lift the jar by the lid. If you find a jar that did not seal, simply put the jar in the fridge and plan on using the food within a few days.
Wash the jar. The outsides will often be sticky. Sometimes a quick rinse is all that is needed, sometimes a bit of soapy water is in order.
It is a good idea (but not essential) to store without the screw cap. I highly recommend removing the bands. Sometimes the band can keep the lid on the jar even if the seal has broken. Personally I want to know if the seal has broken… I don’t want that screw band holding the lid in place. If the seal breaks, the food spoils.
For those that choose to leave the screw band on you still need to remove it to wash your jar and band. Then make sure it is completely dry and put back on your jar loosely. The bands will rust if there is any moisture remaining.
(I’m going to say it again… just leave the screw bands off. It is better.)
Label Food Type & Date
You may think that labeling the type of food isn’t necessary if you can obviously see what is in the jar. But sometimes you will use a different recipe. Soup for example. Or a type of green bean. You will want to know which is which when you open them later. You can then decide which you like better for next time.
More importantly is remembering when you processed the jars.
Always record the date, at least the year. That way, when you find a jar in the waaaay back of your cupboard, you will know how old it is. You think you will keep them straight, but it is so easy to forget and so easy to label them now. Trust me. Just do it.
Store the jars in a cool, dark, dry environment. Usually a pantry is fine. Don’t store in a utility room where there are hot pipes or high humidity. Direct sunlight is a no-no as well.
You’re Done!
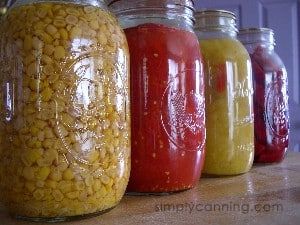
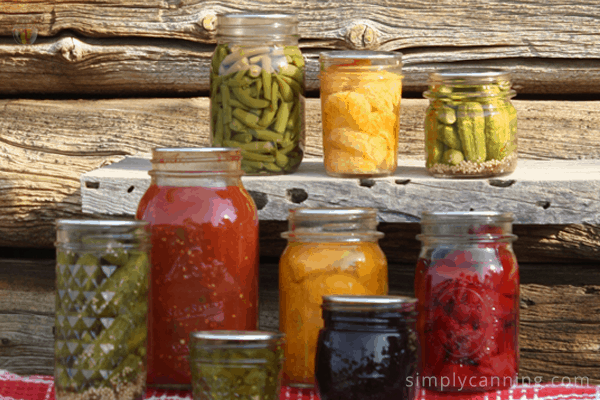
Now stand back and admire all colorful jars full of delicious, nutritious foods. Admire your work! Wasn’t that easy??? Pressure canning is not as difficult as it may seem. What? You’re tired? Yes, but it is a satisfying tired, is it not?
Pressure Canning Workshop
And as a reminder… These videos might be just what you need if these instructions didn’t ease your fear. Go check out this pressure canning confidence workshop. 3 easy sessions and you’ll have the canner off the shelf and practicing.
Pressure canning can be intimidating if you have never done it before. It is so satisfying to learn how to can with this method.
Printable Pressure Canning Instruction Checklist
How to Use a Pressure Canner
Equipment
Materials
- Low-acid food meat or vegetables (any low-acid food that you want to process)
Instructions
Before You Start
- Find a tested recipe for your food (type of food, jar size, and pack method). Familiarize yourself with the recipe’s prep steps (peeling, blanching, pre-cooking for hot pack, acid additions if called for). The recipe should also tell you headspace and whether to use raw pack or hot pack. It should also include altitude adjustments.
Gather all Equipment and Supplies
- Place the appropriate amount of water in the canner. Usually about 3 quarts or 2-3 inches of water. Check your canner manual for exact measurements. Be sure you have the rack in the canner. Start heating it up. The goal is for the canner to be hot but not boiling as you are filling your jars.
- Wash and rinse your jars and lids. (They do not need to be sterilized.)
- Keep your jars hot until ready to be filled. The easiest way is to place them upside down in the canner while it heats up. But you can also leave them in a hot steamy dishwasher.
Canning Process
- Prepare your food according to the directions for that food. This may vary by food type. Follow directions for cut size, blanching or not, pre-cook if needed, raw pack or hot pack, ingredients, acidification etc.
- Fill a jar following the recipe. Jar size matters. Pack method matters. (raw pack or hot pack) Leave the appropriate headspace. (the space between the food and the lid.)
- Remove air bubbles if needed. Adjust headspace again if needed.
- Wipe rims of your jar clean, then place on the lid and screw band.
- Place the filled jar upright into the canner. Continue until all jars are filled.
- Put your lid on the canner, leaving the weights off. Raise your heat and bring to a boil. Watch for the steam to start coming out the vent pipe in the lid.
- Allow the steam to 'vent' for 10 minutes.
- Put the weights on. This is when pressure will start to build.
- When the pressure reaches the proper level for your altitude, start your processing time at that point. Use the correct processing time and weights according to your jars size, pack style, and altitude. This should be included in your recipe.Adjust the heat as necessary to keep the canner at the proper pressure throughout the processing time. A little high is ok… if you drop below your pressure start your time over. For weighted gauges pressure is reached when the weight begins rocking; for dial gauges this is when the needle reads and stays at the target pressure.
- When processing time is completed, turn off the heat. Do not remove weights. Let the canner sit undisturbed until pressure comes back to zero. It will still be very hot!
Cool Down and Storage
- Remove the weight and wait 5 minutes. This allows for gradual cool down. Open the lid to allow steam to escape. (Carefully, don't let it hit your face or arms!) Wait 5 minutes. Take the lid off the canner and remove your jars. Jars may still be bubbling. This is normal. It should not be a hard boil. (Optionally, you can wait another 5-10 minutes if the contents appear to be bubbling hard.)
- Put the jars on a counter with a thick towel beneath them to protect the hot jar from the cool counter. Allow them to cool to room temperature undisturbed. 12 hours is suggested. Do not try to speed up the cooling process!
- When they are cool, remove the metal bands, check the seals. Lids should be concave and not flex. Another way to check seals is to remove the bands lift the lid with your fingers. Remove the bands and wash jars if needed.
- Label and store your foods in a cool dark place. I suggest storing without rings. If you want to leave the rings screw them on loosely.
Pressure Canning FAQs & Tips
How much water do I need to use in a pressure caner? ‘Ive been using 3″-4″ for my quarts and I was told that I needed to fill the canner up to the lids. Is this right?
Sharon’s Answer:
When you are pressure canning, you put about 3 quarts of water in the canner before you put in the jars. When you place your jars, the water will come about halfway up your jars or possibly to the shoulders. The water should not cover the jars.
Greetings! I just used my Presto pressure canner for the first time. I’m trying it out on my enchilada sauce (no meat). Is there a problem if the pressure is ABOVE the stated level the entire time? I know below would cause a start over. I found you on FB and want to also say THANK YOU for all your great recipes and help 🙂
Sharon’s Answer: Hi Gwendolyn, If your pressure goes over, it is still safe. Of course, you don’t want to go too much over, and some foods will be overcooked if you go over a lot when pressure canning. But it is safe. You are correct that if it goes under, you need to start your time over. That is always a bummer!
I have recently read that you should have your pressure gauge checked each year, but it seems as if people who I know, who have been canning for years, are not really doing that. Is it really necessary to have that gauged checked each year? Thanks. Jessica
Sharon’s Answer:
Yes, you should have your pressure canner gauge tested each year. The USDA recommends that gauges be checked every year. That way, you will know that the gauge is reading correctly for pressure canning.
I confess I also used to skip having my gauge read. Don’t make my mistake. I decided to have it checked one year just because it had been a while. I found out that my gauge was not reading correctly! Not a good thing. Now I go ahead and do it regularly. Better safe than sorry.
Check with your local Ace Hardware Store. Ours has a canning day each year. The local extension comes and checks gauges for a discounted rate. They offer advice and recipe booklets too.
I am using a pressure cooker for the first time. I have read the instructions at least 12 times. I finally got enough courage to use it today. The instructions say, “when the control jiggles vigorously, reduce heat…”
Can I assume that the loud and, quite frankly, frighting hissing was the “jiggling vigorously” the instructions speak of? I have a 22 qt. MIRRO. Thanks. Shari
Sharon’s Answer:
Shari, your question made me smile! I never think of the hissing as being frightening. :0 But I suppose if you have not used a pressure canner and are not sure what it is supposed to do, it could be kinda nerve-racking.
Yes, if the sound was loud and frightening, I would definitely say it is time to reduce your heat. It will rock back and forth, letting steam out at each rock. This is what is releasing the steam, preventing the pressure from getting too high.
I am new to pressure canning but have started canning a few things. My question is, do I have to fill the canner up? Can I just do say 2-3 jars?
Just curious as I wanted to can some beef from my freezer but didn’t have enough to fill the canner. BTW, it need to be cooked as its been in the freezer about 5-6 months.
Sharon’s Answer:
Yes, you can run a partially filled load while pressure canning. It is more efficient to have a full canner, but if you only have 4 jars and you really need to get it processed, it is perfectly safe to do so. The guidelines state that you should have a minimum of 2 quart jars or 4 pint jars at a time. You need to follow the same instructions as if you had a full load. Do not reduce the time or pressure.
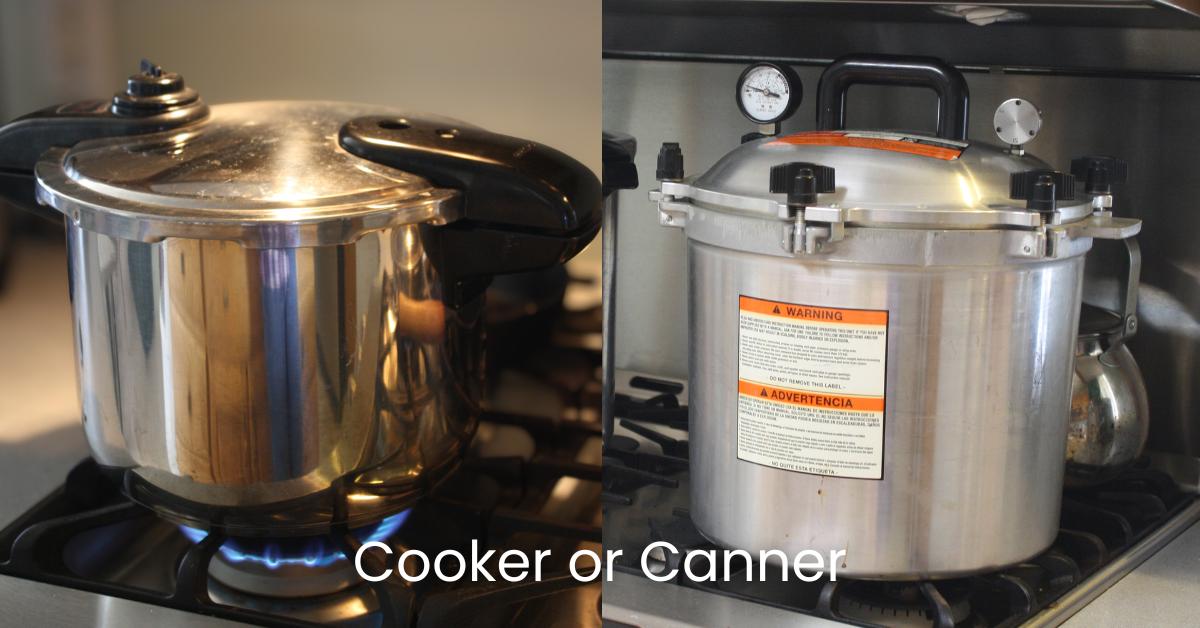
These are two very different things, and they are NOT interchangeable. Pressure cookers cook food directly under pressure. But they are for making meals not preserving. A pressure canner is a canner that’s used to process canning jars full of food for food preservation purposes. You can cook in a pressure canner, but you can’t can in a pressure cooker. They are not interchangeable. Read more about canning in a pressure cooker here.
Sound of the weighted gauge? Could you please help me? I bought a MIRRO 16-quart pressure canner, model number 92116, brand new earlier this year. No matter what I do, I cannot get my weight to jiggle. It lifts off the vent, spins while releasing steam, then sets back onto the vent In about 15/16 counts, it does it again.
I can’t find any information on it saying if this is normal or I’m doing something wrong. Would you happen to know if this is normal for this make of canner? Thank you so very much. I’m about ready to beat it with a sledge hammer. – Karen
Sharon’s Answer:
Hi Karen,
I don’t have a Mirro, but yes, I would think that is normal. If it lifts up and releases steam…consider that a jiggle. My All American also does a weird hissing-type jiggle. The point is that the weight is releasing steam, indicating that the pressure has reached whatever poundage you are working with.
My canning book says that I can double stack pint jars in my pressure canner. Do I need to have a rack or something between the jars or can I simply place the jars on top of one another?
Sharon’s Answer:
Yes, you do need to have a rack between your jars when they are double stacked for pressure canning. You can purchase another rack just like the one that came with your canner or use some other type of rack. Remember you will use the same amount of water as if you had one layer. The reason is that the pressure buildup is what processes the food and jars. The amount of water is the same.
This page has ideas for other things to use for racks. Maybe they will give you ideas of what you may already have: Canning racks.
I’m using a pressure canner, but it seems the steam is coming out around the lid. Not sure if it has a good seal? And will the jars be okay for eating?
Sharon’s Answer:
If the pressure is not building, then your jars will not be processed correctly.
I’d suggest turning the canner off. If there is any pressure, let it release itself, then carefully remove the lid (always tilt it away so steam doesn’t hit you in the face). Check the seal and see if it is twisted or dirty or anything. Then try it again.
If it still won’t seal, you may need to buy a new gasket before pressure canning.
If it does seal, then be sure to start your time over for your food. It needs to process for the entire time suggested. Depending on the food you might want to just freeze it instead of starting over. The food may be overcooked and mushy.
I hope that helps.
I have a very large pressure canner with no gasket. It has big screw-down nobs all around it. I bought it because I knew in time I would have to replace gaskets that would be hard to find.
It is leaking moisture now. Twice I lost all the water and was left with a carmelly mess to chisel off the bottom of my canner. I did manage to reach the proper pounds for the proper number of minutes. I expect to do some deer meat soon, and I know this isn’t going to work for the hour and half it will take to can it. My canner is made of aluminum. I don’t know what to do. – Laura
Sharon’s Answer:
It sounds as if you have an All American Canner. This link goes to a page about the All American and some reader reviews.
Unfortunately I need to warn you that you may have overheated the canner enough that it warped and would be unsafe to use. I’d be sure and have it checked by someone who knows canners.
For these canners here are some suggestions for next time. Try very lightly greasing the edge of the canner with cooking oil before you place the lid. Be sure you also screw the nuts down evenly, working from opposite sides so the lid sits level.
Try these things first with just water in the canner to see if it works before you process another load. You might try calling the manufacturer.
I was recently given a used pressure canner and was told the gasket that seals it may need to be replaced. It looks okay to me but I don’t know what its suppose to look like. How do I test it? Would I just put some water in it and let the pressure come up with no leaks? I’ll be canning vegetables. Thanks! Kathy
Sharon’s Answer:
Yes, you can just add 3 quarts of water and go ahead and heat it up to the pressure you’d use when canning. This way, you will know if it works before you have a bunch of food waiting to be preserved. The gasket should be rubbery and not stiff or brittle. If you see cracks or areas that look dry, I’ll bet it won’t seal for you.
Remember, if it has a gauge, the gauge will also need to be checked to be sure it is reading correctly.
Last summer I used a recipe for stewed tomatoes from the internet. The woman said she always used a water bath for this particular recipe. I did the same and got a great seal. Before we ever used them, I started reading other posts online that said stewed tomatoes needed to be pressure canned, (which I have never done by the way, but do own a pressure canner given as a gift).
My question is…now that I’m nervous about this, can I recan these jars in the pressure canner? They still have a great seal, which tells me they canned properly…the only thing I’m concerned about is if the recanning with the pressure canner would kill any bad bacteria from the peppers and celery, and onions that may be there.
Sharon’s Answer
Unfortunately, since they were canned so long ago, I don’t believe it would be recommended that you reprocess at this point. If you discovered your error within 24 hours, it is safe, but not after this length of time. But do keep in mind also that there are some tested stewed tomato recipes that ARE safe for the waterbath. I don’t know if yours is or not. But you might want to research that before you throw away the jars.
I do a lot of canning as I have a 3/4 acre+, organic vegetable and fruit and medicinal herb garden. I have asked the question a lot whether it is better/safer to use a pressure canner for ALL canning, low or high pH foods.
I can never get a straight answer. Its always just you don’t need to use a pressure canner for low pH foods such as fruit jams.
I have both water canner & pressure canner, neither one is any more or less time consuming to use. So would it not be safer to use the pressure canner for all canning??
Please let me know if you have the straight answer…Thanks a lot, love your site…Tony
Sharon’s Answer:
Hi Tony,
I can only tell you my opinion. I don’t believe either one is any safer, provided it is used correctly. It is much much much safer for veggies and meats to be pressure canned. For fruits, pickled items, or any high-acid foods, it would be your choice.
If you want to pressure can everything, that is fine, but I can’t really say it is “safer.” It certainly won’t hurt anything to use pressure canning, as long as you are using correct pressure and time for your food type.
Finding correct information on how to pressure can high-acid foods is the key. You still need to use appropriate and tested times and pressures for those high-acid foods.
I always use a water bath canner for high-acid foods, so I don’t have pressure canning information for them on Simply Canning. My new pressure canner (a 921 All American) has directions for some jams and fruit.
Another thing to keep in mind is that some foods that are traditionally water bath canned may end up mushy in the pressure canner. Salsa is one that I can think of. Pickles are another. Come to think of it, so would fruits like peaches and apricots.
Mushy foods might just be the reason to keep you using your water bath.
I hope that helps.
Sharon
I’ve always heard that when the pressure canner has done its work, you should let it cool down completely without doing anything to hurry it along, like taking the weight off the steam vent, for example.
I admit that I have done that a few times, and I noticed that when I did, the bubbling sound inside the canner got noticeably louder. I have also noticed that some broth from inside the jars has been pulled out into the canner.
My questions are:
– Why does it matter if I take the weight off the steam vent to hurry cooling?
– Why do I get broth from inside the jars pooling in the canner, even though I left plenty of headspace?
– Are these two things related?
Sharon’s Answer:
Yes, the two things are related. If the jars cool too quickly, they will expand and push the liquid out. Remember things expand and contract with heat. If the pressure in the canner is being released too quickly then the pressure in the jars will push out the contents.
The other reason it is important to let the canner cool by itself is timing. When the USDA tests to see how long foods need to be pressure canned, they include the cool-down time in the total cooking time. So if you cool the canner artificially, you are also shortening the total cooking time.
You should be letting the canner cool all by itself. When the pressure is back to zero, open the vents and wait two minutes. Then you can remove the lid. It will still be hot! Be sure the lid is tilted away so the steam doesn’t hit you in the face.
Sometimes, I notice my jars are really bubbling hard still after I’ve opened the canner. I’ll often leave my jars in the canner for 2 or 3 minutes more when that happens. This allows them to cool more, before removing them from the heat.
Related Pages
Why are my jars loosing liquid in the canner? Learn all about liquid loss on this page.
Pin This to Find Later
Page last updated: 1/26/23

hello Sharon, Thanks for all the wonderful info you provided, as I’m a Newbie and this helped so much. One question: I just checked my 4 pints of canned green beans this morning and all 4 of them had the bands that seemed to loosen, so I tightened them down more. Is this normal in the processing ?? I hand tightened them before putting them in the canner, but they appeared to have loosened.
That happens sometimes. As long as the lids are sealed it is fine. The bands are there just to hold the lids in place during processing. You might tighten just a little more next time. :).
The new vacuum mason jar sealer…does it work and will it work as a pressure canner?
Hi Cindy, I’m not sure which vacuum sealer you mean so I can’t reply to that. But I can say that a vacuum mason jar sealer is not the same as a pressure canner. So that part of you question is for sure no. A pressure canner is a totally different tool.
Can you pressure can 8 ounce jars, like for vegetables. Canning for 2 people.
Yes, you can use smaller jars. However you do not reduce the processing time. Process for the smallest tested size. All vegetables have tested times for quart and pint jars. So for instance, if you are canning green beans, the smallest jar size available is pints so you will process for pint size. The potential is for softer food than you like. You’d have to just try a small batch and see if you are ok with the texture. Many foods will be fine.
Presto brand has an electric Digital Pressure Canner (NOT a pressure cooker). It says it automatically adjusts the pressure so the temperature for processing is always 240°F whether you live at 1,000 or 7,000 feet.
Just curious about your thoughts on this canner.
Hi, Paula, I have not tried the presto electric canner. I’ve got more of my thoughts on this here. Presto Electric Pressure Canner
I have the electric canner and I love it! Makes canning so much easier. Only drawback is, you can do 4 pints or 3 quarts at a time which is fine for me.
[…] low acid foods require pressure canning. This includes meat and […]
Good afternoon
I am a first timer as well. I have precooked hot spaghetti and I am going to put my hot jars in my pressure canner. Should the water in my pressure canner be warm as well?
Hi Lesley, I’m going to link you to my directions on how to can spaghetti sauce. I don’t recommend experimenting with a recipe like this using a homemade recipe. The combination of ingredients makes a difference.
Plus, you say you have precooked hot spaghetti, do you mean the noodles or the sauce? The noodles are not recommended for home canning. Remember home canning equipment is completely different than commercial equipment. You can buy canned noodles at the store but canning noodles at home is not tested or recommended.
Hi there, I am new at canning and I made a spaghetti sauce with meat and now I am going to put in mason jars and put them in a pressure canner. I am at 600ft, should I pressure at 11lbs for how long? Where food is cooked, would 15 minutes be ok?
Hi Lesley Each food type/recipe will have different instructions. And unfortunately, not all regular cooking recipes are suitable for home canning. Recommended recipes are all specifically tested for density, ph levels, and heat penetration among other things to be sure they are safe for home canning. I linked to a spaghetti sauce in your other comment but you should also look at this page about canning safely. And you might also be interested in this Canning Quick Start Series. Your best bet is to freeze this batch of sauce, learn more about home canning and then have a go with… Read more »
What do I do if my timer stopped in the middle of pressure canning chicken stock. I am not positive of time, so I assume I just start time over? I don’t want to under process.
If you maintained pressure the whole time and you know how much time you had processed before the timer quit, I’d just finish the time out. It might be processed a little long, but as long as you don’t shorten your processing time it is fine. However, if you lose pressure you would need to start over. Stock will handle processing long just fine. If it was a vegetable like green beans they might end up mushy.
when double stacking pint jars do you need the change the pressure and time or does it remain the same
It remains the same. 🙂 You can read more about double stacking jars here: https://www.simplycanning.com/boiling-water-bath-canning/
-Rachel (Sharon’s assistant)
First time canner here. Can you tell me if I did anything wrong? I blanched tomatoes, cooled them in cold water. Peeled and cored them. Cut them in quarters and added them to a pot smashing with a potato masher as I went. I cooked them about 25 minutes. I added warm smashed tomatoes to warm jars, with 1/2 in of head space. I added lemon juice and salt and placed limes and rings on. I pressure canned them at 12lbs (per my altitude) for 25 minutes. When the pressure valves went down, I opened the canner and moved the… Read more »
Liquid loss does happen! As long as it’s not extreme (i.e., more than half of the way empty of liquid), they should be fine. https://www.simplycanning.com/liquid-loss-in-home-canning/ May I ask where you got the 25-minute processing time from? I was looking at Sharon’s tomato sauce recipe, and it says 15 minutes. It’s safe to overprocess, of course, but could that explain the liquid loss?
The separation is normal, however. That happens with tomatoes sometimes and isn’t anything to worry about. 🙂
-Rachel (Sharon’s assistant)
Canning beef stock – does the stock have to be hot to pressure can or can I start out with it cold?
The stock needs to be hot going into the jars. Here is a link to complete instructions for canning homemade chicken stock. Beef will be done the same.
Okay can you give me a reason why? I did mine cold, so I want to be sure that it’s safe to use. All of the jars are sealed.
The reason is that the testing that was done was done with hot broth going into hot jars. The timing might be off if the broth was cold to start. It seems like such a small thing… I always err on the side of caution. Another reason to have things hot is that the jars might break if you start cold. But apparently, you didn’t have issues with this so that is good!
Hi, I have my Grandma’s old 1975 Presto 16QT that only has a 15lb rocker that basically acts as a safety valve – so no steam really comes out. It has a gauge for pressure. The manual says to use 2qts water. My mom has a newer Presto 16QT that doesn’t have a gauge, but has the appropriate 10lb rocker. Her manual says 3QTs, like you said. I just bought a Buffalo QCP435 which is a large 37QT canner. It has both a weighted rocker and a gauge. BUT the manual doesn’t tell how much water to use. Not wanting… Read more »
Hi David. I had never heard of a Buffalo canner so I searched it out. Wow! What a beautiful piece of equipment. Stainless steel too! It appears this is made in Taiwan and has a “Safety Goods (SG) Certificate from Japan”. Link for anyone else who never heard of this! Buffalo QCP435 (opens at amazon. If you order through this link I’ll get a small commision) Since I do not know how this would compare to US standards or how it would relate to the testing that our NCFHFP has done. I don’t think I can help you with these… Read more »
Hello. I’m new to pressure canning. Have water bath canned in the past. My husband bought me a Barton 22 qt pressure canner with a weight for the vent pipe and it also has a pressure gauge. I live at 1880 ft above sea level. As long as I have 11 lbs of pressure for a canning session, am I canning food safely?
Hi, Amanda! That’s a great question! The pressure required actually varies somewhat depending on what food you’re canning, as well as your elevation (as you mentioned). You’ll need to look at each recipe individually to make sure you have the safe processing instructions for that particular food.
-Rachel (Sharon’s assistant)
Ok, thank you. I’m going to return it. I did a “water test” with it and it will only get up to 12lbs of pressure. I just don’t feel safe processing low acid foods for mine and my family’s consumption. *sad*.
First time canning beef tonight. I did a raw pack in quart jars, chopped up pretty small, with a teaspoon of salt and about half teaspoon dried onion each. Reread the instructions for using the canner (it’s an All American 21). I forgot to do the 10 minute steam release at the beginning prior to putting on the weight!! Argh. I didn’t even think of it until I was reading this great page you have. I’m looking at my mostly cooled jars on the counter right now. Should I start over tomorrow? What happens if you forget to do that?… Read more »
Well, the good news is you realized your mistake right away.:) If you tried to pressure can it again it would be pretty overcooked and I don’t think the quality would be very good. I would suggest you go ahead and freeze this load. Any freezer container would work. Personally, I’d drain the jars and put the loose meat into freezer bags. Then you can take out as much as you need when you are making dinner.
You might be interested to read this page. Canning Mistakes… what do I do now?
Thanks so much for the quick response, Sharon. I will put it in the fridge now and freeze it tomorrow. So much to pay attention to when you’re starting out! Glad I did this as a dry run before we get venison and I’m processing lbs and lbs!
Hi. This is my first time pressure canning. We are doing venison. Is it dangerous to move the canner while canning. Like when opening the microwave up and the pressure gauge hits the door. Can you slid it out of the way. Will it explode.
You should not move the canner while it is processing. I don’t think the canner would explode but it could cause other issues. If the canner is under pressure the weight will be jostled if you try to move it. This would impact the pressure inside the canner as it will release pressure quickly. This could cause issues with the jars. Try to plan ahead and not use the microwave during a canning project.