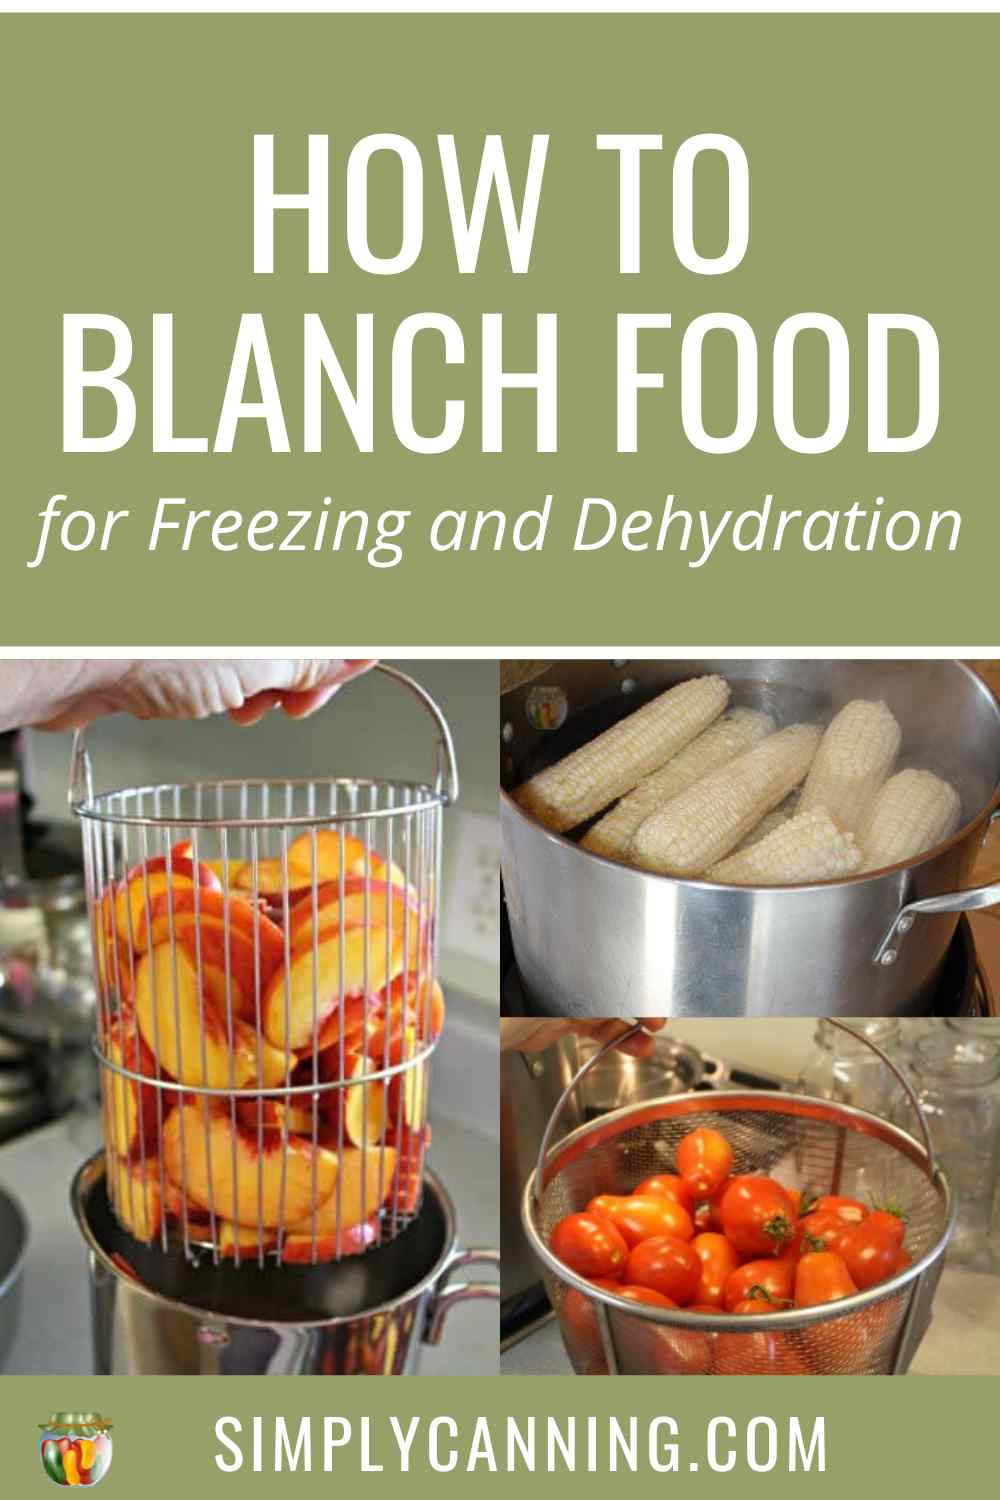
How To Blanch Food For Freezing And Dehydrating
This page may contain affiliate links. More Information.
How blanching food makes it easier to freeze and dehydrate it. Includes step-by-step instructions for steam blanching and boiling water blanch. Information on microwave blanching and printable blanching time charts.
Learn how to blanch foods for home food preservation methods such as canning, dehydrating, freezing, and freeze-drying.
- benefits of blanching
- when it is required and when is it optional
- step-by-step instructions for boiling water blanching
- step-by-step instructions for steam blanching
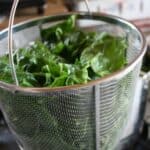
Briefly boiling or steaming vegetables and fruits before preserving them helps to maintain their flavor, color, texture, and nutritional value.
What is Blanching
First we’ll cover the question; What is blanching?
Super simple explanation is… Blanching is dipping food into boiling water or steam for a specified amount of time, then quickly cooling that food in a bowl of ice water, or very cold water to stop the cooking process.
There are actually 2 purposes for blanching in food preservation
- To briefly heat and minimally cook vegetables to prepare them for preserving. Blanching vegetables before freezing for instance.
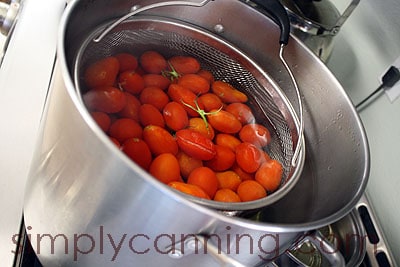
- To easily skin or peel food. Tomatoes and peaches for instance are peeled before canning.
Each food has it’s own blanching time needed. It will depend on the food type and size and the food preservation method you are working with….
- Canning
- Dehydrating
- Freezing
- Freeze Drying
Why blanch?
Blanching is an extra step that is often questioned. Why do you have to blanch anyway? Can’t I just add the food as it is?
In some cases blanching is a quality issue rather than a safety issue. When you are freezing food, blanching is highly recommended for quality control.
But for canning, it is much more important and can be a safety issue. If you are canning and the recipe calls for blanching… do it. Don’t skip it.
For example if you are blanching for removing tomato skins this is done to lower the bacteria levels and is considered a safety issue. (A hotly debated one at that!) link to canning tomatoes safety article
These are some top reasons why blanching is a good thing to do.
- Enzymes: Blanching helps to inactivate enzymes. Enzymes are what causes food to soften and eventually decompose. Keeping enzymes from acting preserves the texture and color of your food.
- Packaging: Blanching can also help during packaging food by softening it slightly and making it easier to freeze or can. For example blanching softens the green beans and allows you to put more in a jar. Blanching softens broccoli or cauliflower which makes packaging them for freezing easier.
- Clean food: Blanching can also help to clean the surface of the food, removes dirt, bacteria, and other contaminants that may be present. Less dirt cleaner food is always a good thing.
- Peeling food: Blanching can soften the skins of some food and make it easy to peel. For example tomatoes and peaches, this is done to lower the bacteria levels and is considered a safety issue. Peeling tomatoes in particular can be hotly debated. link to canning tomatoes safety article
What happens if you don’t blanch
Dependent on the food type and preserving method, some items really need the blanching… some don’t. (I’ve got printable lists below).
Canning
I want to emphasize that blanching can be a safety issue in canning. It all has to do with the heat in your jars, (blanched foods will start out hotter) and the texture or density of your foods (blanched foods will be softer).
Canning recipes don’t usually call it blanching. It will just say simmer your food for a specific amount of time. Basically you are blanching/lightly cooking for hot pack. It’s just different terminology.
Some foods will have recipes for both hot or raw pack options. For example carrots can be canned either raw pack (un-blanched) or hot pack (simmered/blanched). In that case you have the choice and can pick either one.
Often hot pack vs raw pack will have the same processing time. The benefit of blanched green beans for example is the same. The benefit is you can fit more beans into the jar.
Again please follow tested instructions for canning purposes. The blanching chart I have below is not for canning processes. It is for either freezing, dehydrating or just cooking for dinner.
Freezing
Basically nothing dangerous will happen if you don’t blanch your food for freezing. It is a quality issue. It is almost always recommended for quality and I recommend it too. If you really don’t want to blanch whatever you are freezing, try it. See what happens to your food. If you’re not keeping it in the freezer for very long it might be just fine. For longer storage, blanching becomes more important.
Dehydrating and/or Freeze Drying
Dehydrating is another case where it is a quality rather than a safety issue. Blanching softens the food which the drying time shorter and the final result much better.
Did you know? You don’t want to over or under blanch either.
Blanching time is important, don’t over or under blanch. That timing is important.
- Over blanching cooks the food more than needed and you’ll lose more nutrients.
- Under blanching where the time is too short, can actually be worse than not blanching at all. Apparently it triggers the enzymes but then the time is cut short and the enzymes are not stopped.
Timing for boiling water blanch
You start timing when the water returns to a boil after adding your food. After adding the food the boil will naturally subside. You want to keep this time short. The NCFHFP recommends using a gallon of water per pound of vegetables. I never measure but this gives you an idea of where to start.
Try to manage your batch so that he water will either maintain a boil or come back to boiling within a minute. If it takes too long to get back to a boil, you have 2 options.
- start with more boiling water.
- add less vegetables at a time.
Expert tip- keep the heat in your pot by putting a lid on immediately after adding the vegetables This helps it get back to boiling quicker.
Start counting blanching time when the water returns to a boil.
Timing for steam blanching.
Start your time when you add the food and put the lid on. The steam will continue as the food is not going into the water to cool it down.
Cool down time.
After blanching (any method) you will put your food into an ice bath or very cold water to stop the cooking, drain the water off and package for preserving. A general rule of thumb is to keep the food in the cold water the same time as you blanched it. So if you blanched for 4 minutes, cool it for 4 minutes.
Equipment for Steam, Boiling Water, and Microwave Blanching
This section includes some resources and the equipment I’d recommend.
Blanching Pot
There are specialized blanching pots available. I had this one years ago. It worked great. It’s simply a deep pot with a basket specifically made to fit.
The only issue with this type of pot is that they chip. When the black coating chips the pot starts to rust. I used this for several years before I replaced it.
Blanching basket and stock pot.
You can also use a stockpot and some sort of a basket. This is my preference because then I also have the stock pot and basket for other uses. Any large pot will work, check the measurements so you know your basket will fit your pot.
I have this Polder brand stainless steel wire basket…. I highly recommend it. It’s a favorite in my kitchen! It gets used often and is great for larger batches of food. Use it with any stock pot. Get measurements to be sure your basket will fit into your stock pot.
If you are blanching a small amount a slotted spoon works. Use tongs if you’ve got food like corn.
4th Burner pot
You could also consider this 4th burner pot. I’ll use this for blanching small batches, I also use it for dipping fruit in pretreatment before dehydrating.

Instant Pot
You can also get creative when needed. I tried using my instant pot to blanch carrots when I had no other options. It actually worked pretty slick.
Blanching Methods
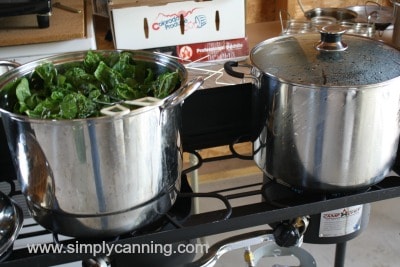
Boiling water blanching
Boiling water blanching simply involves submerging the food in boiling water for the appropriate time. The time will depend on the food type and how you are preserving. Check your recipe for how long to blanch your food.
- Fill a pot with water and bring it to a rolling boil.
- when it is boiling (and steaming) add your basket with the prepared food (chopped, sliced, peeled dependent on the food)
- Start timing when the water returns to a boil.
- Move food immediately to a cold/ice water bath to stop the cooking.
- Pat food dry with paper towels if needed and package.
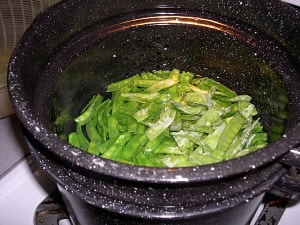
Steam Blanching
Steam blanching involves exposing the food to steam for an appropriate time. You can use the same style pots I mention in the boiling water section above.
- Put a few inches of water in a pot and bring it to a rolling boil.
- Add water to the pot as needed so it does not boil dry.
- When it is boiling (and steaming) add your basket with a single layer of the prepared food (chopped, sliced, peeled dependent on the food) You want to do this in small batches so the steam circulates and covers all the food in the basket.
- Start timing right away.
- Move food immediately to a large bowl of cold/ice water to stop the cooking.
- Pat food dry with paper towels if needed and package.
Microwave Blanching
Microwave blanching: involves placing the food in a microwave-safe container with a small amount of water, covering it, and microwaving it for the appropriate cooking time. Effectively steaming the food.
According to the NCFHFP research has shown that microwave blanching doesn’t work very well. Enzymes are not always inactivated which can result in poor quality. Microwaves vary and the time will be different for each. If you do decide to blanch using your microwave, find a manual and follow the instructions for your specific model.
Microwaves do not save time or energy so in my opinion… just don’t. Do it the more effective way. It is more effective to use boiling water or steam blanching where appropriate.
What food should be blanched with water vs steam.
Canning – Remember for canning purposes, you need to follow the instructions in your specific recipe. Some need the blanch some don’t. For example carrots can be raw packed (un-blanched) or hot packed (simmered/blanched)
Freezing and Dehydrating – you’ll have a choice of methods. I’ve included charts below so you can check your food… and check out what methods work for which food types and preserving methods.
How to Blanch Food – Printable List
I’ve got 2 lists here that I’ve collated with blanching time for both dehydrating and freezing foods. Steam blanching and boiling water blanching. Print these up and keep them handy for when you need to know how long to blanch vegetables.
These charts are also a part of our Preserving Pantry Journal . It’s a great place to keep all the charts and printable pdf’s that make preservation easy.
Blanching Questions
For boiling water blanching I suggest putting the lid on. If you leave the pot covered it will keep in the heat better and will enable the water to boil quicker. You will need to lift the lid to see when the water is boiling to know when to start your time.
For steam canning the lid is a must. The lid is what keeps the steam in and surrounds your food.
Each food will have it’s own timing. This will depend not only on the food type but the size of your pieces. Check the charts above or your blanching directions.
I almost always use boiling water blanching. I like bein gable to stir my food in the water a bit to be sure the heat is evenly distributed. But often steam is perfectly suitable. I don’t think one is necessarily ‘better’ as long as you are doing it properly.
Blanching too long simply over cooks your food and is not needed. You’ll lose more nutrients.
Under-blanching is said to be worse than no blanching at all. According to the NCFHFP the heat activates the enzymes in your food, if you shorten the blanch time the enzymes are not then stopped. It can affect the quality of your food.
For food preservation salt is not needed. If you are cooking dinner… yes, add salt. It adds to the flavor.
Some foods that need to be blanched.
How to Blanch Food
Equipment
Materials
- Food Whatever you will be blanching, vegetables, fruit, tomatoes, etc
Instructions
Boiling water blanching
- Fill a pot with water and bring it to a rolling boil.
- when it is boiling (and steaming) add your basket with the prepared food (chopped, sliced, peeled dependent on the food)
- Start timing when the water returns to a boil.
- Move food immediately to a cold/ice water bath to stop the cooking.
- Pat food dry with paper towels if needed and package.
Steam Blanching
- Put a few inches of water in a pot and bring it to a rolling boil.
- Add water to the pot as needed so it does not boil dry.
- When it is boiling (and steaming) add your basket with a single layer of the prepared food (chopped, sliced, peeled dependent on the food) You want to do this in small batches so the steam circulates and covers all the food in the basket.
- Start timing right away.
- Move food immediately to a large bowl of cold/ice water to stop the cooking.
- Pat food dry with paper towels if needed and package.
Notes
Pin this for later!
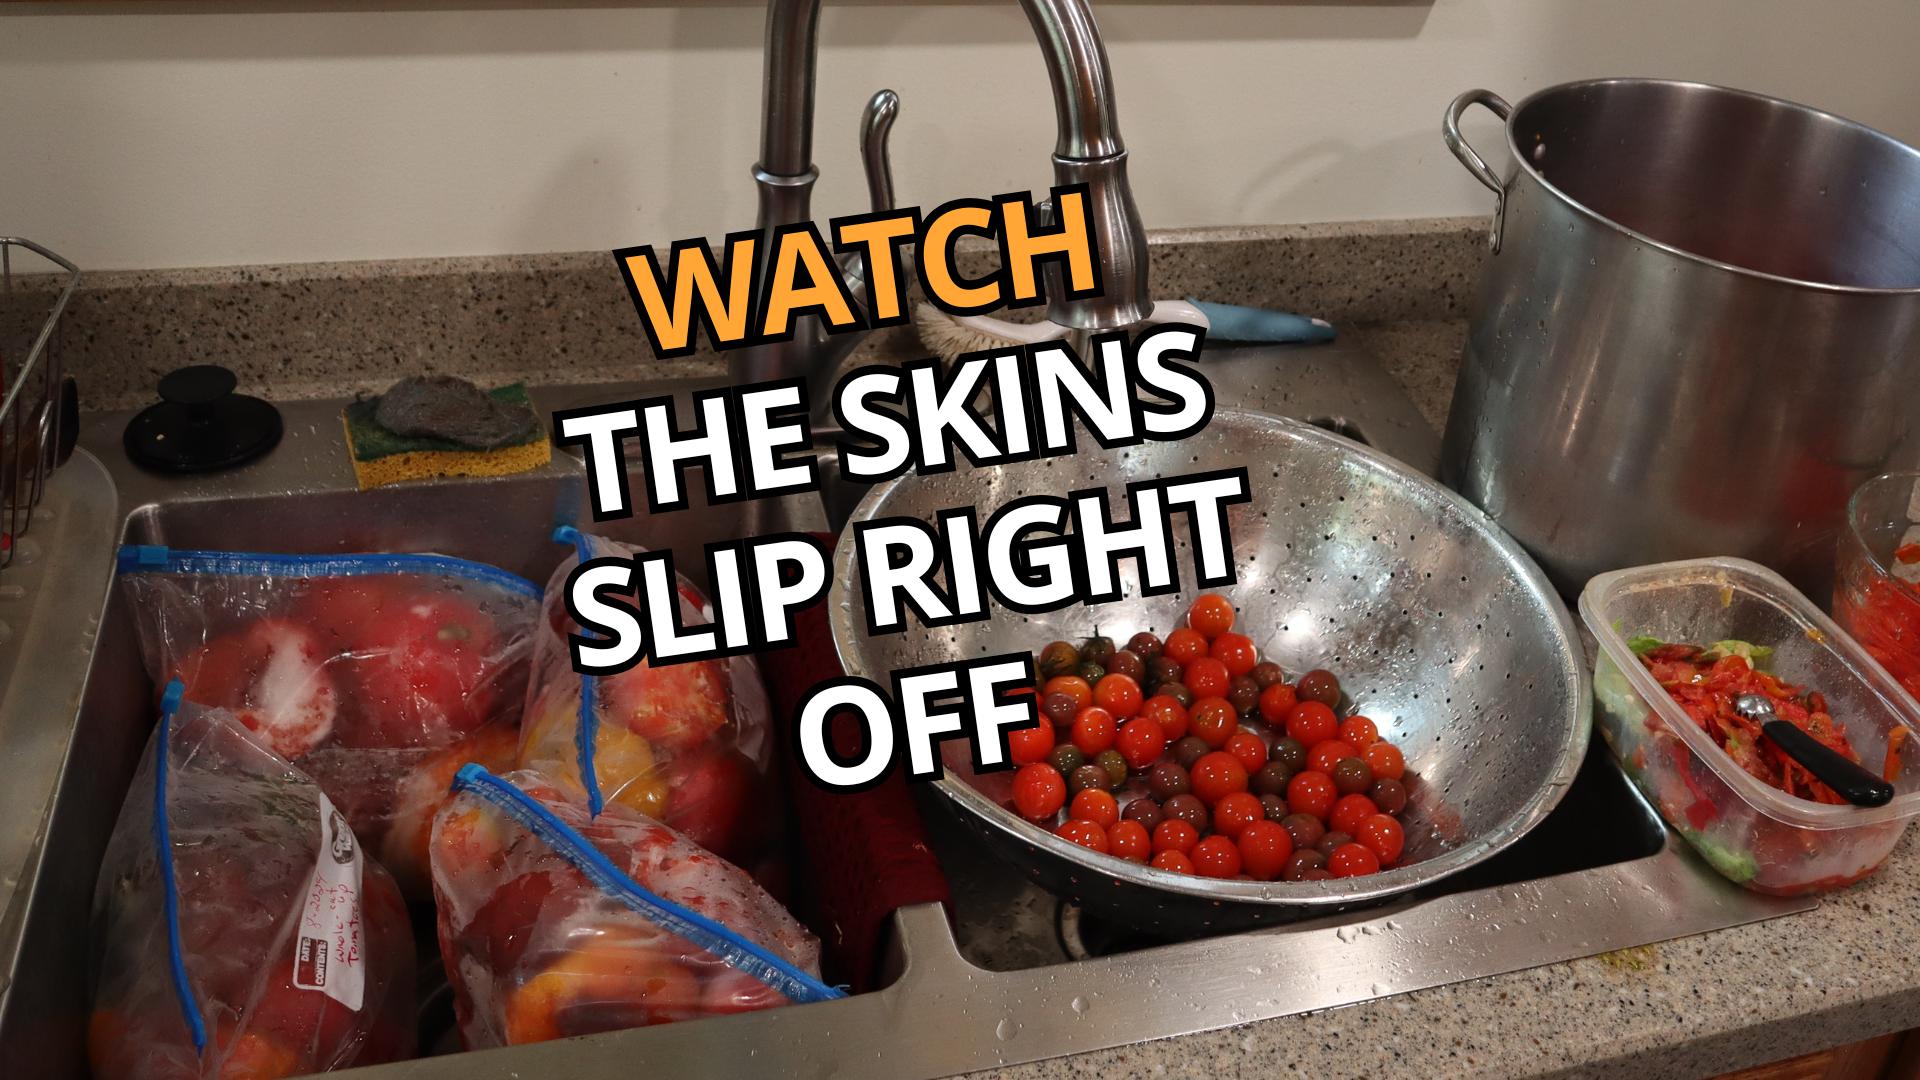
Re: peeling peaches before canning
One year I tried canning without peeling and they were fine! Yes, the water was a little off in clarity because of the bits of fuzz, but it was not at all noticeable when eating. To me, it was not worth the hassle and waste of peeling. I never looked back! 🙂
Just so you know the tested way is peeled. :). then that is a personal choice. Personally, I don’t think I’d like the peels.
I appreciate so much your info on blanching I especially never thought about blanching before dehydrating food.