Learn How to Can Strawberries
This page may contain affiliate links. More Information.
Canning strawberries is not hard. I keep reading about how canning strawberries is not really a good idea. They don’t turn out well, they fade, they get soft and mushy.
Yet, here I am. Canning Strawberries just because I’m nosy and I need to try it myself. Learn what happens and my final thoughts. Will I ever do it again?
The basic steps to canning strawberries is to clean and hull your berries, put them in pint canning jars, cover with sugar syrup (other sweetening options available) and process in a water bath canner. Allow the jars to cool check the seals and store away in the cupboard. Not hard at all and you’ll end up with shelf stable strawberries for lots of recipe options.

How to Can Strawberries; Extended Directions and Tips
Know Your Canner
Before you start this project, if you are not familiar with using a water bath canner please read How to Use a Water Bath Canner. This will familiarize you with how your canner works and what steps to take to get set up for any canning project. You can also substitute a steam canner. Learn how to use a steam canner here.
Gather your canning supplies and get your canner heating and all equipment ready.
Prepare the strawberries.
Wash Berries – This is a simple as rinsing the berries with clean water several times. I use a colander and simply rinse with tap water.
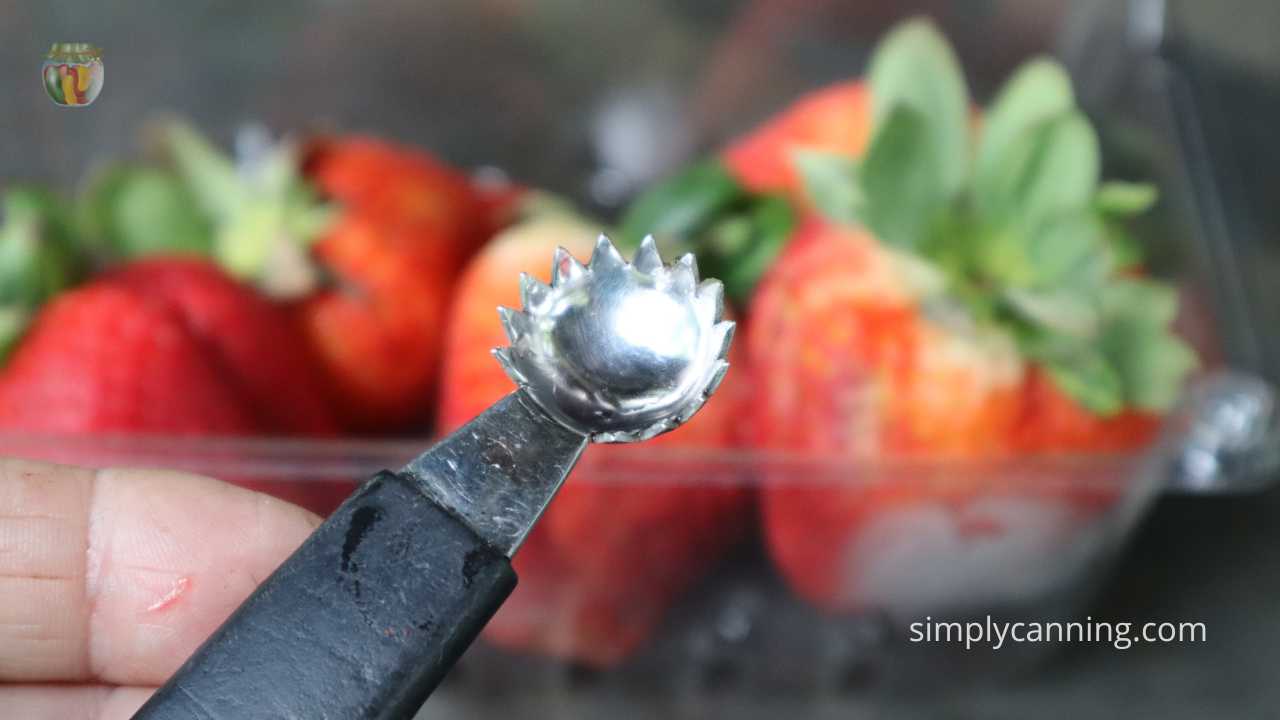
Remove caps and green parts of strawberries. The caps (or hulls) need to be removed. Then cut out any green or unripe portions of your berries.
I use a strawberry corer for this step but a knife works too. The goal is clean strawberries ready for the jar.
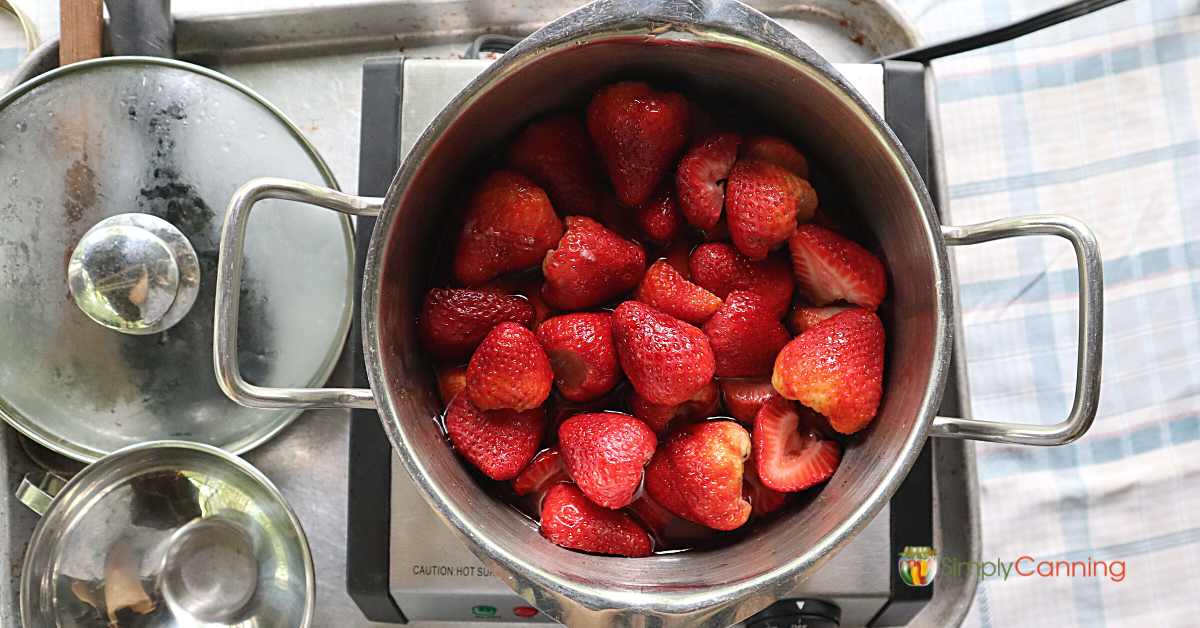
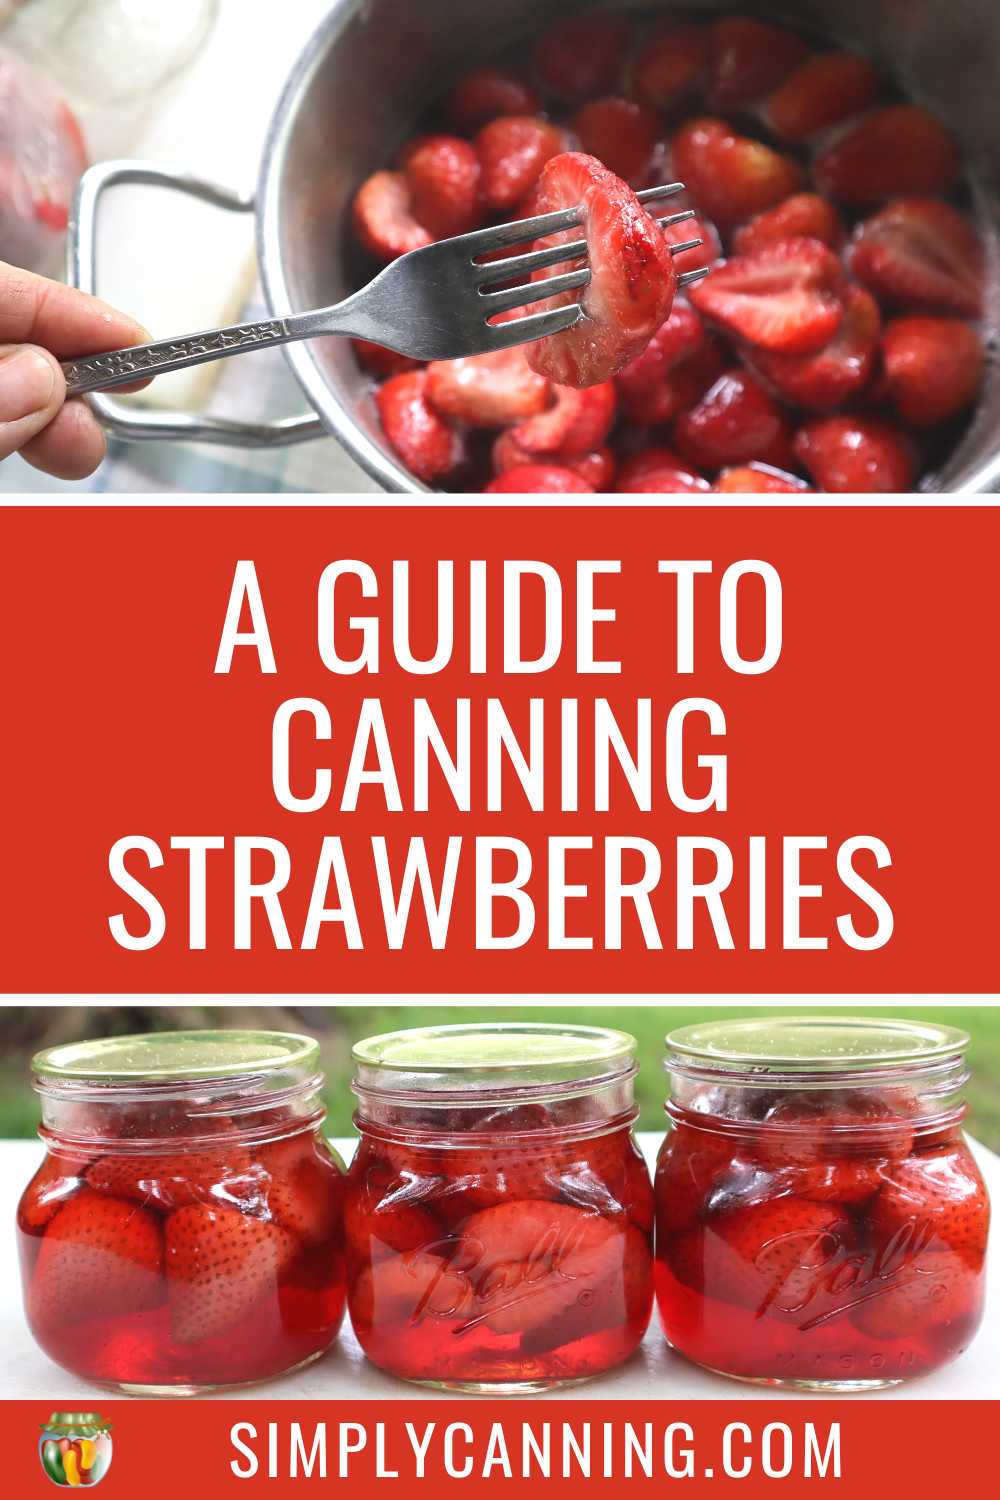
Add cleaned berries and sugar into a large pot. Add sugar. 1/2 to 3/4 cups per each 4 cups strawberries is suggested. I went with the lower amount of 1/2 cup. It still seemed like a lot.
I know someone will be wondering… can I do this with no sugar? Yes you can… scroll down a bit below for more information.
Let strawberries and sugar rest 5-6 hours in the refrigerator. Over night works too. 5-6 hours would be a minimum. You want the sugar and berries to start creating juice. Waiting a bit longer will produce more juice to put in the jars.
Heat berry sugar mixture on low until sugar is dissolved and the juices come to a low boil and the strawberries are heated.
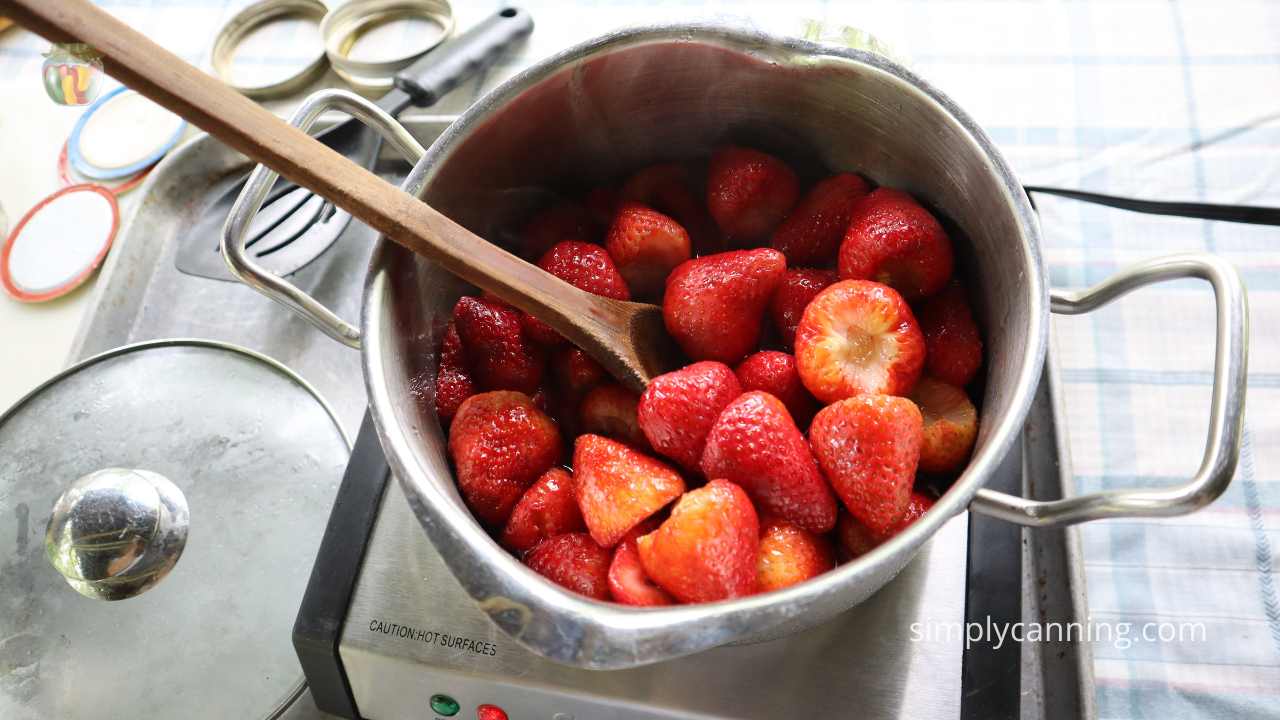
You’ll be surprised at how quickly the juices start flowing. Stir a bit while you do this. But gently so as not to squish the quickly softening strawberries.
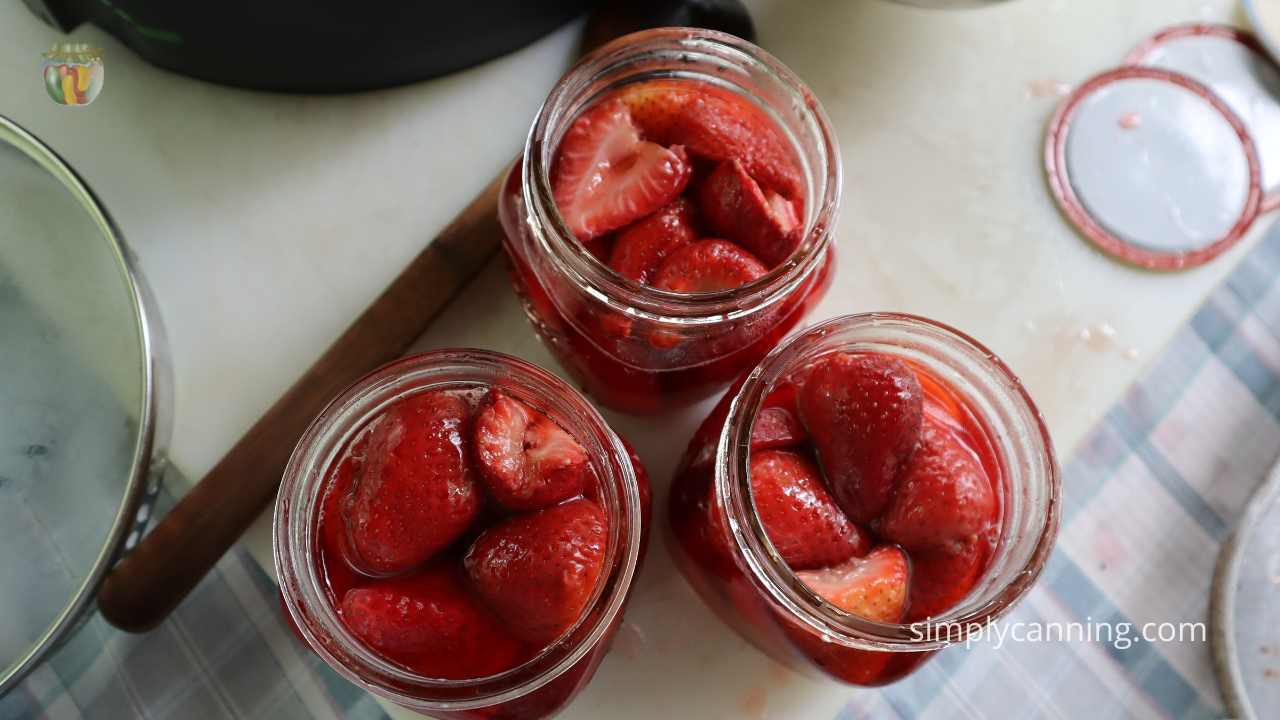
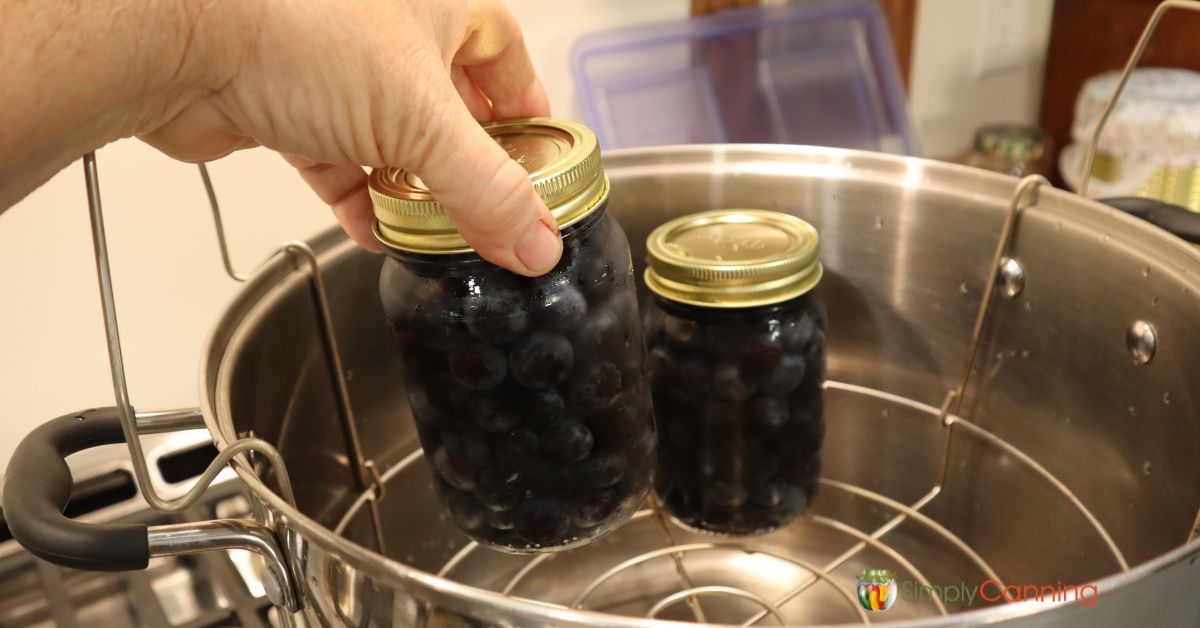
Packing the jars.
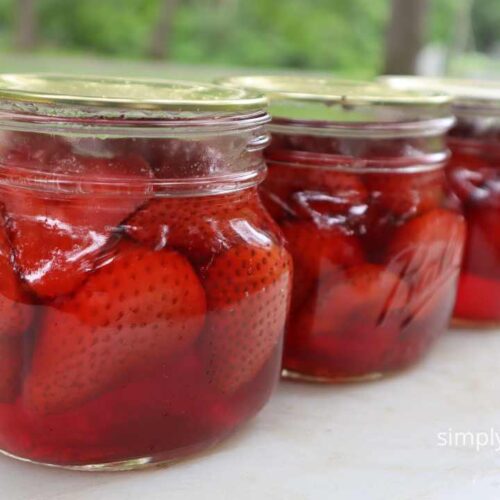
Pack hot berries carefully into hot jars, leave 3/4 inch headspace.
The strawberries will be soft, so do this gently. I did not have a lot of juice so it was easier for me to grab the strawberries with tongs or a fork at first. When I got lower down into the pot, I could scoop better.
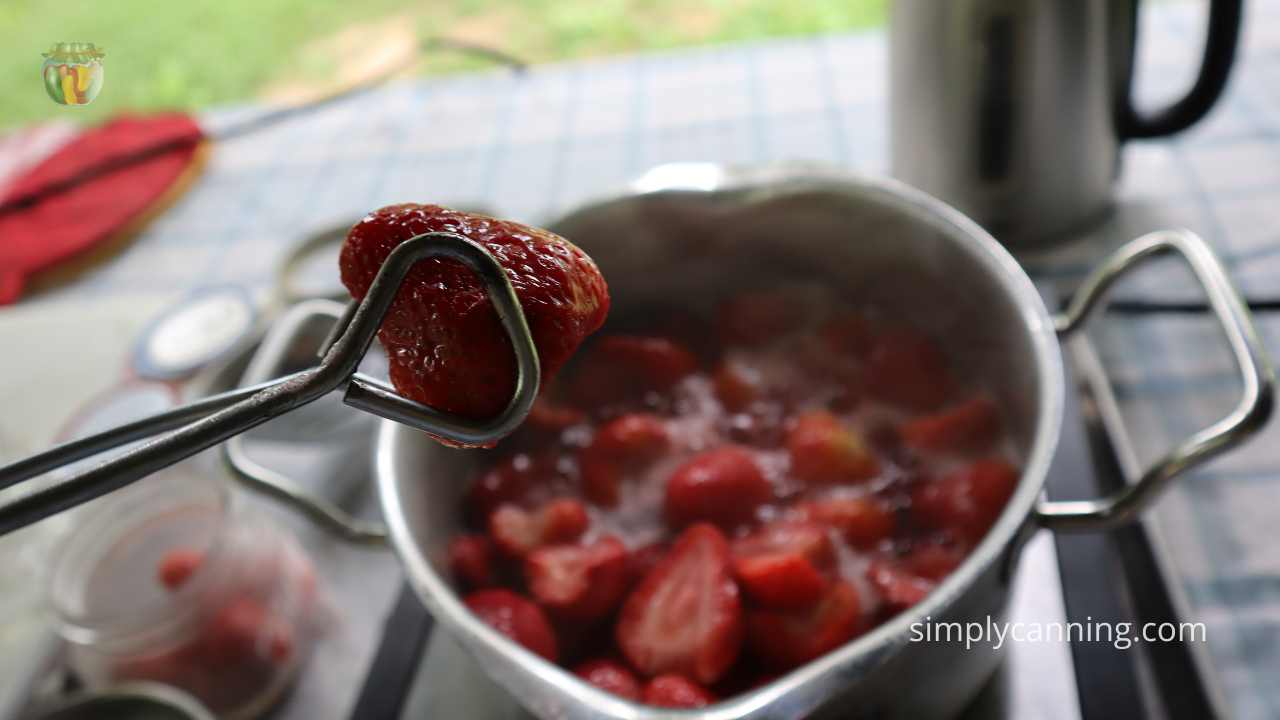
Add berry juice to cover strawberries. You should have enough to cover most if not all of the strawberries. If there is not enough juice, split what you do have between all jars. Then add a bit of water to top off the jar to the correct headspace.
You could also have some hot sugar syrup ready for this step if you’d like. A light syrup would be 1 cup sugar to 1 quart water. Heat until sugar is dissolved. This is most likely not needed.
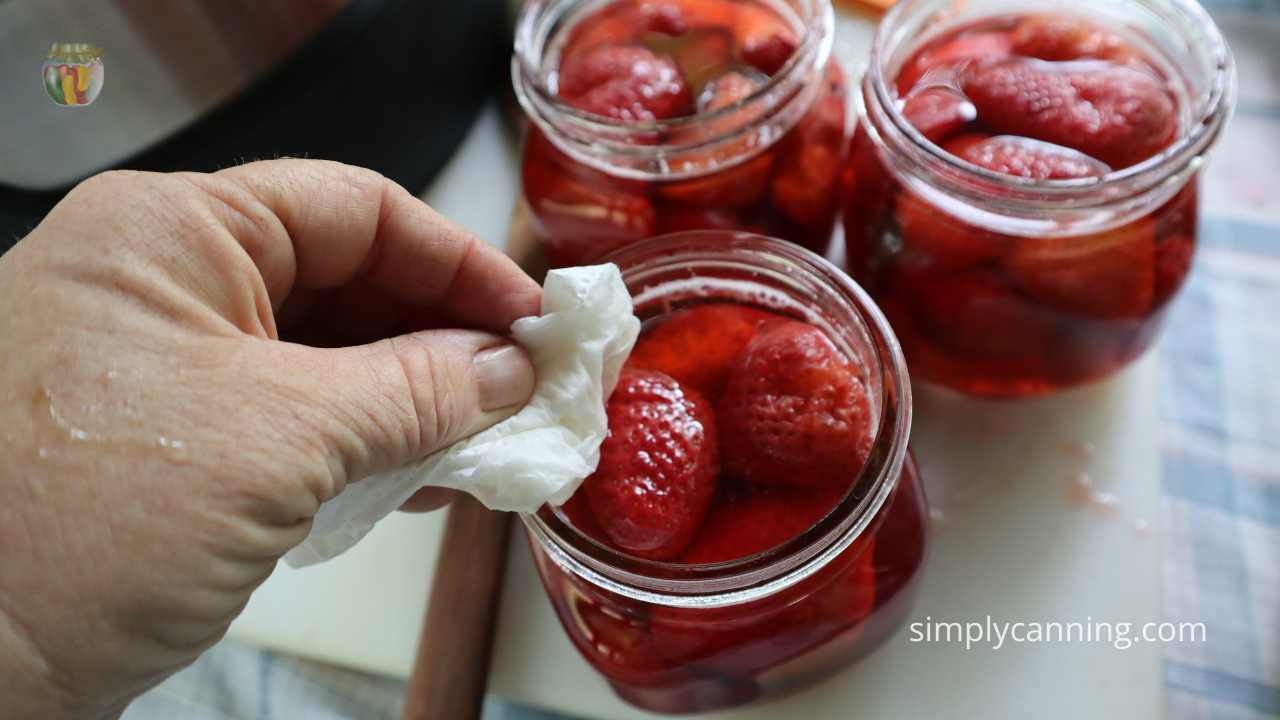
Remove air bubbles. Use an bubbler tool and run it down into each jar moving the berries around a bit to release any trapped air. Once again… gently!
Check your headspace again in case this changed the levels. Adjust if needed.
Wipe rims of jar clean with damp towel or paper towel. This is a sticky project so they might be sticky and that might interfere with the seal.
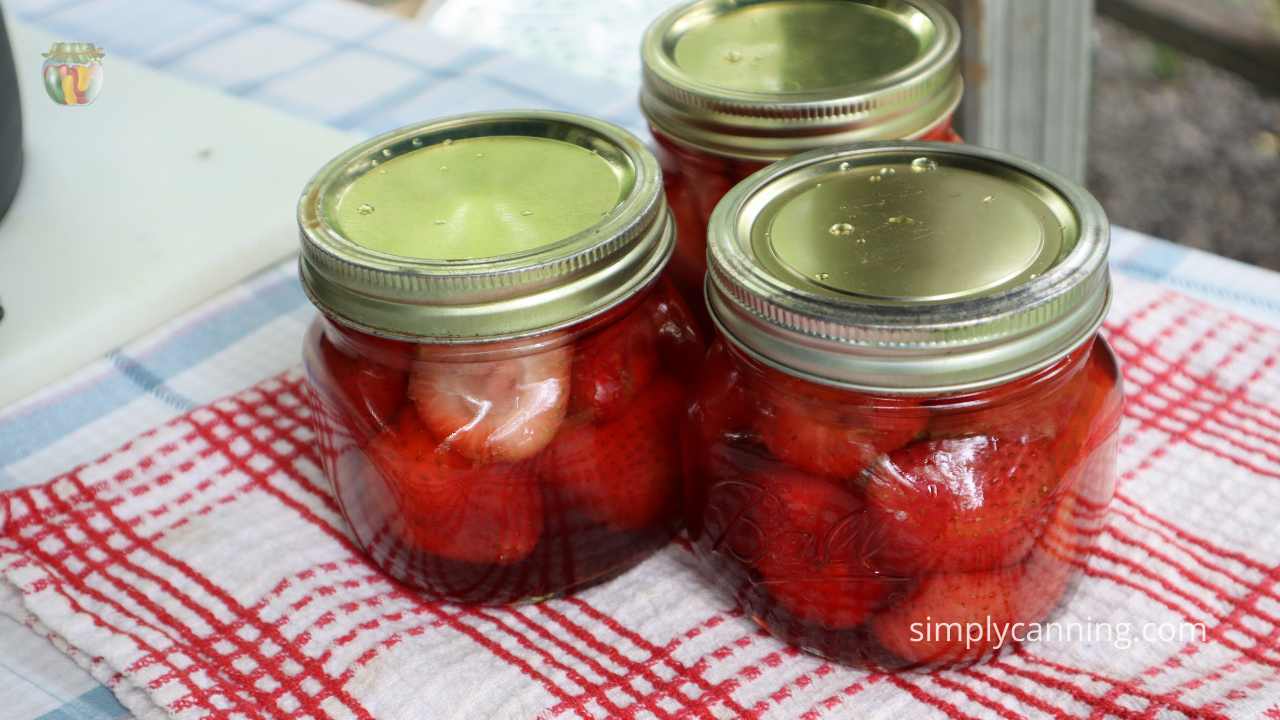
Add your flat canning lids and screw bands. Just finger tight is fine, you don’t have to tighten hard.
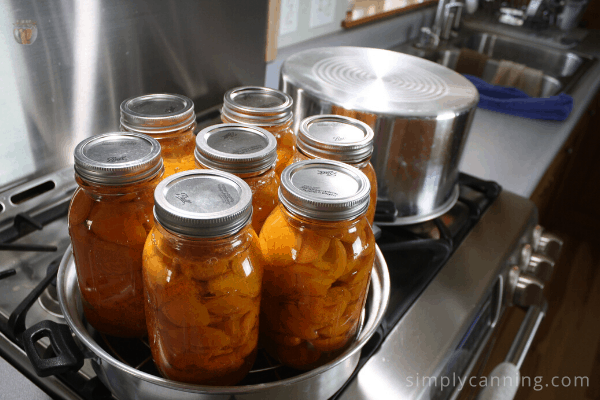
Canning Strawberries with a Water Bath Canner.

Place hot jars in the hot canner and make sure they are covered with a couple inches of water. Put the lid on the canner. Bring to a boil.
When you have boiling water, reduce heat just enough to maintain a full low boil. The water should be continually boiling for the entire processing time.
Process pints for 15 minutes.
Altitude Adjustments
If you live above 1,000 feet you need to add processing time. Use this chart.
Altitude – time increase
1,001-3,000 – increase 5 minutes
3,001-6,000 – increase 10 minutes
6,001-8,000 – increase 15 minutes
If you’d like more information on why these altitude adjustments are needed you can check this post.
As the jars process, adjust the heat as needed. The canner should be at a rolling boil the whole processing time. But remember it doesn’t have to be boiling so hard the water is splashing out of the pot. Just be sure there are bubbles happening.
When processing time is completed turn off the heat.
Remove the lid from the canner. Allow the canner to rest 5 minutes. This gives those jars time to reduce pressure and can reduce liquid loss.
Carefully remove the jars from the canner. Place them a few inches apart on a thick towel and allow them to cool to room temperature undisturbed. 12 hours is suggested. Do not test the seals yet! They should be left alone.
Remember to separate the jars so they have room.
Allow canning jars to cool completely.
When the jars are cool, remove the metal bands, check the seals. The lids should be sucked down.
Wash jars, dry completely. It is not uncommon for the jars to be a bit sticky. A quick rinse is all that is usually needed.
I recommend leaving the screw bands off in storage. Dry your jars, label the contents and date and store away.
If you really want to leave the screw band on, be sure it is thoroughly dried (it will rust if damp) and screw on loosely. It should not be tight.
Steam Canning Strawberries
Strawberries would be a great project for a steam canner too. You’ll just follow the same steps, same processing time. But the steam canner works just a little different. Check this post for step by step steam canning directions.
Do Home canned strawberries get mushy?
Everything I read is that strawberries get mushy, they aren’t very good… why would I do this? Because it’s strawberry season. I am dehydrating and freezing strawberries. Why not try canning?
I’m curious… and people asked about it. I decided to just find out for myself. Can they really be that bad? If all else fails, I’ll just blend them up into smoothies. Strawberries aren’t cheap and I didn’t want to waste a lot if it didn’t turn out so I just planned 3 pint jars. This was a great small batch project.
Update! Yes they get mushy.
Still fantastic for smoothies or make a strawberry topping by simply stirring and adding a bit of sweetener if desired. Eating straight out of the jar?? Not so much.
Why are My Strawberries Floating?
Strawberries will shrink even more in the canning step. They do have a tendency to float.
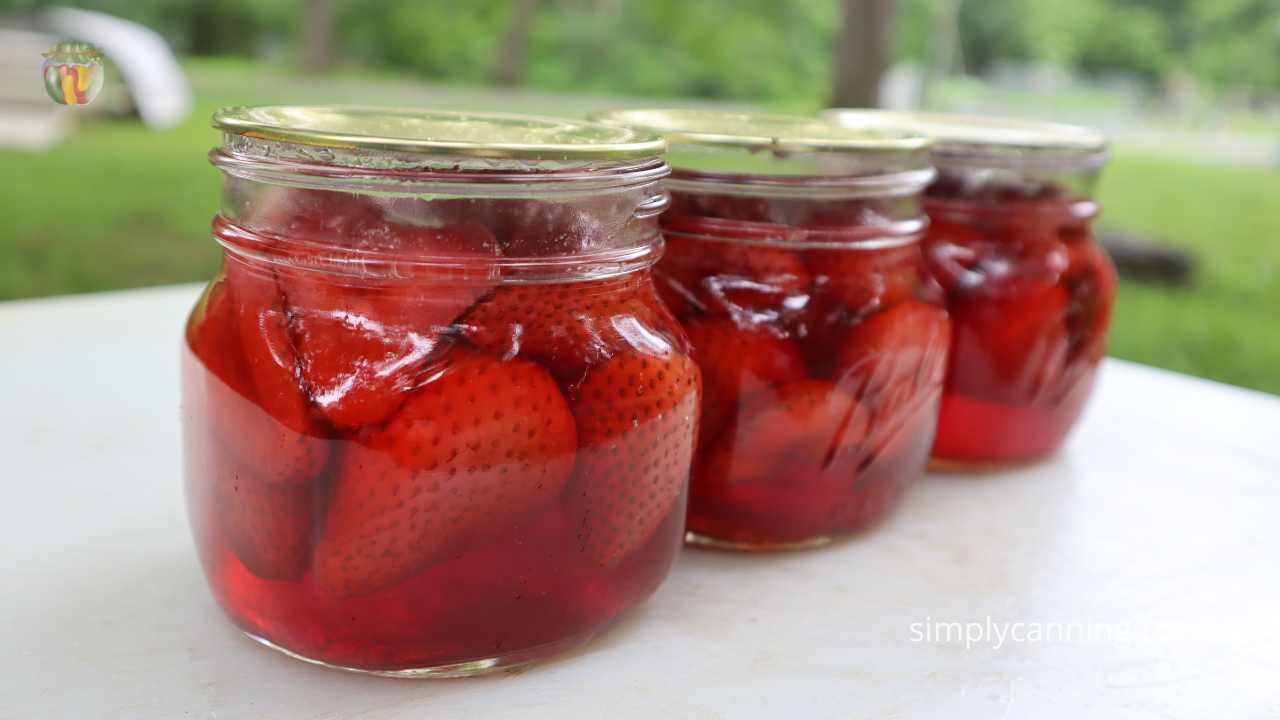
It is not a problem. You can reduce it by making sure you’ve got the jars packed full. The trick is you want it full, but you don’t want to squish the soft heated strawberries. I tried to arrange them a bit to make sure that my jar was as full as possible.
Canning Strawberries- Extension Recipes?
Why is it that the NCFHFP or any of its extensions do not provide instructions for canning strawberries? In this instance… it is a quality issue. Home canned strawberries fade, they are very soft and there are other great ways to store them. Canning is ok… but not ideal.
The recipe I found came from the bernardin.ca website.
Canning Sugar Free Strawberries?
You can leave out the sugar but remember strawberries don’t can well. The sugar will help the strawberry to retain some texture.
If you really don’t want sugar I’d suggest cutting it down the first time you do this. See how it works and then you can decide if you want to reduce even more… or just use the sugar called for.
If you did not add sugar, include about 1/4 cup water when you heat the strawberries. This will help you to avoid sticking. The berries will still produce juice but maybe not as much.
Will I Ever Can Strawberries Again?
At first I thought maybe. It wouldn’t be my first choice but then…. a few months went by and this happened.
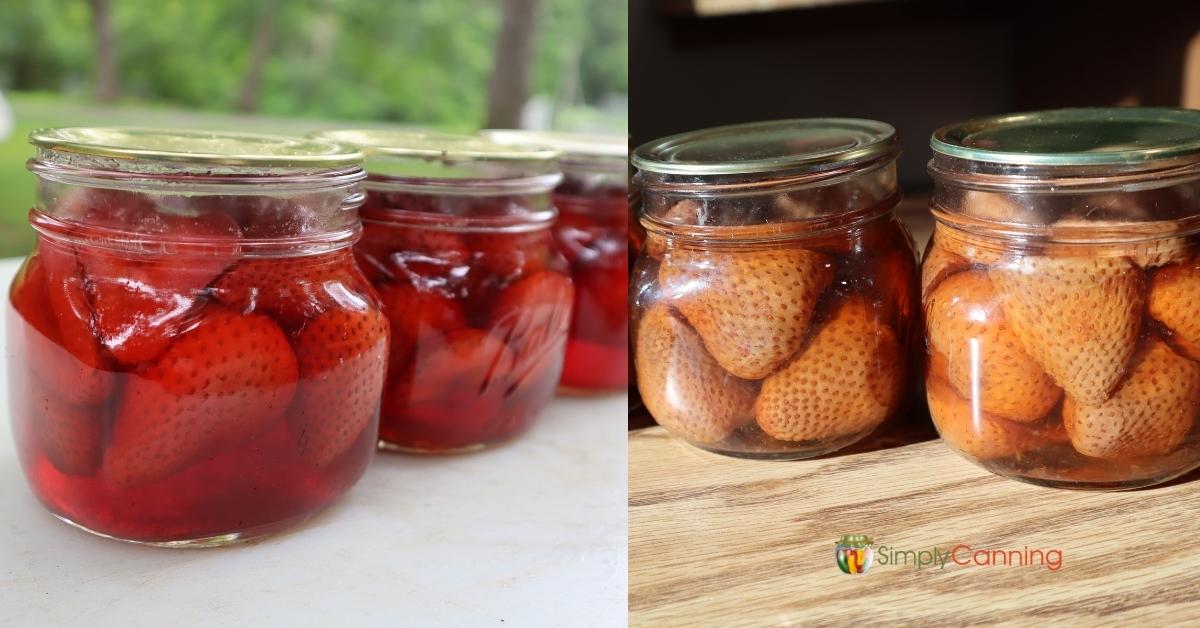
The berry quality went down. And kept getting worse. The color faded. The berries are soft and soggy. The quality is now poor enough I probably won’t do this again.
I’ll probably use these up in a smoothie and check canning strawberries of my list.
- Dehydrating would be my first choice.
- Freezing strawberries is also a great option.
- And of course strawberry jam is the ideal solution as well. There are a bunch of strawberry recipes on this post to choose from.
Frequently Asked Questions
Personally I think freezing is my favorite option. But dehydrating is a very close second. It all depends on how you want to use them.
Home canned strawberries will last about a year. After that the quatlity starts diminishing at a faster pace. You don’t need to throw them away at a year… but make a plan to use them up.
Yes. If you want to can strawberries a water bath canner is the way to go.
Canning them gives you great options for using strawberries in smoothies, baked goods, and other dessert recipes. Gently cook down a bit and make pancake syrup. Just remember they will not be fresh and firm.
Recipe Card
Equipment
- Steam Canner optional
Ingredients
- Strawberries
- Sugar optional
Instructions
How to Can Strawberries
- Wash Berries
- Remove caps and green parts of strawberries.
- Add cleaned berries and sugar into a large pot. 1/2 to 3/4 cups per each 4 cups strawberries.
- Let stand 5-6 hours in the refrigerator.
- Heat berry sugar mixture on low until sugar is dissolved and the juices come to a lot boil and the strawberries are heated.
- If you did not add sugar, include about 1/4 cup water to avoid sticking. The berries will produce juices.
Packing the Jars
- Pack berries carefully into jars, leave 3/4 inch headspace.
- Add berry juice to cover strawberries. If there is not enough juice, split avialable juices between all jars and top off the jar with hot water. You should have 3/4 inch headspace.
- Remove air bubbles and check your headspace again. Adjust if needed.
- Wipe rims of jar clean with damp towel or paper towel.
- Add your canning lids and rings, finger tight.
- Place jars in the canner.
- Process according to the instruction and chart in the notes area below.
Canning Strawberries with a Waterbath Canner
- Put the lid on the canner. Bring to a boil.
- When you have a rolling boil, reduce heat just enough to maintain a low boil.
- Process pints for 15 minutes
- These times are for altitudes below 1,000 feet. Adjust your processing time according to the chart in the notes below.
- As the jars process adjust the heat as needed. The canner should be boiling the whole processing time.
- When processing time is completed turn off the heat.
- Remove the lid from the canner. Allow the canner to rest 5 minutes.
- Remove the jars. Place them a few inches apart on a thick towel and allow them to cool to room temperature undisturbed. 12 hours is suggested.
- When the jars are cool, remove the metal bands, check the seals, wash jars, dry completely, and store in a cool dark place.
Notes
Altitude – time increase 1,001-3,000 – increase 5 minutes 3,001-6,000 – increase 10 minutes 6,001-8,000 – increase 15 minutes 8,001-10,000 – increase 20 minutes
More Strawberry Recipes
Pin This for Later!
There is some misinformation here. Water does boil at different temperatures at various elevations in an open pot, but in a sealed pressure cooker atmospheric pressure has no effect on the inside . The reason for canning at increased pressure is so that when cooled there is more of a difference between inside and outside of the jar ., holding the lid tighter at lower atmospheric pressures ..
The pressure canner (which is not needed for strawberries) gets to a much higher heat level than boiling can. For some foods to be safe for shelf storage that higher heat is needed. You can find more on the different canning methods here.
I had a lot of strawberries and decided to can some also. I used a pressure canner. The result was a very unappetizing appearance. Pale pink blobs floating on top of beautiful red syrup. BUT the strawberries still made some delicious ice cream and I thickened the syrup to pour over the ice cream. So not a waste but I won’t can them again.
I love strawberry ice cream. I will can some in a preshercaner , just to try this. Was the ice cream really good??
Hi Frank, My ice cream comment was just a suggestion of how to use the strawberries, I didn’t actually make ice cream with them. Although that does sound like a good idea! And strawberries definitely don’t need a pressure canner. A water bath is fine. Check the instructions above.