Canning Spinach and other Greens like Kale, Beets, Chard
This page may contain affiliate links. More Information.
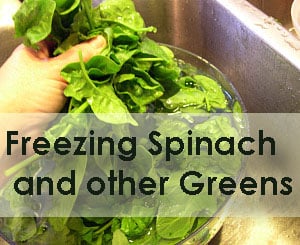
Canning greens like spinach, kale, Swiss chard, turnip or beet tops is surprisingly easy once you understand how to can greens safely using a pressure canner. The hardest part is probably the washing step. Greens can be crinkly and you’ll need several rinses with fresh water to get all the dirt out.
As with any home canning project, start with the best quality produce you have. Remove wilted, dried, or insect-damaged leaves before you begin. Good ingredients make a better finished product—and better results on your shelf.

Quantity
Greens are light and bulky when fresh. When you blanch them to pack your jars….. they shrink.
They shrink – a lot!
According to the NCHFP “An average of 28 pounds is needed per canner load of 7 quarts; an average of 18 pounds is needed per canner load of 9 pints. A bushel weighs 18 pounds and yields 3 to 9 quarts – an average of 4 pounds per quart.”
In real life? I just picked a big basket of greens and kept blanching and filling jars until I had 7-pint jars ready for the canner.
How to Can Greens
Because greens are a low-acid food, they must be canned in a pressure canner using tested methods. Water bath canning is not safe for greens.
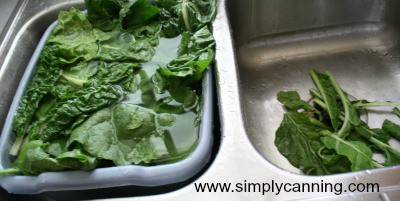
Washing the Greens
Wash greens well. Dirt has a tendency to get in the crinkly leaves so you will need to use several rinses of water. Rinse in small amounts and keep rinsing until you are sure all the grit is gone.
This will depend on your situation. Right after heavy rainfall, your greens may have more dirt splashed up onto the leaves. If your greens are mulched well, you may not have much dirt at all! (That mulch really does help.)
Chop Greens
When I canned this batch, I left the pieces fairly large, and in hindsight I think chopping them smaller might have helped. Since taste is personal, I recommend trying a small batch and seeing what you prefer. But chopping them up a bit is an option.
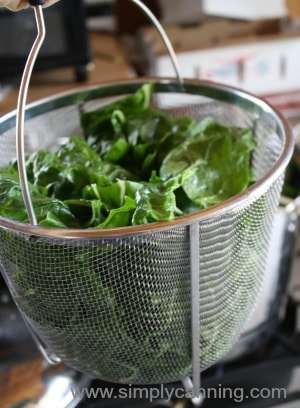
Blanching
After washing, you will want to blanch the greens before packing them into canning jars. Heat them in a few inches water until just starting to wilt. Stir while you are heating them to get them evenly heated.
Using a blanching basket makes this easy, but you can also just use a tongs to handle the greens. When the greens are wilted, dip into cold water to stop cooking and then drain well.
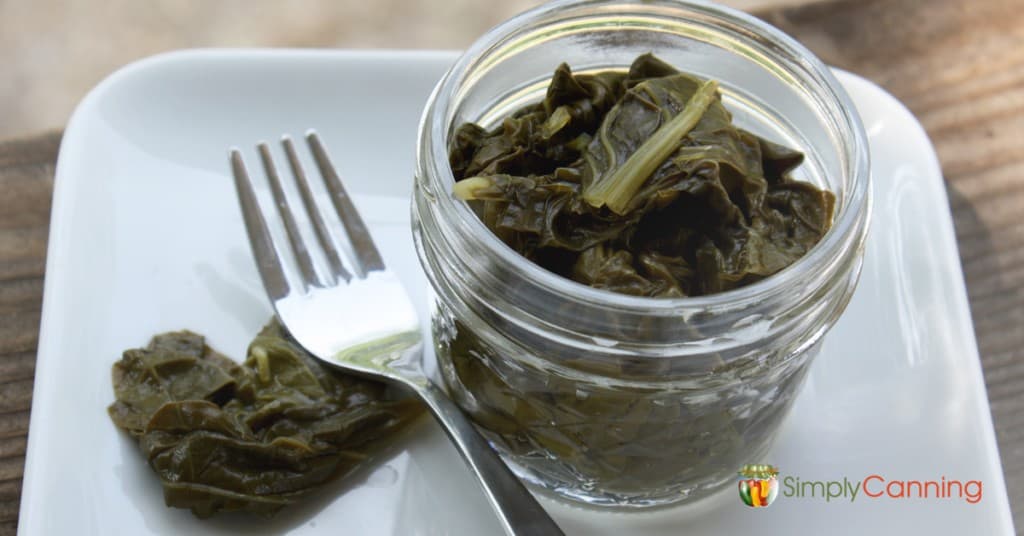
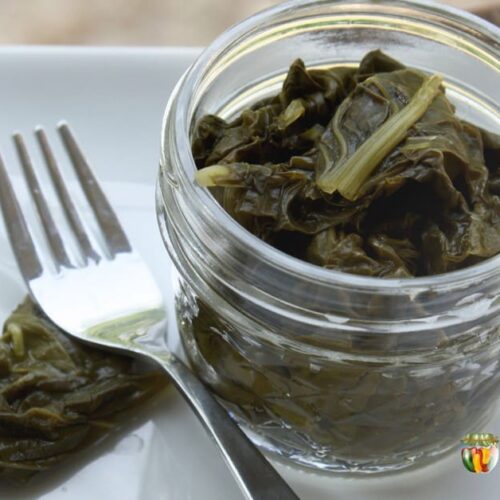
Packing the Jars
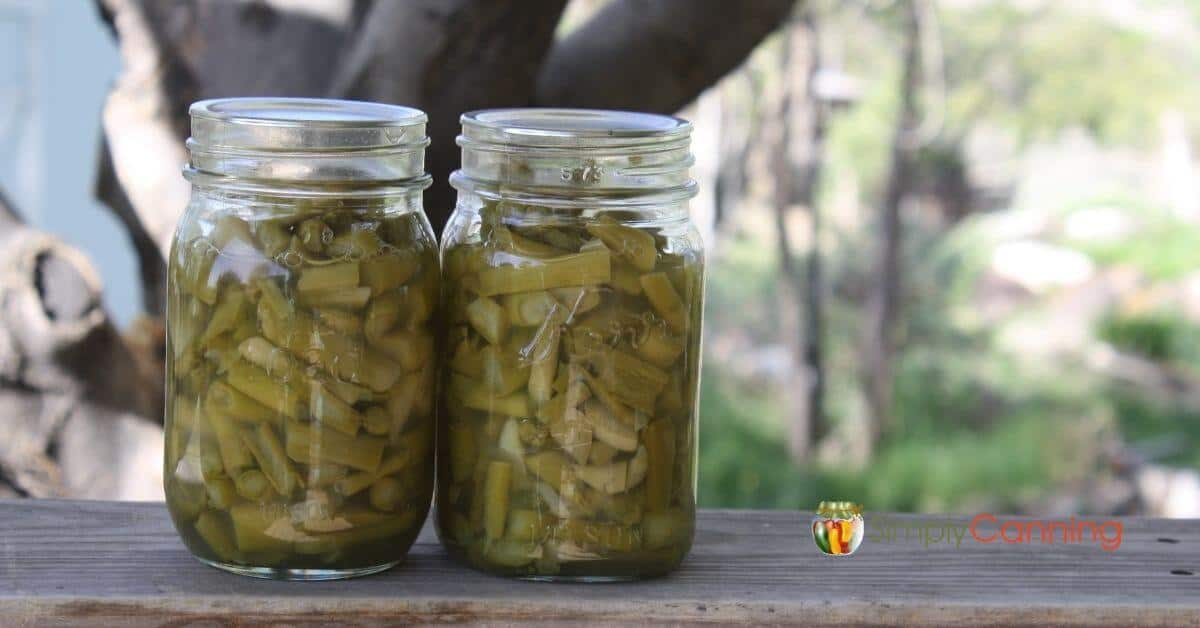
Pack the blanched greens into hot jars, leaving 1 inch of headspace. I recommend using pint jars, as quarts hold a lot of greens once cooked.
Add salt if desired (salt is optional):
- ½ teaspoon per pint
- 1 teaspoon per quart
Fill jars with boiling water, maintaining the 1-inch headspace.
Wipe jar rims with a damp paper towel to remove any salt or bits of greens. This step is important for a good seal. Place lids and rings on the jars and tighten finger-tight—snug, but not overly tight.

Pressure Canning Greens
Process greens in a pressure canner following tested processing times and pressures for your altitude. There are detailed step by step instructions with altitude adjustments in the recipe card at the bottom of this page.
If you’re new to pressure canning, be sure to review a full guide on how a pressure canner works before starting.
Always adjust pressure for altitude. I live at high altitude and use 15 pounds of pressure, but your requirements may be different.
Processing times:
- Pints: 1 hour 10 minutes
- Quarts: 1 hour 30 minutes
Always follow tested methods from reliable sources such as the National Center for Home Food Preservation.
Do Canned Greens Taste Good?
I’ll be honest—I’m not a big fan of canned greens. (even my homemade version! 🫣) I love fresh greens in salads and the occasional smoothie, but cooked greens aren’t my favorite. I can tolerate cooked spinach, but other greens not so much.
I canned a batch mostly because I kept getting questions about canning kale and canning spinach. I moved to TN and mustard greens are definately a thing here. I wanted to try it.
Swiss chard grows for me very well, so I used that. The following spring, I’d used exactly one pint jar. The rest were still on the shelf.
That said, plenty of people do enjoy them. Taste is personal, and the only way to know is to try a small batch for yourself.
Tips and Frequently Asked Questions:
Greens shrink a lot when blanched, so you’ll need far more fresh greens than most people expect. When you blanch greens to pack them into jars, they collapse down to a fraction of their original volume, which is why it can take a surprisingly large harvest to fill even a few pint jars.
Because of this shrinkage, I recommend using pint jars rather than quarts. A quart of canned greens is a lot of cooked greens to use at one time, and pints tend to be more practical for most families.
No, bacon or bacon grease should not be added when canning greens because the processing time has not been tested for recipes that include meat.
Adding bacon introduces a completely different ingredient, and the safety of that combination hasn’t been established for home canning. However, you can safely add bacon or bacon grease after opening the jar when heating the greens to serve. You’ll still get the flavor without compromising safety.
Canning greens works well for shelf-stable storage, but freezing usually gives better texture and flavor. If your goal is to store greens on the pantry shelf without electricity, canning is a good option.
Personally, I prefer freezing greens. I canned greens mainly because I kept getting asked about it, and while the process was easy, I didn’t care for the final texture as much. When I canned them, I left the pieces fairly large, and in hindsight I think chopping them smaller might have helped. Since taste is personal, I recommend trying a small batch and seeing what you prefer.
Liquid loss, or siphoning, can happen if jars cool too quickly after processing. Greens are tightly packed, and if pressure changes too quickly, liquid can be pulled out of the jars. To reduce liquid loss, make sure your canner is properly vented before processing and allow the canner to cool slowly after processing is complete. A gradual cool-down helps the jars equalize pressure and reduces liquid loss. I’ve got more information on siphoning here.
Below is a recipe card with step-by-step instructions for how to can greens. The sections above explain the details, tips, and common questions that come up when pressure canning greens at home.
Recipe Card Canning Greens
Canning Greens
Equipment
Ingredients
- Greens
- Canning Salt optional
- Water
Instructions
- Start by preparing your jars and getting water in the canner heating. You want the canner hot, but not boiling, when the jars are ready to be processed. If you are new to using a pressure canner, see this article for full pressure canning instructions. This includes more detailed information and step-by-step instructions on how a pressure canner works.
Hot pack only
- Wash greens well with several rinses.
- Blanch until just wilted. See below for more on blanching.
- Dip into cold water to stop cooking. Drain
- Pack greens into jar. Don’t pack tight.
- Add salt (1/2 tsp. per pint or 1 tsp. per quart) to jar.
- Cover with fresh boiling water, leaving 1”headspace.
- Remove bubbles, wipe the rim clean, and place on seal and ring. Place the jar in the warm canner. Proceed to fill all jars.
- Process in a pressure canner according to the directions below.

Can you waterbath greens
No, greens really must be processed in a pressure canner. YOu can read more about how to decide what canning method to use here.
Usually when I cook greens I throw smoked turkey neck in with them. Can I add the turkey meat to the jars instead? I’ve never canned greens before. It never occurred to me to do so.
No unfortunately when you add meat you totally change it up. This is not sufficiently processed for meat. But you can certainly add it when you open the jar to eat it.
May I suggest trying the greens fried in bacon fat and with onions?
Or maybe making them part of a soup like Wedding Soup?
(My first try, I can’t just let them go to waste)
So long as you mean when you open the jar to serve… fried in bacon fat with onions actually sounds pretty good. I might have to give that a try! Just so others are clear I don’t mean adding bacon fat or onions to the jar. :).
I was told by a friend of mine that she cans her mustard greens without any water in them for 90 minutes. Have you ever heard of a method of canning them like this?
Hi Rhonda, this is a new method that I’ve only seen recently. Some people call it dry canning but the term is pretty vague. I don’t recommend it. Here is a short video chat (and written article) I did regarding the topic. What is ‘dry canning?’
Can I add raw bacon to my turnip greens before processing?
No, unfortunately you can not. Bacon adds a whole new ingredient and the recipe is not written to include bacon or any other meat.
You can however add a bit of bacon when you open the jar to serve your turnip greens. Simply cook up some bacon, chop it and add to your cooked greens. I do this will green beans and bacon. I also add a bit of the bacon grease too.
I’ve never had turnip greens but I bet with bacon it is yummy! Just don’t can turnip greens with bacon.
can your use water bath method to can beet green in stead of a pressure cooker
No, Greens must be processed in a pressure canner.
I’m not a fan of canned greens as a side, but if the freezer is packed
and I just can’t fit one more bag, I don’t mind sparing some jars for the extra greens. I like to puree them and add to soups, stews and pasta/chili/mole sauces for the nutrition. I also add them to my home-made dogfood and feed them to ailing chickens/goats for an iron boost.
Ooo pureeing them to add to other things is a great idea. Something to consider when I’m thinking about whether or not to can more greens.
Hello. I have been following your blog for some time. I really have confidence in your methods and advice. I’ve never pressure canned before and just received my Presto 16qt pressure canner with a dial gauge and weight. I live @1880 ft above sea level. What pressure do I need to achieve to safely process non-acidic foods? 11 lbs, 12 lbs, 15 lbs? I’m confused!! Thank you for your time.
Hi there, Congrats! You are going to have fun! Take a look at this page. Altitude Adjustments in home canning. I think it will answer a bunch of questions for you. Since you have a dial gauge you can use 11lbs pressure as measured on the dial. The weight that comes with your canner is likely just a one-piece weight to hold in the pressure. You adjust the heat source to keep the canner at pressure. If you had a weighted gauge they have 5,10,15 pounds as options. So if your requirement is 11 you’ll go to the next poundage… Read more »
Thank you so much!! Yes, I was worried about pressures at my altitude. I did a “water test” yesterday and on the lowest heat setting, the canner maintained 16 lbs of pressure. Also, I have a smooth top Frigidare stove. The 8 inch burner fits the bottom of the canner perfectly. I know my local extension office will check dial gauges. And I’ll certainly check out the workshop!
How. Much. Water. in the canner? A few inches? Enough to cover the cans? Why is this essential info NOT in the instructions?
Hi, Martha! It’s generally something like 3 quarts, but it depends on your canner, so make sure and check the manual. 🙂 This information is linked in the recipe: https://www.simplycanning.com/pressure-canning/
-Rachel (Sharon’s assistant)
Your PC comes with instructions. Always have a minimum of 3 qts water in it.