
Steam Canning 101 : Beginners Guide
This page may contain affiliate links. More Information.
I’ll be honest — I was a holdout on steam canning for years. I kept hearing people rave about it, and I kept saying I’d wait until there was proper testing behind it. So I waited. And waited. And then the Utah State Extension published their findings, Wisconsin followed, and I finally had what I needed.
By the end of this guide you’ll know whether steam canning is the right method for what you want to make, which style of steam canner to look for, and how to run the whole process from start to finish.
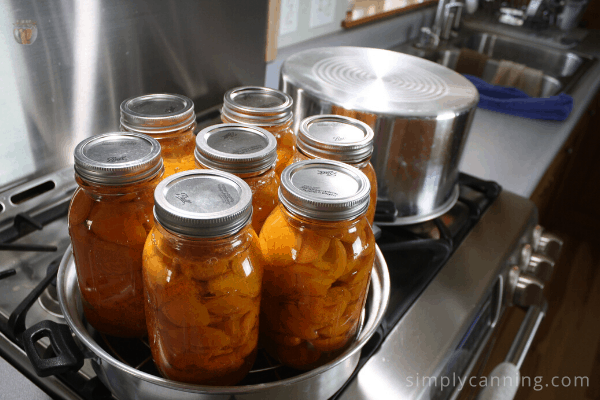
Now I use it whenever I can! It’s faster, lighter, and just as safe as water bath canning for the right foods. If you’ve been curious about steam canning but weren’t sure where to start, you’re in the right place.
What You’ll Find in This Guide
- Whether steam canning is the right method for your food.
- The two conditions it has to meet. (This is important.)
- What equipment you need and how to choose between the two styles of steam canners. (I have a strong preference on this decision.)
- Complete step-by-step directions on using a steam canner.
- Troubleshooting and FAQs
- A printable checklist to take to the kitchen.
Is steam canning better than water bath canning?
Steam canning is not ‘better’ that water bath canning. It’s just a more efficient way to do what a water bath does. A water bath still works great and if you like it, no need to change. But I’d encourage you to look at steam canning as an option.
What Foods can be steam canned?
Steam canning works for the same foods as water bath canning — high-acid foods like fruit, jam, jelly, and pickles.
Note- The steam canner I am referring to on this page should not be mixed up with a pressure canner. Which is sometimes referred to as a steam-pressure canner. Thus the confusion. This is NOT a pressure canner.
Steam canning only works safely when two conditions are met.
Condition One: Hot Pack Only
Steam canning requires a hot pack. You’ll heat your food first, pack it hot into hot jars, and load those hot jars into the canner. There’s no raw pack option here the way there is with water bath.
Many foods do have both a hot and raw pack option. So check your recipe and use the hot pack method.
Condition Two: Processing Time Must Be 45 Minutes or Less
A steam canner holds much less water than a water bath canner — just a few inches in the base.
This means that if your processing time runs long, the water can run dry before your jars are done. This might under process your food and/or warp your canner. Neither is a good outcome.
The 45-minute limit includes any altitude adjustments. If you live at higher elevation and your adjusted processing time pushes past 45 minutes, switch to a water bath for that recipe. (When I lived at high altitude Colorado there were some tomato recipes that called for longer than 45 minutes because of the altitude adjustments.)
If both conditions are met — hot pack, and 45 minutes or under — you’re good to go with a steam canner.
What Steam Canning Is Not
A steam canner is not a pressure canner. So don’t get them confused. Sometimes people say ‘steam pressure canning’. This is not the same.
Both involve steam and a lid, but they work completely differently and are not interchangeable.
- An atmospheric steam canner processes high-acid foods at the same temperature as boiling water. No pressure involved.
- A pressure canner builds pressure to reach a much higher temperature. It does have steam, but it is the pressure build up that makes it difference.
You also can’t use a pressure canner as a substitute for a steam canner. That setup hasn’t been tested and isn’t recommended.
Not sure which method your food needs?
- Water bath and steam canning are both for high-acid foods — fruit, jam, pickles, and properly acidified recipes.
- Pressure canning is for low-acid foods like vegetables, meat, and broth.
Here are some high-acid foods appropriate for steam canning:
What Is Steam Canning?
Here’s how it works.
A small amount of water sits in the base of the canner — just a few inches. As it heats, it produces steam that fills the canner and circulates around your jars. That steam reaches the same temperature as boiling water, 212°F at sea level, which is what processes high-acid food safely.
That is a big difference from filling up a full water bath canner with water. A steam canner is just a few quarts.
What You’ll Need
Essential Equipment
- Steam canner — see below for which style to choose. There are 2 styles.
- Canning jars in good condition, no chips or cracks
- Lids and screw bands — always use new lids; bands can be reused if they’re in good shape
- Jar lifter, Canning funnel, Bubble tool.
- Ladle
- General kitchen supplies depending on your recipe: towels, pot holders, pots, bowls, knives, spoons, etc.
- All ingredients called for in your recipe
Traditional Style or Dual-Use — Which Should You Get?
There are two styles of steam canners, and which one you use depends on what you already own and is really just personal preference. They both work.
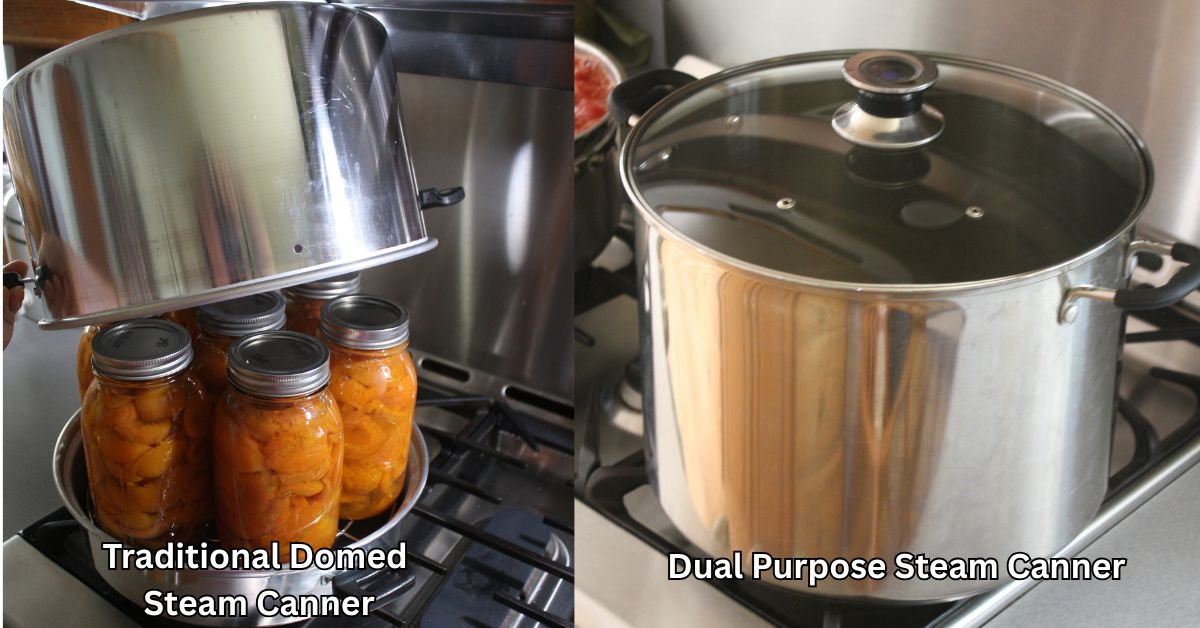
Traditional style
A traditional steam canner has a shallow pan with a rack as the base and a deep domed lid that fits over your jars. These are typically made of aluminum, they’re inexpensive, and they work well. Only downfall is it has only one purpose. Steaming.
Dual-use style
This style is a deeper stainless steel pot that can function as both a water bath canner and a steam canner. (Not to mention a large stock pot for big batch cooking.)
The lid has vents and a built-in dial thermometer that shows when you’ve hit processing temperature adjusted for your altitude. This is the style I use and highly recommend. One pot, two uses.
More details on both styles, including what has been tested, what to look for when buying.
Choose Your First Project
Water bath canning processing times apply to steam canning. Any tested water bath recipe that meets the two conditions (hot pack, 45 minutes or under) works in a steam canner.
What Should You Make First?
The good news is you have options, and any of these make a great starting point:
- Strawberry jam or a simple fruit jam — small batches, straightforward process, and one of the most satisfying things to see lined up on the counter afterward. Jam is where a lot of canners start, and a steam canner makes it even quicker.
- Peaches or other canned fruit — if you have fruit coming in from the garden or the farmers market, canned peaches are a great first project. Simple prep, beautiful results.
- Pickles — if you lean more savory, a simple pickle recipe is a great place to start. Just make sure your recipe is tested and meets the 45-minute limit.
Pick whatever sounds most appealing or whatever you have on hand.
Steam Canning: Complete Step-by-Step Instructions
Ready? Here we go. Check your recipe first for the specific prep, pack method, headspace, and processing time for your food. This page walks you through operating the canner itself.
Want a shorter version? There’s a printable checklist at the bottom of this post.
Step 1 — Gather Your Supplies
Get everything out and ready before you start. You’ll want:
- Steam canner and rack
- Jars, lids, and bands
- Jar lifter, canning funnel, ladle
- All recipe ingredients
- Kitchen towels or paper towels
- A non-metallic utensil or bubble tool for removing air bubbles
Step 2 — Prepare Your Canner and Jars
Add water to the base of the canner, roughly 2 quarts. The water will be just up to the rack. Remember your jars are not in the water, they are steamed above the water.
Cover with the dome or lid and bring the water to just below boiling. It needs to be hot.
Wash and rinse your jars and lids. Keep jars hot until you’re ready to fill them. I like to place them upside down on the rack in the canner base while the water heats, or keep them in hot water in a separate pot. Lids just need a bowl of warm water, no boiling required.
Step 3 — Prepare and Hot Pack Your Food
This is where you need to have that food specific recipe. Steam canning requires a hot pack so heat your food according to the recipe directions before packing it into jars. Pay attention to:
- How the food is prepared — cooking method, cut size, any added acid or sugar
- Processing time — confirm it’s 45 minutes or under, including your altitude adjustment
Step 4 — Fill Your Jars
- Fill jars with hot food, leaving the headspace your recipe calls for. (Headspace is the space between the food and the canning lid.)
- Remove air bubbles by running a non-metallic utensil (bubble tool) around the inside of the jar. (An orange peeler or plastic knife also works well.)
- Wipe the rim clean with a damp towel or paper towel. Any residue may interfere with the seal.
- Place the lid on and screw the band on finger tight. It should not be cranked down hard.
As you fill each jar, set it on the rack in the canner base to stay warm while you fill the rest.
Step 5 — Load and Process
- When you’ve got your jars in the canner, place the dome over the base or put the lid on.
- Turn up the heat and bring the water to a boil.
With a traditional steam canner you should see a clear, steady steam column coming from the vent holes at the base of the dome. You want it to get to an 8-10 inch column.
If you’re using a dual-use canner with a thermometer lid, watch the dial instead and wait until it reaches the correct temperature for your altitude. - Once you have a steady steam column (or the dial confirms temperature), start your timer. You’ll use the same time as you would with a water bath recipe.
- Maintain that steam throughout processing. Adjust heat as needed to keep it steady.
Do not open the steam canner during processing. You lose all heat and have to start over.
Do not let the water run dry. This is where not having a processing time of over 45 minutes comes into play. If you’re doing multiple batches, check the water level between loads and add more hot water as needed before starting the next batch. But don’t open the lid during processing.
Step 6 — Cool Down
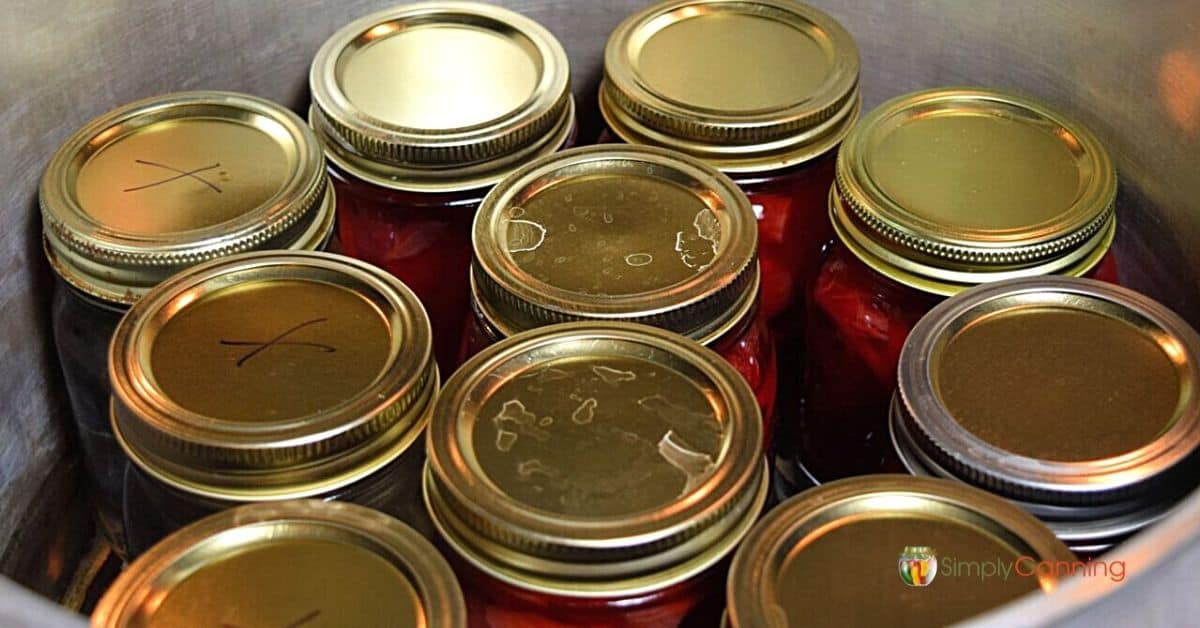
When the processing time is up, turn off the heat and wait 5 minutes before removing the dome or lid. When you open it be careful to tilt the lid to direct steam away from your face. It will be very hot and steamy! Then allow the jars to rest in the canner for another 5 minutes.
Remove jars with your jar lifter and set them upright on a towel-lined counter with a little space between each one for air to circulate.
Leave them completely undisturbed for at least 12 hours while they cool. Mine usually are left over night. Don’t tighten the bands if they seem loose. Don’t push down on the lids. You want the seal to happen all on it’s own.
You may hear the lids ping as they seal, Love it! That sound never gets old. It’s a smiley sound.
Step 7 — Check Seals and Store
After your jars are cooled to room temperature you can check the seals. Press down on the center of each lid. A sealed lid stays down and doesn’t flex. You can also remove the band and lift the jar gently by the lid edges — if it’s sealed, the lid will stay on.
If a jar didn’t seal: refrigerate it and use it within a few days.
For sealed jars:
- Wash the outside of the jar because it can be sticky. That’s normal.
- Remove the screw bands for storage. Not required… but I highly recommend it.
- Label with contents and date.
Store in a cool, dark, dry place away from direct sunlight and heat.
Understanding Why It Works
Steam will reach the same temperature as boiling water – 212°F at sea level. The canner traps that hot steam around your jars, so heat penetrates the food in the jar the same way it does in a water bath.
As the food heats during processing, the contents expand and push air out of the jar. That’s why we leave the headspace.
When the jars cool after processing, everything contracts, pulling the lid down into a vacuum seal. That seal is what keeps your food shelf stable, and what makes that satisfying ping when the lid sets.
What’s Next?
Browse recipes appropriate for steam canning:
The other two methods:
- Water Bath Canning ; Start Here — steam canning’s closest method; same foods, same times, more water. Also just as easy as steam canning.
- Pressure Canning ; Start Here — the method for low-acid foods like vegetables, meat, and broth
Frequently Asked Questions
Can I use a steam canner for green beans or other vegetables?
No. Vegetables are low-acid foods and must be processed in a pressure canner. Steam canning reaches the same temperature as boiling water, which isn’t enough to safely process low-acid food. Here’s the full guide to pressure canning.
Can I use my pressure canner as a steam canner?
That hasn’t been tested and isn’t something I can recommend. A pressure canner is built to build pressure, not to function as an atmospheric steam canner. The temperatures and conditions inside are different. Stick with a canner designed for steam canning.
What about tomatoes or salsa?
It depends on the recipe and your altitude. If your tested recipe’s processing time — including any altitude adjustment — is 45 minutes or under, a steam canner works. If it’s longer than that, use a water bath instead. Salsa made with a tested recipe that’s been properly acidified is generally a good candidate; check your specific recipe’s time first. More on canning salsa here… because there are always questions about salsa recipes.
Does steam canning work at high altitude?
Yes, with adjustments — but this is where the 45-minute limit matters most. Altitude adjustments add processing time, and those extra minutes count toward your limit. If your altitude-adjusted time pushes past 45 minutes, use a water bath for that recipe instead.
Can I use a raw pack in a steam canner?
No. Steam canning requires a hot pack only — hot food into hot jars. If your recipe has a raw pack option for water bath, you’ll need to use the hot pack method when steam canning, or switch to water bath.
Printable Checklist
How to Use a Steam Canner
Steam Canning
Materials
- High-acid Food fruit, jam or jelly, pickled items. (use tested recipes)
Instructions
- Check your recipe. Confirm it’s a hot pack, and that processing time (including altitude adjustment) is 45 minutes or under.
- Add water to the canner base. Water should be up to the level of the rack. Turn on the heat and bring to just below a boil with the dome on.
- Wash and rinse jars and lids. Keep jars hot until you’re ready to fill.
- Prepare and hot pack your food according to recipe directions.
- Fill jars, leaving correct headspace. Remove air bubbles, wipe rims, and apply lids and bands finger tight.
- Set each filled jar on the rack in the canner base as you finish filling the rest.
- Place the dome (or lid) on the base. Increase heat until an 8-to-10-inch steam column is visible from the vent holes (or the thermometer dial reaches the correct temperature for your altitude).
- Start your timer. Maintain steady steam throughout.
- When time is up, turn off heat. Wait 5 minutes, then carefully remove the dome away from your face. Be careful… it will be hot and steamy!
- Wait another 5 minutes. Remove jars and cool undisturbed on a towel-lined counter for 12–24 hours.
- Check seals, remove bands, label, and store in a cool, dark place.
Notes
- Used tested recipes for any water bath appropriate food that is processed LESS than 45 minutes.
- You must use a hot pack.
- Maintain the stream of steam throughout the processing time.
- Do NOT open the lid.
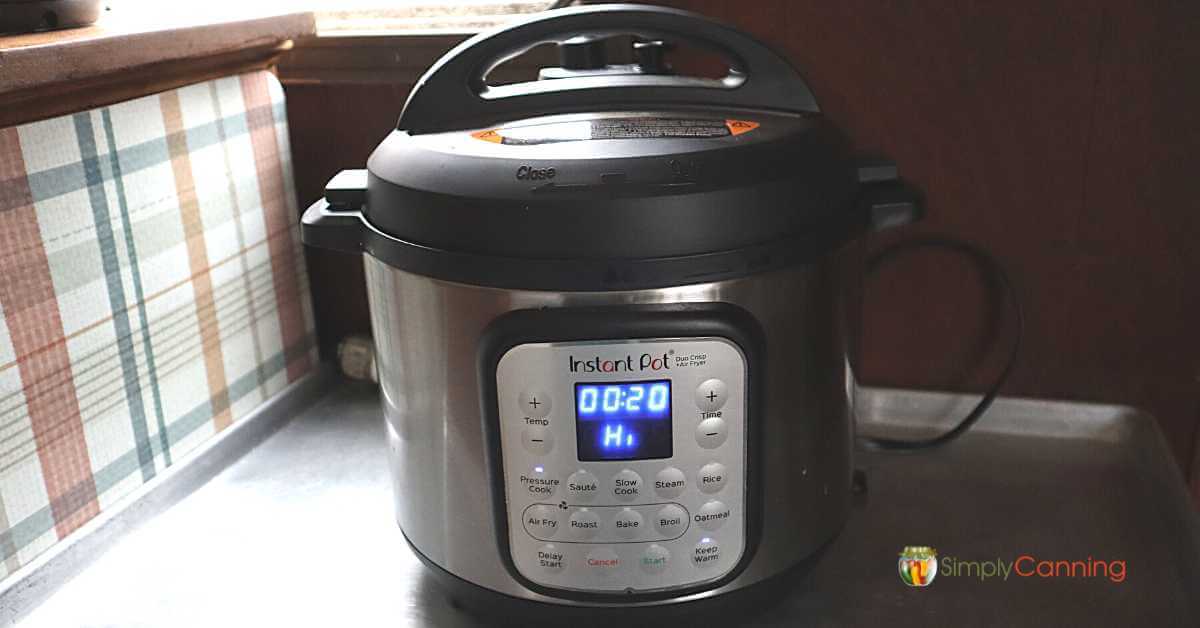
I am picking green beans and would like to usemy streamer ca ner. Is this safe to do? And if so how long do I stream the greenbeans.
No, Vegetables must be processed in a pressure canner. You can not substitute steam canning nor water bath canning. Here are full instructions on how to can green beans.