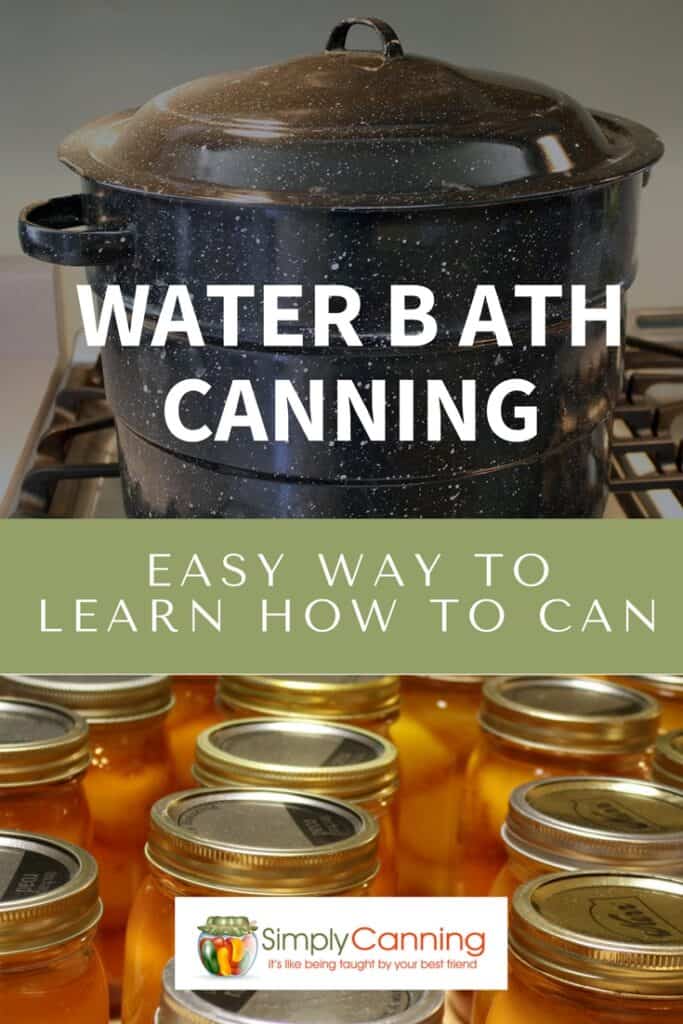
Water Bath Canning ; Start Here
This page may contain affiliate links. More Information.
Water bath canning is one of the simplest ways to preserve high-acid foods at home. Learn how to use your canning pot. Beginner friendly step by step.
Boiling water canning, hot water bath, water bath canning — these are all variations on the same term. I’ll use the term water bath canning throughout this post, but just know they all mean the same thing.
I’ve been canning for over 30 years, and I’ve put up hundreds of jars. By the end of this guide, you’ll understand exactly what water bath canning is, whether it’s the right method for what you want to make, what supplies you need, and how to do it from start to finish.
What You’ll Find in This Guide
- Whether water bath canning is the right method for your food (this is the most important question — start here!)
- What equipment you need — and what you can skip
- Complete step-by-step directions with tips from my own experience
- Troubleshooting and FAQs
- A printable checklist to take to the kitchen
The table of contents has links to jump to each section if you’re looking for something specific.

Is Water Bath Canning the Right Method for Your Food?
This is the first question to answer — Not all foods can be safely processed in a water bath.
The Short Answer: It’s All About the Acid
Water bath canning is a safe processing method for high acid foods.
High Acid foods generally include:
- Most fruits
- Jams and jellies
- Fruit-based sauces like applesauce
- Pickled items (cucumbers, also pickled peppers, green beans, and more!)
- Some tomato products (more on tomatoes in a moment)
Low acid foods generally include
- Most vegetables
- Meat, broth, soup.
- Recipes that include vegetables or meat.
These all require pressure canning. You can read about pressure canning here when you are ready. (opens in a new window)
Why Does Acid Level Matter?
Here’s the important part. Clostridium botulinum, the bacteria that causes botulism, cannot survive in high acid environments. Boiling water (212°F at sea level) is sufficient to make high acid foods safe.
I don’t say this to scare you — I say it so that you understand why the rules exist. Once you get that, it all makes sense. I’ve got a more thorough explanation of botulism, home canning, and why you don’t need to be afraid.
What About Tomatoes?
Tomatoes are a special case. They can be processed in either a pressure canner or a water bath depending on your recipe. Tested recipes will specify which method to use and may call for added lemon juice or citric acid.
Read more about how to can tomatoes here.
A Quick Note About Steam Canning
Steam Canning: Just a quick mention of steam canning here. It’s a great alternative to water bath for the same high acid foods. (Not low acid, those do still need a pressure canner.) It uses less water and less time, and I love it. If you haven’t heard of this, check out this page. I am recommending the steam canning alternative more and more.
Links to some water bath canning recipes
What Is Water Bath Canning?
Here’s how it works.
You fill canning jars with your prepared food, submerge them in boiling water for a specific amount of time, and allow them to seal as they cool. The heat kills spoilage organisms like molds, yeasts, and bacteria.
What You’ll Need
Essential Equipment
Here’s what you need to get started. Links will take you to more information on each item.
- Water bath canner – or any deep pot (more on that in a moment)
- Canning jars – Make sure they’re in good condition
- Lids and screw bands – always use new lids; bands can be reused if they’re in good shape
- Jar lifter – not optional, trust me on this one
- Canning funnel– makes filling jars so much easier
- Ladle – very hand on occasion.
- General kitchen supplies depending on your recipe: towels, pot holders, pots, bowls, spoons, knives, etc.
- All ingredients called for in your recipe
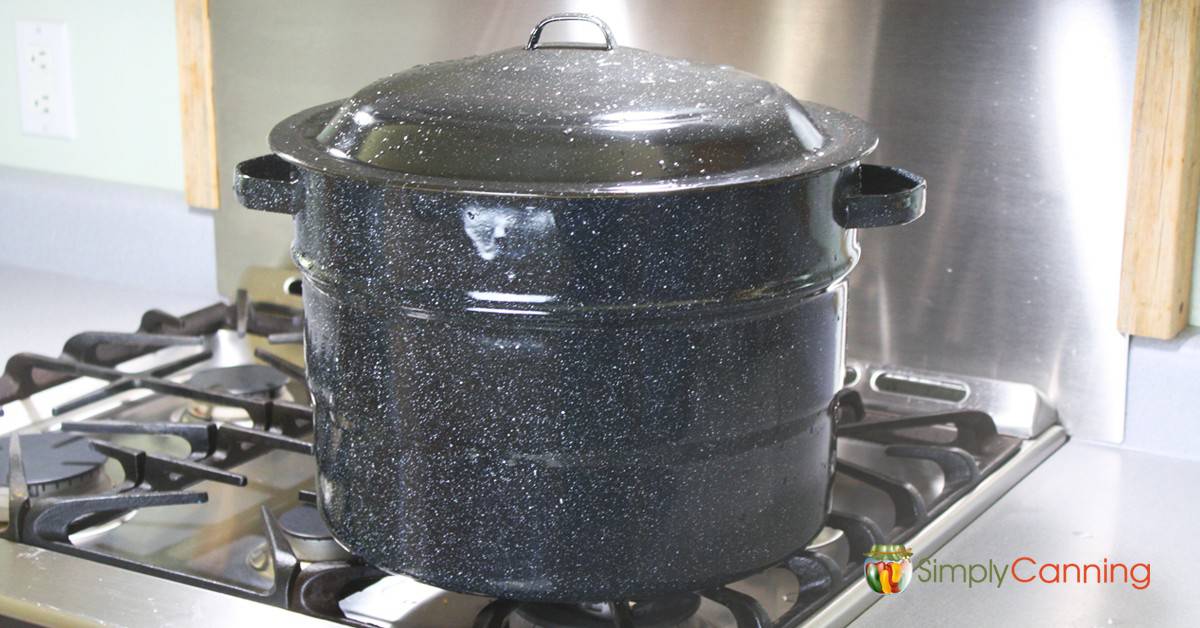
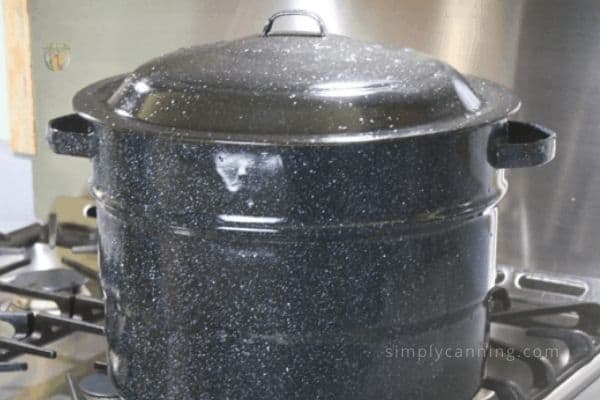
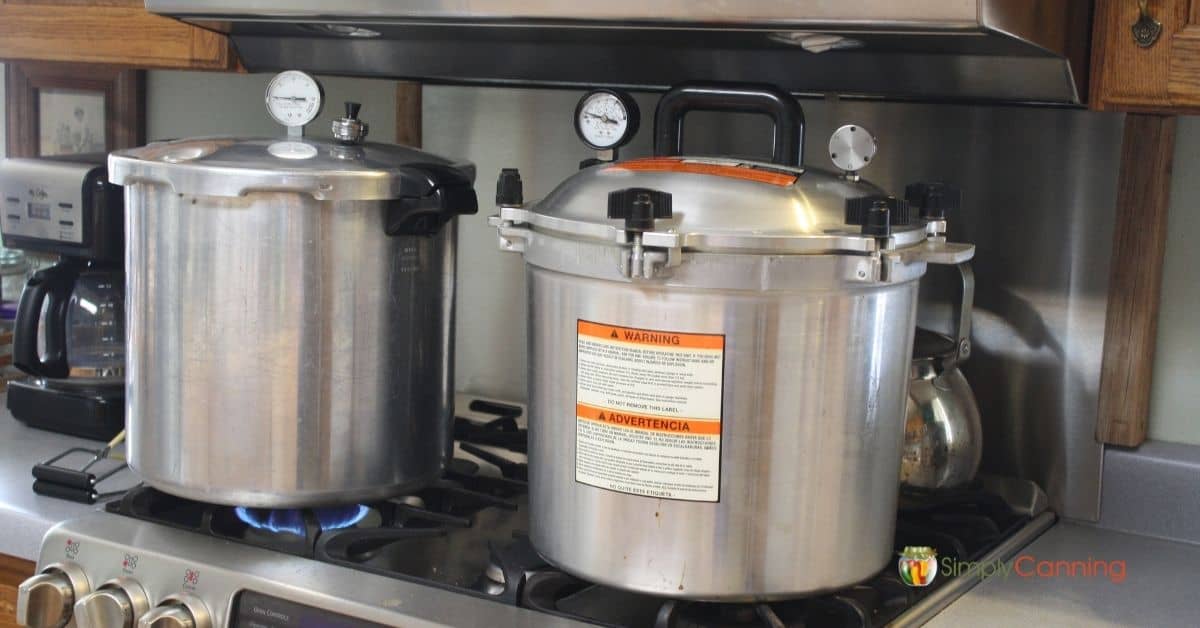
Do You Have to Have a Special Water Bath Canner?
Good news! No special pot required. Any deep pot will work as long as:
- the pot is deep enough to have 2–3 inches of water covering the tops of your jars while boiling.
- you have something to act as a rack to keep the jars off the bottom — a cake rack, a small piece of board, or even a layer of canning rings wired together all work.
Having said that, I do recommend getting a specialized canning pot. There are inexpensive options to get you started, and they make it much easier.
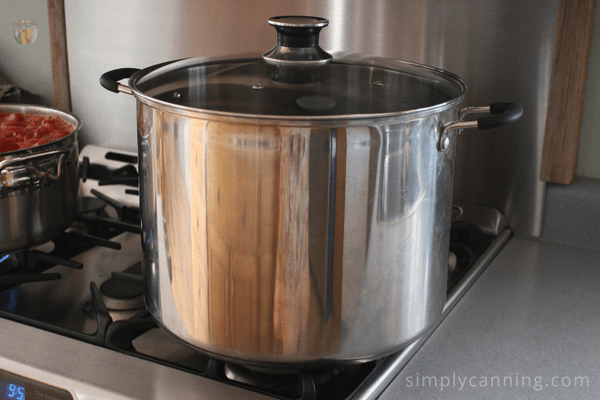
But don’t let equipment be the thing that stops you — start with what you have! A deep stockpot and rack work.
Here is a canning set with a traditional black speckled canner and hand tools.
Choose Your First Project
Before you pull out your canner, you need a recipe. And not just any recipe — a tested one.
Always Use a Tested Recipe
Tested recipes have been developed with safe packing and processing instructions. The USDA, Ball, and the National Center for Home Food Preservation are all reliable sources. (The recipes here on Simply Canning, in my video courses, and in the guide book, all come from safe tested resources.)
Remember tested doesn’t just mean it’s been done by a lot of people with no problems. These recipes are scientifically tested by experts in the field.
You’ll see lots of recipes online. They may be great… but they may not. Don’t take a chance. Here is an article that might interest you. Are we on overkill?! My thoughts on why I’m careful and why I’m not afraid!
What Should You Make First?
Not sure where to begin? Here are my beginner-friendly recommendations:
- Most fruits make great starter projects with Applesauce being the easiest! Minimal ingredients and a simple process. You practically can’t mess it up.
- Jam or jelly is a great pick for first-timers. Strawberry jam is a classic for good reason it’s quick to make, and you’ll have beautiful jars to either enjoy or impress your friends with.
- Pickles are wonderful if you have a garden overflowing with cucumbers in summer. And pickles goes beyond cucumbers. Pickled beans, carrots or beets anyone? How about corn relish?
Water Bath Canning: Complete Step-by-Step Directions
Ready? Please refer to your individual recipe for specifics on the food you are working with.
This particular page leads you step by step through the processing task.
There is more to canning than just processing. How you pack the jar matters, the ingredients matter. This should all be included in your recipe.
- I’ve included notes and tips from my own experience throughout.
- Want a shorter version? There’s a printable checklist at the bottom of this post.
Step 1 — Gather Your Supplies
Get everything out and ready before you start. Nothing worse than hunting for your jar lifter mid-canning session! (been there, done that!) You’ll want:
- Canner and rack
- Jars, lids, and bands
- Jar lifter, canning funnel, ladle
- All recipe ingredients
- Kitchen towels or paper towels
- A non-metallic utensil or bubble tool for removing air bubbles
- General kitchen supplies will be needed depending on your recipe. Towels, pot holders, pots and bowls, spoons knives etc.
Step 2 — Prepare Your Canner and Jars
The goal is to have your canner and jars hot (not boiling) and ready to go when your food is prepped and ready to pack. So timing matters. Take a look at your recipe. As you do more projects you’ll get the feel for how long it takes for the canner to heat. Occasionally a recipe will have a 2 day process. Orange marmalade for example. In that case you’ll obviously not start your canner until the second day.
Fill your canner about 1/2 full of water. This should be enough so that when you’ve added your filled jars the water level will rise and cover the jars fully.
Tip: Keep a tea kettle with hot water on hand in case you need to add hot water. With experience you’ll know how much to start with.
Heat the water until hot, but not yet boiling. You’ll bring it to a full boil later once the jars are loaded.
Wash your jars by hand or in the dishwasher. Check each jar for cracks or nicks on the rim. If there are cracks on the rim of the jar it will not seal.
Do You Need to Sterilize Jars?
Usually sterilizing is not needed. Clean is fine.
If your recipe calls for 10 minutes or more of processing time (which most water bath recipes do), you do not need to pre-sterilize your jars. The boiling water bath takes care of that.
For recipes with less than 10 minutes of processing (some jam or jelly recipes), you’ll need to sterilize first. It’s not often, but worth knowing! Here is an article on how to sterilize your canning jars if you need to.
Three Ways to Keep Jars Hot Until You’re Ready
You do want warm jars when you fill them — putting hot food into cold jars then into a hot canner can cause thermal shock and cracking. Here are my three favorite methods, in order of preference:
- Place jars upside down in your canner rack above the water. As your canner heats up, the steam warms the jars. No extra burner, no extra pot. This is my go-to.
- Wash jars in the dishwasher and simply leave them there until you are ready to fill. Keeping the door to the dishwasher closed keeps in the steam and heat. Remove the jars as needed.
- Place jars upside down in a separate large pot with 2–3 inches of hot water. Leave jars to warm. (I’ve read the tip to use a slow cooker on low with a few inches of water.)
Often people want to warm jars in the oven. It is common, but actually not recommended. Canning jar manufacturers say their jars are not to be used in an oven, even just to warm up.
Have clean lids on hand. I keep mine in a small bowl of hot (not boiling) water on the counter. This gives them a good rinse.
No need to boil them; in fact most lid manufacturers actually recommend against boiling. A simple wash is all they need. I skip the soap personally, but that’s up to you.
Step 3 — Prepare and Pack Your Food
Prepare your food according to your recipe. It should specify one of two packing methods:
- Hot pack means your food is heated — usually simmered for a few minutes — before going into the jar. Most jams, sauces, and cooked fruits are hot packed.
- Raw pack (sometimes called cold pack) means the food goes into the jar uncooked. This does NOT mean you skip processing! The jar still gets processed in the boiling water bath. Many fruits and some pickles are raw packed.
Some foods can be packed with either a hot or raw pack according to your preference. Just follow your recipes suggestions.
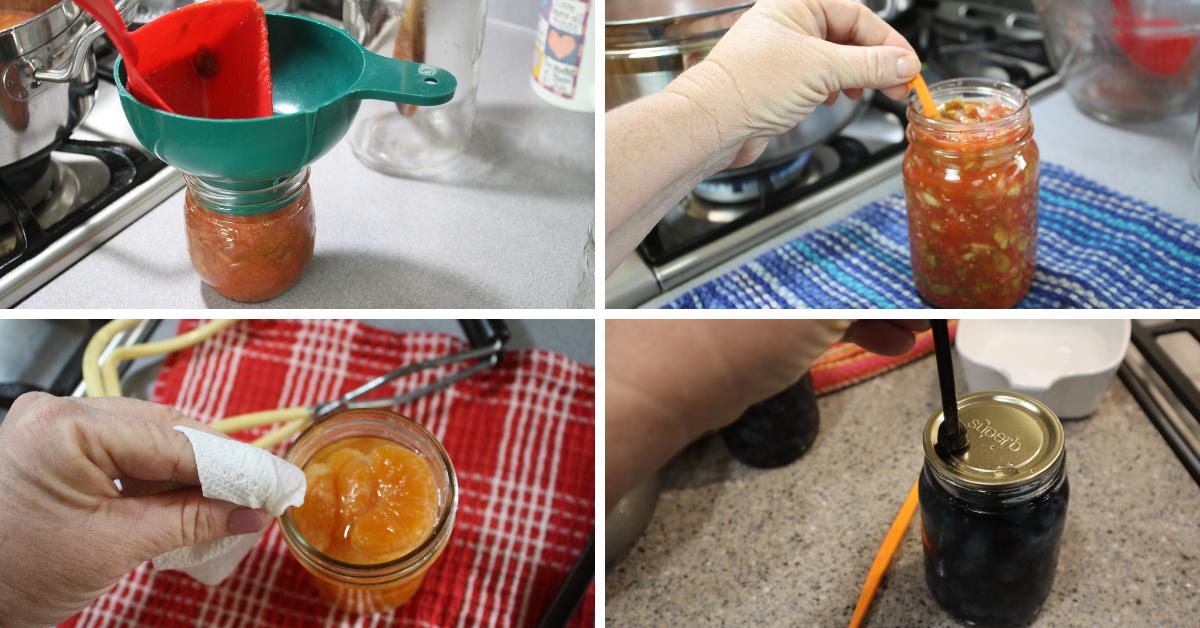
Step 4 — Fill Your Jars
- Fill jars leaving the headspace specified in your recipe. Headspace is the gap between the food and the top of the jar — usually 1/4 inch for jams and jellies, 1/2 inch for fruits and pickles. It’s important for a good seal.
- Remove air bubbles by running a non-metallic utensil or bubble tool around the inside of the jar. Move things around gently to release any trapped air bubbles. A bubble tool is a special canning tool that helps with this step. But I sometimes use a plastic orange peeler when I can’t find my bubble tool — it works great!
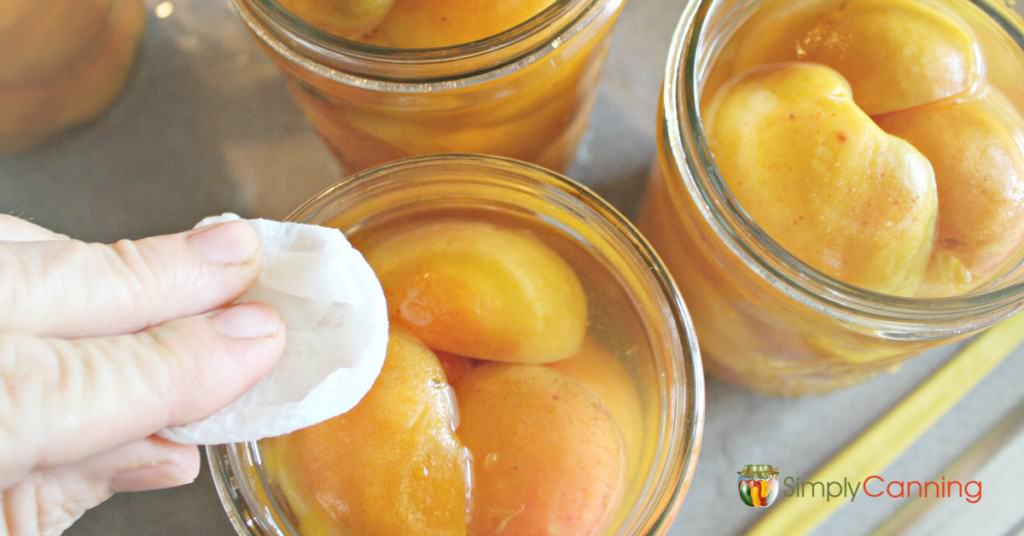
- Wipe the rim of the jar clean with a damp tea towel or paper towel. Food residue on the rim can sometimes prevent a proper seal.
- Place the lid on the jar and screw on the band until fingertip tight. Snug is fine — you don’t need to crank it down hard.
Step 5 — Load and Process
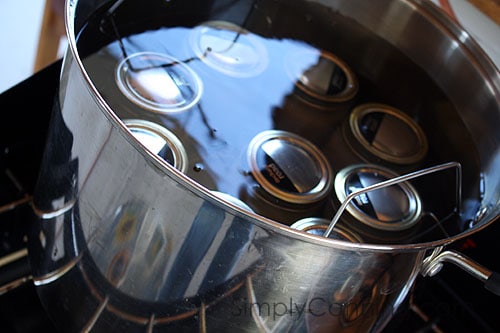
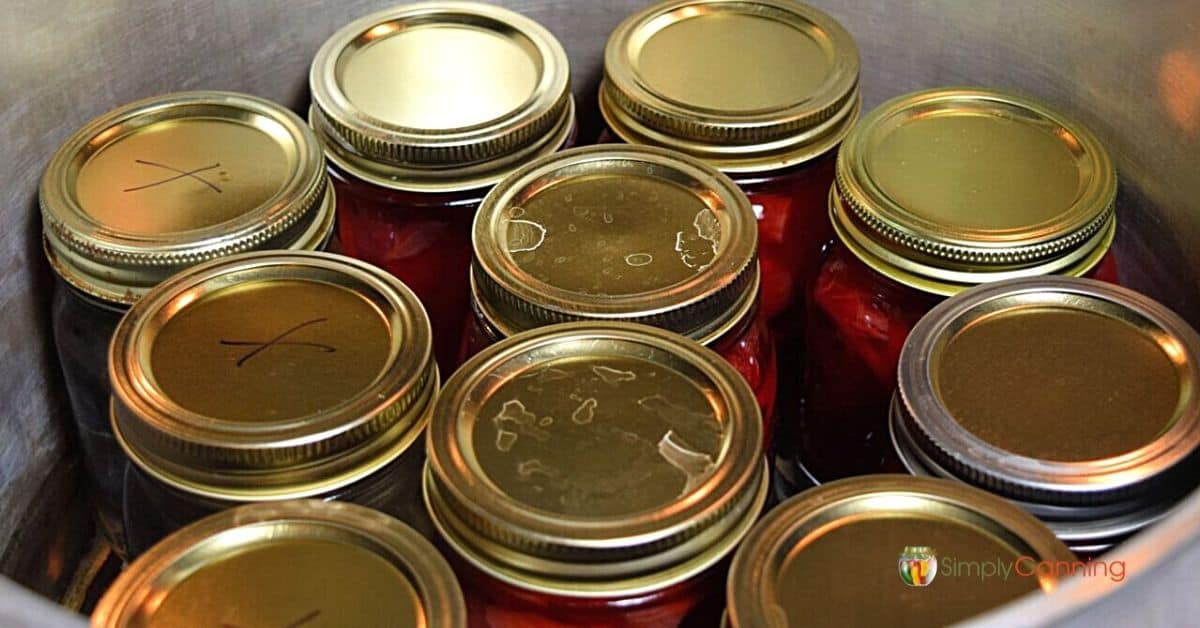
- Place filled jars upright on the rack in your canner. Water bath canners come with a canning rack. This rack is built so that it rests on the sides of the canner, keeping the jars above the water until you have it loaded and then you can lower it down. The picture below shows the jars lowered into the canner.
If you are using a stock pot you can just place the jars onto some sort of a rack on the bottom of the pot as you work. Use a jar lifter or you are almost certain to burn your fingertips. Remember, the canner should be full of hot water at this point. - Add hot water if needed so that jars are covered by 2 inches of water. Use hot water to avoid dropping the temperature of the canner too much.
- Once all jars are in the canner, put the lid on and bring to a full rolling boil. Don’t start timing yet.
- Once boiling, START your timer. This is important — you do not start timing until the canner is at a full boil.
- Maintain a rolling boil for the entire processing time. The water should be actively bubbling but it doesn’t need to be so hard it is splashing out of the canner. Adjust heat as needed during processing. Add boiling water if the water level drops.
Note on Altitude Adjustment: Processing times are based on boiling at sea level. If you live above 1,000 feet, you must adjust your processing time.
Any canning recipe worth using will have these adjustments. More on altitude adjustments here. If your source doesn’t include altitude adjustments be suspect of the accuracy of the whole recipe.
Step 6 – Cool Down
When your timer goes off, how you handle cooling matters. Rush it and you risk liquid loss (siphoning). Drag it out too long and you risk flat sour. The goal is a slow, 2 to 3 step steady cool down but don’t leave things sitting indefinitely either. Learn more about siphoning and flat sour.
- When your timer goes off, turn off the heat. Wait 5 minutes.
- Raise the rack and jars above the water. The jars may still be boiling. That is normal, but it shouldn’t be boiling so hard that you can see food spurting out of the jar. If that happens just lower the rack back down and wait another 5 minutes before raising again.
- Once you’ve raised the rack leave the jars on the rack and wait another 5 minutes. This lets the jars rest and reduces the pressure inside. As before, if they start spurting (they shouldn’t) wait a few more minutes.
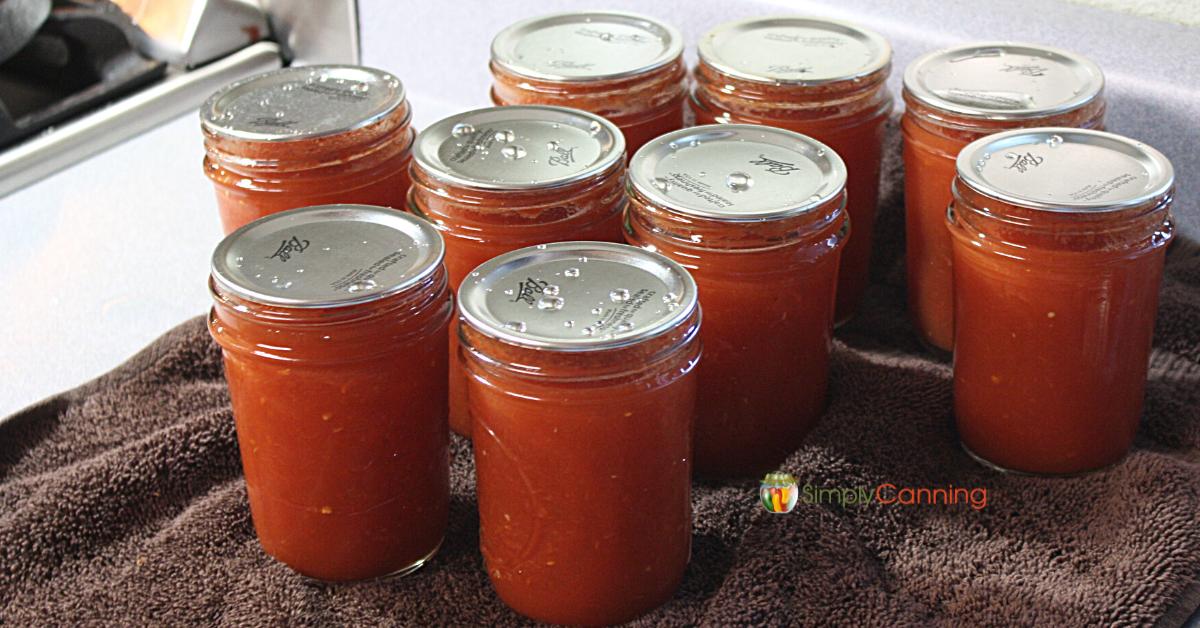
- Remove jars with your jar lifter and set them upright on a wooden board or thick towel. (This prevents thermal shock and broken jars.) Remember the jars will still be extremely hot! Leave some space between jars so air can circulate. Keep them in a draft-free spot to cool to room temperature.
Now listen. Do you hear it? This is my favorite part.
As the jars cool, the lids will pull down and seal. They make the best little ping sound. I will never get tired of that. It means everything is working!
In case you don’t hear the ping, it’s ok. They don’t always make the sound. It is just cool when they do. (Superb brand canning lids actually sound more like a thunk.)
Resist the urge to press on the lids. You want the seal to happen with no help from you. Leave the jars completely undisturbed for a minimum of 12 hours. Cool to room temperature. I usually leave mine out overnight.
Step 7 – Check Seals and Store
After jars have fully cooled, now you can check the seals.
Press down on the center of each lid. A sealed lid will be sucked down and won’t pop up and down if you press on it. You should also remove the screw band and lift the jar by the lid edges. If the seal is good, that lid will remain in place.
If a jar didn’t seal: Just put it in the refrigerator and plan to use it within a few days. It happens occasionally. Sometimes you know what happened, and sometimes you don’t.
For jars that did seal:
- Remove the screw band and wash or rinse the outside of the jar(they’re sometimes sticky).
- It’s a good idea to store the jars without the screw bands. (Check out more here on storing your jars.)
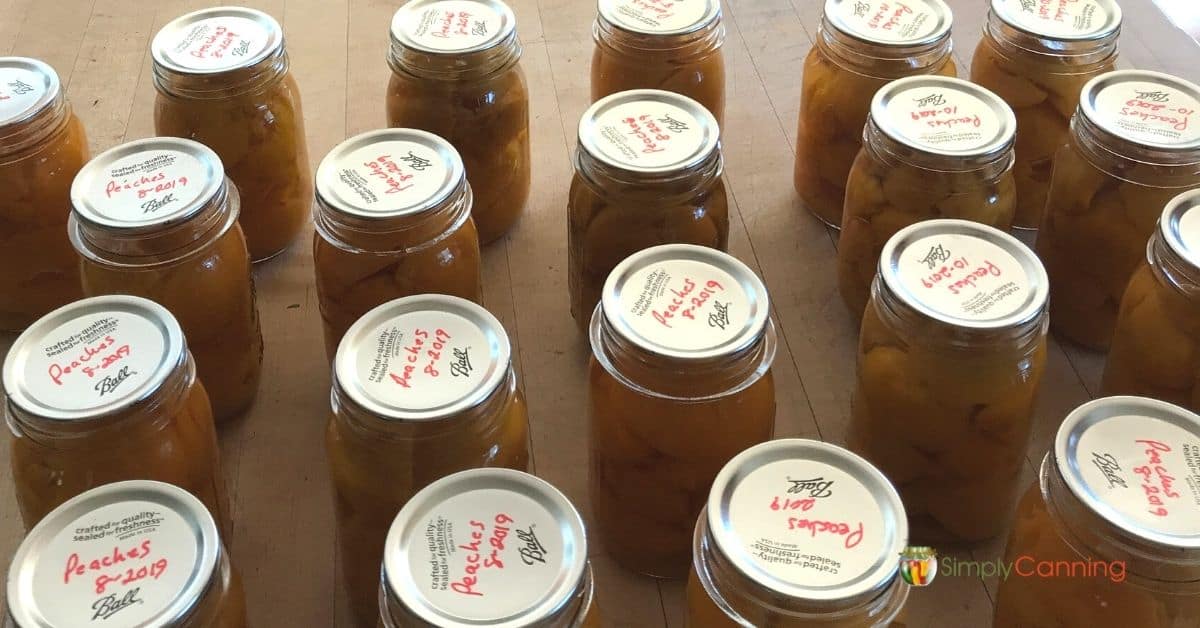
- Label each jar with the contents and the date — at minimum, the year
You might be thinking, do I really need to label it? I can see what it is. Trust me on this one. You might forget.
Plus you can do things like label with ingredients, or food type. What if you make applesauce three times this season from different apple varieties and want to know which you liked best? What if you find a mystery jar in the back of the pantry two years from now?
Just label it. Future you will be grateful.
Store jars in a cool, dark, dry place — a pantry works. A cool basement. Avoid areas with hot pipes, high humidity, or direct sunlight. Avoid freezing in the winter too. Don’t store in an unheated shed or garage.
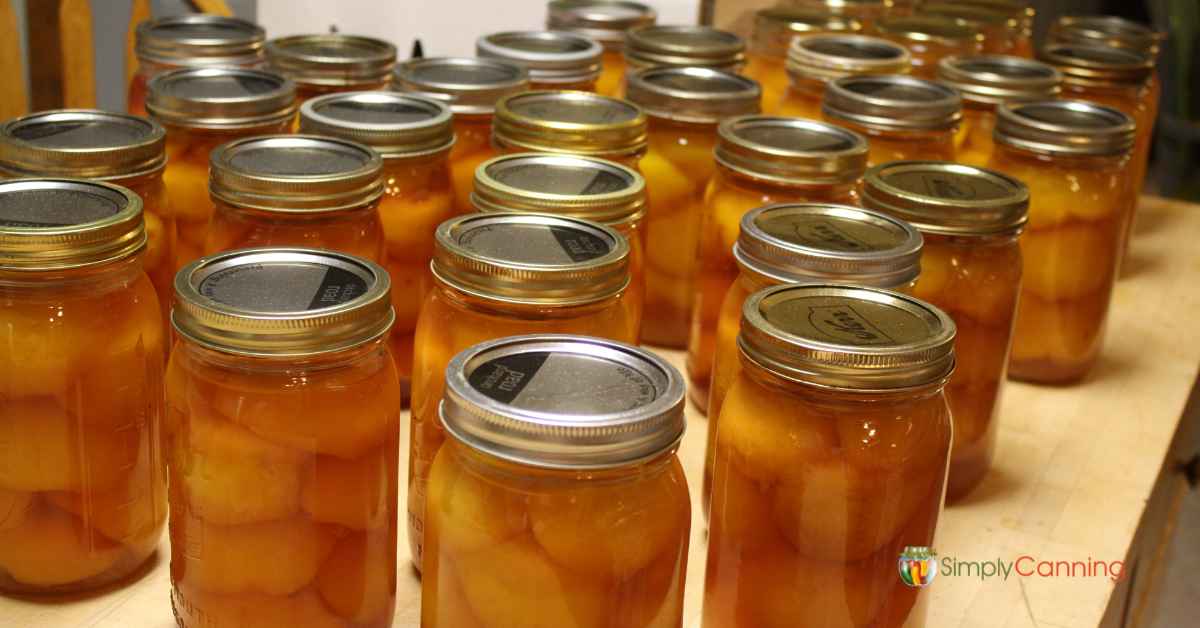
Stand back and admire the colorful, gleaming jars of nutritious foods ready for your family. Water bath canning is so easy!
What? You are tired?! Yes, but it is a satisfying tired, is it not?
Almost there!
We’ve covered a lot of ground so far. I’d like to address some frequently asked questions, and even answer a few questions you might not know to ask.
I’ve got a printable checklist/recipe for you at the end of this post.
Understanding Why It Works
You don’t actually need to understand the science to can safely, but my goal here is confidence. And I find that knowledge often conquers fear. Many beginners find it reassuring to know why the process works. Here’s a quick overview of what’s happening in that canner.
Heat penetration: As the jars boil, heat works its way through the contents all the way to the center of the jar. This heat stops spoilage organisms like enzymes, molds, yeasts, and some bacteria. Processing time in a recipe is important. You need enough time for the heat to reach the center of the jar heating the entire thing to the appropriate temperature.
Vacuum seal formation: Heat during processing causes the food and air inside the jar to expand. As the jars cool, the contents contract pulling the lid down and create a vacuum seal. That vacuum is what keeps air, bacteria, and spoilers out during storage. It’s also what makes that satisfying ping!
What’s Next?
You did it! Water bath canning is one of those skills that feels a little intimidating at first. Once you’ve got a batch or two under your belt, you’ll wonder why you waited so long.
When you’re ready to start: Browse beginner-friendly water bath canning recipes.
Curious about other methods? Each one opens up a whole new category of foods to preserve:
- Steam Canning Start Here — a wonderful alternative for high acid foods that uses less water and less time. I love it.
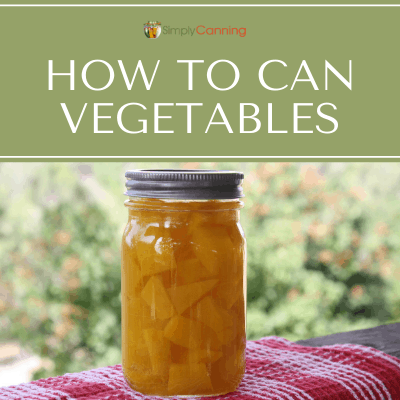
- Pressure Canning Start Here — this is how you preserve vegetables, meats, and low acid foods.
Frequently Asked Questions
Properly canned, high-quality home-canned food is best used within 1–2 years for peak flavor and nutrition. It doesn’t “go bad” overnight after that, but quality does decline. This is another reason to always label with the date.
Yes, you can stack jars in a water bath! The rules are: all jars must be covered by 2–3 inches of water at a full boil, and you need a rack between layers to keep jars stable. I did a video about stacking jars if you want more details.
No. Lids are designed for one-time use. The sealing compound degrades after processing and can’t reliably seal again. Screw bands, however, can be reused as long as they’re in good shape — no rust, no bending
This will depend on the food you are making. Some items are processed for 10 minutes, some can be 30 minutes or more. Larger jars will usually be processed longer that smaller jars. And prep time will vary as well. Jam and jelly may take a while to make, while tomatoes can be a pretty quick prep time.
Printable Checklist
Water Bath Canning
Equipment
Materials
- High-acid Food fruit, jam or jelly, pickled items; any high-acid food that you want to process
Instructions
- Fill your canner about half full of water. Start heating it up. The goal is for the canner to be hot but not boiling as you are filling your jars. You want enough water to cover your jars when they are filled and in the canner. Have a teapot of hot water available in case you need to top it off.
- Wash and rinse your jars and lids. (They do not need to be sterilized.) Keep your jars hot until use. The best way is to place them in the canner rack raised above the water while it heats up.
- Prepare and fill jars according to the canning directions for that food. Remember proper headspace, removing bubbles if needed, wipe down the rims of your jars, and put on the lids and rings.
- Place the filled jars in the canner. Continue until all jars are filled.
- Lower the jars into the water; if needed, add hot water so the jars are covered by about 2 inches. Put your lid on the canner and raise your heat and bring to a boil.
- When your water is at a rolling boil, start your processing time at that point. The proper processing time for your altitude will be given in your recipe. Different altitudes will have different times. The higher you live, the longer you process. Make sure the water remains above the level of the jars. Add hot water as needed.
- When the processing time is completed, turn off the heat. Open the lid to allow steam to escape. (Carefully, don't let it hit your face or arms!) Wait 5 minutes. Raise the rack and jars above the water. Allow them to rest another 5 minutes. Now remove your jars. (Optionally, you can wait another 5 minutes if the contents appear to be bubbling so hard it is coming out of the jars.)
- Put the jars on a counter with a thick towel beneath them to protect the hot jar from the cool counter. Allow them to cool to room temperature undisturbed. 12 hours is suggested. Do not try to speed up the cooling process.
- When they are cool, remove the metal bands, check the seals, and store the jars in a cool, dark place.
Pin This to Find Later!

When processing jam or pickles in a water bath, do they keep cooking, and should allowances be made for that? My pickles are a bit soft when put in a water bath and jam overcooked
Ah soft pickles is something we all have dealt with at some point. No you should not change the recipe directions. I do however have some tips for keeping home canned pickles crunchy. . As far as the jam, This will partly depend on your method. If you are using a packaged pectin… follow those directions. If you are making jam without added pectin, then it could be you are cooking it longer than needed. But this is before it goes in the jar. It does need to be processed for the full time. Check this post for some canning… Read more »
I’m going to be canning pickles but will be using a metal trivet instead of a canning rack. My question is when you get to the part where you raise the rack and let it sit over the water what do I do since I won’t be able to hang the trivet on the sides of the pot?
What I would do is just let the jars rest in the water for an extra 5 minutes or so then just use a jar lifter and remove them to a counter. Set them a few inches apart so they cool. Please use a jar lifter! Tongs will be very awkward and you are likely to drop a jar. They just don’t work very well.
Dear Sharon,
Do I have to change the water before adding another batch to wash?
Mom use to empty it halfway and then add more cold water, and let it boil again.
I am assuming you mean washing (rinsing) your food before you can. I would say it depends on the food and how dirty it is. I always wash in fresh water. But if your water is not getting dirty and you need to conserve water you could reuse it.
why do you take the bands off the jars?
The bands tend to rust if you leave them on the jars. And potentially could hide a failed seal. If a seal fails in storage I want to know that it has failed. I don’t want the band to hold the lid on, I want the seal to hold the lid on. Great Question!
This story will start as many canning stories start…My Mom… My Mom had seven children. This wasn’t way back when, way out on the farm. This was in the suburbs (although most didn’t call them that then) in the 60’s and 70’s (7 kids takes awhile) when families of that size were rarer. My Dad was an only child and wanted a large family. He bought a tiny house on 3 lots and proceeded to add on and built us a home to fit. 5 bedrooms library, huge rec-room storage room and a living room that was 18′ X 53′.… Read more »
Thanks for your story Dan. and thanks for pointing out the typo! I’ve got it all fixed now.
Loved the part about waiting for the ‘ping’ when the jars are sealing after processing them. I always had the same reaction that you described. Thank you for the great memory.
Mary in Nevada
I canned spaghetti sauce without meat in a hot water bath; however, I forgot to add 2 tablespoons of lemon juice. Will they be safe? The jars sealed.
Marlene, I don’t believe your recipe is safe as you canned it. My guess is it is NOT safe. I’m assuming you added onions or peppers to your sauce in which case it is likely you actually needed to use a pressure canner to process it. Here is a safe way to can spaghetti sauce without meat.
Hi.
Can I water-bath can with the bottle sideways?
Joe
Joe, no the jars must be in the upright position. So if you are water bath canning your pot must be deep enough for the jar to sit upright and still be covered in water.
How many minutes to can by water bath for peaches in quarts?
Follow the processing time for your altitude on this page. 🙂 https://www.simplycanning.com/canning-peaches/
-Rachel (Sharon’s assistant)
Do I have to first blanch yellow cherry tomatoes before water bath canning? Prefer not to unless I have to for safety. I thoroughly washed the tomatoes first, sterilized jars, lids, put tomatoes in jars with 1/4 tsp citric acid, debubbled jar, allowed for headspace, covered tomatoes with boiling water in jar allowing for headspace, then processed jar in boiling water for 40 min. Is that OK?
Yes, you should blanch and peel your tomatoes. It is a bummer because they are so easy but the good news is… they peel really easy! Fast blanch as they are so small and just pinch one end and the skins pop right off. Now having said that, this is somewhat of a debate in the canning world. Some people do leave on skins or just blend tomatoes up to make a sauce. But just know that all tested methods indicate peeling those tomatoes. Even if you wash them, the bacterial load of washed tomatoes will be more than peeled… Read more »
Hi Sharon, Going to start my first project tomorrow making blackberry jam! I don’t have a water bath canner! Have a pot – Paula dean porcelain with non stick. Smooth bottom. Can I use this? Also I don’t have a jar lifting rack. Do I need one? I have a rack to keep jars off the bottom-just doesn’t have handles and jar lifting rings. Do you recommend I get one for my new presto 23 quart pressure canner I ordered this morning?
Love your site! I’m taking the 7 day free course! Day 2!
Thank you!
Laura B
Hi Laura, For waterbath canning all you need is a pot deep enough that your jars can be covered with a couple inches of water while bioling and you have a rack under your jars. the handles are handy but not required. YOu can pull your jars out one by one with a jar lifter. I do recommend a jar lifter OR the canning rack. The jars will be super hot and a pot holder or towel is difficult to handle them. I talk more about canning racks here. As far as the pressure canner it should come with a… Read more »