Canning Sauerkraut: Easy Water Bath Recipe
This page may contain affiliate links. More Information.
This post will show you how to can fermented sauerkraut safely using a water bath canner.
I’ll show you how to make the sauerkraut first and then walk you through the water bath canning steps so you can store it safely on the shelf.
First ferment, then can it up!
I’ll divide this page into a couple of parts.
Canning Sauerkraut involves several separate steps so you might think it will be hard, complicated messy! Totally wrong impression. It is actually pretty easy. Just take one step at a time.
- First the fermenting part. (There’s a dedicated article if you just want to make fermented sauerkraut.)
- Then how to can your sauerkraut.
That fermenting step is important if you want to can it. It’s what makes sauerkraut safe for water bath canning. This is not plain cabbage, so please don’t skip that part.
A Quick Word About Fermenting (Before We Talk Canning)
Sauerkraut must be fermented before it can be safely canned. The fermentation creates the acidity needed for water bath processing.
I’m not going to walk through every detail of fermenting here. If you want the full process, equipment options, and troubleshooting tips, and a video of the process, see my post on fermenting sauerkraut. That post goes step by step and answers all the “what if” questions.
Below is just a general overview so you understand what’s happening before canning.
Fermenting Basics
Preparing your cabbage
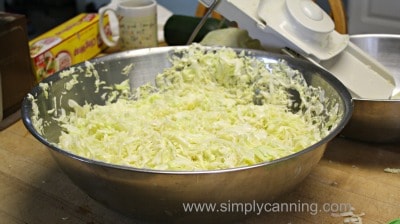
Find some nice fresh healthy green cabbage. Remove any outer leaves that are damaged or are wilted. Core and shred the cabbage. Now weigh it. The amount of salt you use is based on the weight of your cabbage.
Mix in 3 Tablespoons of salt for every 5 pounds of cabbage. Cover cabbage with a cloth and allow it to rest for at least an hour. It will become wilted and soft.
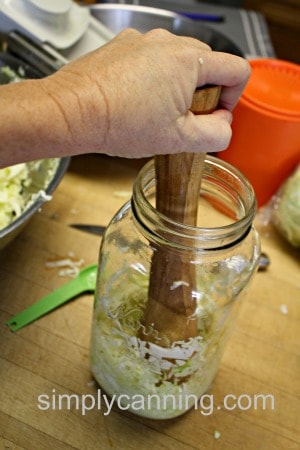
Packing for fermenting
Pack your shredded cabbage tightly into jars in layers. Add a layer, press it down, add another layer, press it down. As you work your brine will start rising and cover the shreds.
(Reminder, for a video of this process see How to Make Fermented Sauerkraut at Home)
Stop packing when you are 3-4 inches or so below the top of your jar. Right around the shoulder of the jar. The cabbage will likely expand as it ferments so you need that headspace.
If you don’t have enough cabbage juice to fully cover, add some brine to the jars so the cabbage is completely covered with a couple of inches of liquid. Be generous.
Extra Brine Recipe – 1.5 Tablespoons salt to 1 quart water. Bring this to a boil and let it cool.
Next, weigh your cabbage down. The goal is to keep the shredded cabbage submerged.
- Use a saved leaf from the cabbage itself.
- Pickle Pebbles are another product that I have that work pretty slick.
- If you are using a crock, try using a plate that will just fit inside the crock close to the edges. Place something on top to keep it down. A small jar filled with brine works.
- The simplest method if you don’t have handy weights, is to place a small brine-filled storage baggie on top. Fill this with a brine mixture, not plain water. If the bag breaks you don’t want to lower the salt content of the brine in the ferment.
After weighing down, cover your jars.
I’ve got a review of 3 fermenting lid methods and my favorite here.
Edit to add: Since I wrote this article I’ve also tried the Kefirko Fermenting Kit. It’s now my favorite… with pickle pipes a close second.
The wait for fermentation
Now for the fun part. The wait. Store jars in a cool place for 3 to 6 weeks. I label mine with the start date, and an estimated end date so I know when to check it. Bubbles are normal. Smells are normal. This is all part of the process.
Once it’s fermented to your taste, it’s time to decide how you want to store it.
Choose How to Store Sauerkraut
Once your sauerkraut is fermented to your liking you have choices.
- Move your ferments to a refrigerator and store there. It will last a very long time. Remember this is a fermented product which has all kinds of great health benefits. Probiotics which are great for the gut.
- Freeze in freezer containers.
- Process your sauerkraut in a water bath canner so you can store it on a shelf. (directions below) Yes you do lose the probiotic benefits with canning. But it is still better than store bought stuff!
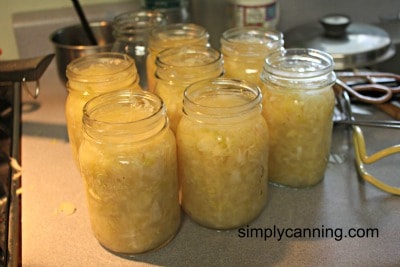
I do both. I have jars in my storage cupboard, and I have sauerkraut in the fridge to use as needed.
Canning Sauerkraut (water bath method)
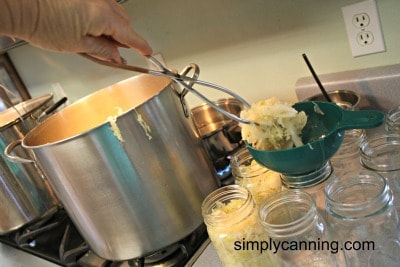
Hot Pack
This is a hot pack. Heat your sauerkraut before filling your jars for processing. Pour your sauerkraut into a large pot and bring to a low boil.
This heating step is required. The canning process was tested this way, so don’t skip it.
Fill jars
Either pint or quart size jars work. Leave 1/2 inch headspace. Make sure brine covers solid ingredients. Brine should cover solids.
Wipe your rims clean and place your lids on the jars with the screw bands.
Process in a water bath
Process in a water bath canner according to the process times listed below. Be sure and adjust for both your altitude and jar size.
- If you need more on how to use a water bath canner check this page.
- See the printable card at the bottom of this post as well.
Pints are processed for:
- 0-1000 ft / 10 minutes
- 1001-3000 ft / 15 minutes
- 3001-6000 ft / 15 minutes
- 6001 ft- and higher / 20 minutes
Quarts are processed for:
- 0-1000 ft / 15 minutes
- 1001-3000 / 20 minutes
- 3001-6000 / 20 minutes
- 6001 ft and higher / 25 minutes
Remember: This cabbage product is safe for the water bath only because of the fermenting you have done. Please don’t adapt this recipe to unfermented cabbage!
Frequently Asked Questions
A water bath is sufficient for sauerkraut. The fermentation process makes this acidified food. So the pressure is not needed. If you try to process in a pressure canner your kraut will be soft and soggy.
Yes, the canning process was tested with a hot pack. Some people don’t like to heat their sauerkraut but if you want to can it you’ll need to. Remember this does remove the probiotics and it is no longer a raw food if you can it. But for convenience canning is a good option.
Yes, the canning process does stop fermentation. More importantly, canning does stop the benefits of the probiotics in your fermented sauerkraut.
This is why I like to store some of my sauerkraut in the fridge and some canned. I’ve then got the probiotic benefits of what is in my fridge and the jars on the shelf are great for later convenience.
Recipe Card
Sauerkraut Recipe
Equipment
- Mandolin Slicer or something else to slice cabbage finely
- Kraut Pounder or a spoon works too
- Weight like Pickle Pebbles, plate, small jar or bag filled with brine, etc.
- Fermenting Lid optional
Ingredients
- 5 pounds Shredded Cabbage
- 3 Tablespoons Pickling Salt
- Water combined with more salt for additional brine if needed
Instructions
- Remove outer leaves, core cabbage, and slice in half. Slice cabbage into very thin slices.
- Weigh out 5lbs of shredded cabbage into a large bowl and thoroughly mix in 3 Tablespoons of salt.
- Allow cabbage to rest for about an hour, until wilted and slightly juicy.
- Pack tightly into containers. Add one layer, press down tightly. Add another layer, press down tightly. Continue until all cabbage is used.
- Add brine if needed. Cabbage must be fully covered. To make brine; bring one-quart water and 1.5 Tablespoons salt to a boil. Let cool.
- Weigh cabbage down to keep it below the brine at all times.
- Cover your container with a cloth or fermenting lid. Label jars with start dates and estimated end dates.
- Store your jars for fermenting in a cool, dark place. The best temperature is 70-75 degrees for about 3 – 6 weeks. This may vary according to your actual temperature. Cooler temperatures may require more time, warmer temperatures may require a shorter time. Remove scum if needed.
- Sauerkraut is done when fermented to your tastes. Store in the refrigerator once complete or continue to water bath canning instructions.
Processing with Water Bath Canner
- Pour fermented sauerkraut into a large pot and bring to a low boil.
- Fill jars with hot sauerkraut, leaving ½” headspace.
- Remove air bubbles and check your headspace again. Adjust if needed.
- Wipe rims of jar clean with damp towel or paper towel.
- Add your canning lids and rings, finger tight.
- Place jar in the canner. When all jars are filled, process according to the instructions below
- After all jars are in the canner, lower rack into the water. Bring to a boil.
- When the water comes to a rolling boil, start your time.
Processing Time
- Process pints for 10 minutes or quarts for 15 minutes. Be sure and adjust your time for altitude:
- Pints: 0-1000 ft / 10 minutes1001-3000 ft / 15 minutes3001-6000 ft / 15 minutes6001 ft- and higher / 20 minutes
- Quarts:0-1000 ft / 15 minutes1001-3000 / 20 minutes3001-6000 / 20 minutes6001 ft and higher / 25 minutes
- Process for the full time indicated, adjusting the heat as needed to maintain a boil for the entire processing time.
Cool Down Time
- When processing time is completed turn off the heat.
- Remove the canner lid and wait 5 minutes.
- Remove your jars. (optionally you can wait another 5 minutes if the contents appear to be bubbling so hard it is coming out of the jars)
- Put the jars a few inches apart on a thick towel and allow them to cool to room temperature undisturbed. 12 hours is suggested.
- When the jars are cooled, remove the metal bands, check the seals, wash jars, dry completely, and store in a cool dark place.
Notes
- NCHFP

Sharon, you make everything that looks complicated, so much easier! The best investment I ever made years ago was your cookbook!
Oh my goodness Denise I missed your comment. Thank you so much. I’m happy it has helped!
Oh please don’t worry. I’m sure you’re really busy! Let’s hope for wonderful harvests this year!
Just curious, but wouldn’t pressure canning preserve the nutritional value while still also allowing the kraut to be shelf stable?
A benefit of fermenting is the probiotics that result. The high temperatures of canning make sauerkraut shelf-stable, but that heat also kills off the beneficial probiotics. Probiotics are a living bacteria. (good ones!)
The live, gut-healthy bacteria (probiotics) are destroyed in the process. So, canned sauerkraut still has nutritional value, but it loses the probiotic benefits that fresh sauerkraut offers.
Can I use my vacuum sealer to can fermented sauerkraut. If so do I have to refrigerate it or is it shelf stable.No, this vacuum sealer is not a replacement for canning. It does not make things shelf stable. It is for dried goods, or it can be helpful keeping fresh foods fresher in the refrigerator.
How long do you can it if it has little Smokey’s in it and do i now need to pressure can it
Jessa, If you’ve got little smokeys in it I would not can it. I have not seen a recipe that has been tested for time etc with those ingredients.
I’m assuming you can remove the pickle pipes and pickle pebbles and just use regular lids when moving to the fridge?
Thanks!
Yes that works fine.
Thanks!
Can I pack the kraut into smaller jars, and, if so, how long do I process them for? My husband is the only one who eats kraut and I’d love to make some myself as I’m sure it will taste better than the cans from the store. But 1 can (about a pint) is too much and he throws it away after about a week because it is mushy. I want to pack my kraut in half- or even quarter-pints for one or two meals for him. Is that possible?
Debbie, Yes you can put your sauerkraut in smaller jars. But you’ll need to process for the pint size. Don’t just cut your time down. Some foods I don’t recommend it for quality issues because the food would be over cooked. But I think sauerkraut would be fine for the longer processing time. You’d have to try it for quality, but it is safe. I’ve got more on using smaller jars when canning here… The other option is to just can it in pint. When he opens a jar, put half of it in the freezer for next time. Again… Read more »
Hi. I have prepped my cabbage and have the fermentation process started. They have been processing for 3.5 days. I am using the pickle pipes as my lids. I made sure that the brine was over the cabbage and I am using whole cabbage leaves to hold the shredded under the brine. Already the brine has increased in the jars and there is no longer a two inch space between the brine and the top of the jar. Do I need to empty out some brine and how often during the process do I need to do so?
Yes, the brine does sometimes swell as it is fermenting. What I do is place my jar in a container or bowl to catch any overflow. On occasion I’ve ended up taking off the pickle pipe and use a non-metallic spoon to press down a bit on the ingredients. This releases some of that air. You could also spoon off some brine if you think more needs to come out. Then just put your pickle pipe back on and continue the process. It should turn out great!
Looking for a recipe for sweet kraut, almost like a relish.
Gregory, I don’t think I’ve seen a recipe like that for canning purposes. If you want to make it to store it in the refrigerator I bet you should be able to find it. I don’t know of one myself. Do a search on fermented sweet sauerkraut. Or something similar. Just remember if you want to store it in jars without refrigeration you’ll need to use a tested recipe like this one. Fermenting and canning are two different methods.
After I let it sit and ferment, can I then can it in the same jar?
No. You’ll want to remove it from the jar and heat it for canning. Follow the steps in the Canning Section for processing.
I’m ready to bottle but there isn’t a lot of liquid left (always had enough to cover while fermenting). Do I worry or just pack my jars?
I would personally take out some of the sauerkraut. Use a slotted spoon and leave as much juice behind as you can. Eat that on brats for dinner tonight. 🙂 Or put it in the fridge. Just take enough so that you’ll have more brine for the sauerkraut that you’ll pack in jars. And then next time remember to be a little more generous with your brine. 🙂
I have been canning kraft for a few years now, ferment for approximately 6 weeks, scrap off top of crock, fill sterilized jars with kraft and hot bath 15 minutes for pints last 2 years we had many jars that turned dark and the taste and texture was wrong, what did we do wrong??.
Hi Shirley, It is hard to say what might have gone wrong. There are many variables with fermenting.
Be sure you are using the proper ratio of salt to cabbage. Check that you are keeping the cabbage down in the brine. There should always be a liquid layer on top. Any cabbage exposed to the air may spoil and mess with the rest of the batch. Make sure you are processing for the correct time for your altitude. (there is a chart above that shows the altitude and time needed.)
Better to use organic cabbage. Might not work with usual produce you buy in supermarkets.
So I put salt on my cabbage and let it wilt for awhile then stuffed it into jars and did a water bath for 25 minutes. All of my jars sealed. Will my cabbage ferment in 3-6 weeks or did I just can cabbage?
Hi Amanda,
Unfortunately, you just canned cabbage, which isn’t considered safe. 🙂 The cabbage has to ferment on the counter before being canned as sauerkraut. It won’t ferment properly in the jars once canned.
-Rachel (Sharon’s assistant)
it has been 8 weeks now
It taste salty is there anyway of removing some of the salt taste before canning
No not really. You don’t want to lower the salt content as that is preservative. Mine is not overly salty so just be sure you are measuring correctly.
After, and only after, canning you could rinse it just before you eat it or add it to your recipe. I also find salts like sea salt or redmond salt leave behind a better flavor as it fermints. I’ve never felt the need to rinse mine. Fair warning though, the minerals in the redmond salt will affect the color of your brine.
I am making kraut for the first time and it has been in a foodgrade bucket for about 3 weeks. When I check it, it does smell like kraut.but there is also a musty/ moldy smell when I first open the bucket. I do believe that where I have it in mybasement, fermentation isgoing to be pretty slow. Is that smell okay? How can I know when/if it’s ready? I’m not seeing scum. But there was a few small spots of mold on top of the plate I am using to weigh it down
Hi Lisa, it is hard to say without knowing just what you did but if it is moldy and smells moldy I don’t think I’d trust it.
How long will it keep in the fridge if not canned?
I’ve kept it for several months.