Easy Method for Canning Apple Pie Filling
This page may contain affiliate links. More Information.
Do you love pie, but never take the time to prepare it? I’ll bet if you start canning apple pie filling, and have it all ready and waiting on your pantry shelf, you’ll have it more than just at Thanksgiving.
Basic steps for canning apple pie filling; peel and slice apples, mix with apple juice, water, and lemon juice. Combine with sugar, Clear Jel, cinnamon, and nutmeg. Place this apple mixture in hot jars with 1 inch headspace and process using a water bath canner.
For additional ways to preserve your apple bounty, browse our list of recipes and tutorials. From canning and dehydrating to freezing, making jelly, and essential tools, we’ve got you covered Preserving Apples

Extended Directions and Tips for Canning Apple Pie Filling
Quantity
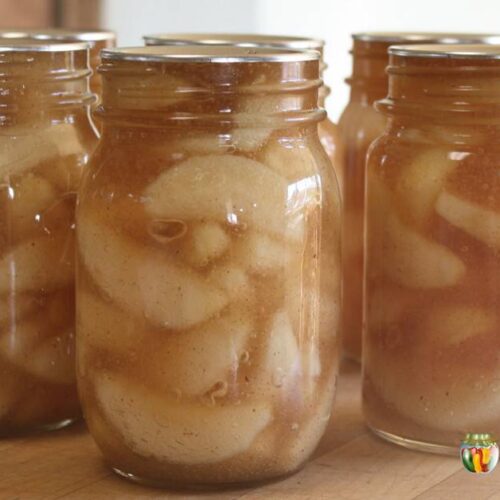
The recipe included below will make 7 quart jars of filling or about 14 pint jars.
Approximately 19 pounds will yield a canner load of 7 quarts;
You can reduce this recipe if you’d like to make less. Ingredients for 1 quart jar are as follows. Multiply this by however many quarts you want to make.
- Ingredients per 1 quart pie filling
- blanched sliced apples – 3 1/2 cups
- sugar – 3/4 cup
- clear Jel – 1/4 cup
- cinnamon/nutmeg 1/2 tsp
- cold water
- apple juice
- bottled lemon juice
It is ok to can this in pints or quarts depending on your preference. Enjoy!
Know your Canner
This recipe can be processed in a water bath canner (also known as a boiling water canner). It is also a great option to use a steam canner. (not to be confused with pressure canning).
To get familiar with these methods, I recommend checking out these helpful guides: They’ll walk you through the ins and outs of each method, ensuring you’re all set up.
- How to Use a Water Bath Canner (hot water bath)
- How to Use a Steam Canner
These are the basic prep and canning steps with tips following. There is a printable version and more Frequently asked Questions at the bottom of this page.
You’ll prepare your apples, prepare your thickened filling, mix the two together, fill jars and process.
Gather your canning supplies and ingredients.
- water bath canner
- canning jars
- canning seals and rings
- jar lifter and canning funnel
- ladle
- 2 large stock pots
- apple peeler-corer-slicer (this is optional)
- 6 quarts peeled, sliced apples (24 cups)
- 5 1/2 cups sugar
- 1 1/2 cups Clear Jel
- 1 tsp. cinnamon (to taste)
- 1 tsp. nutmeg (to taste)
- 2 1/2 cups water
- 5 cups apple juice
- 3/4 cup lemon juice
Prepare your apples.
- Begin by peeling, coring, and slicing your apples.
- Boil the sliced apples for 1 minute, then drain and keep them covered to keep warm while you make your thickener.
- Heat and stir until it becomes thickened and bubbly.
Cutting up the apples.
The apples must be peeled. The testing done for this processing method is with peeled apples. The slices should be 1/2 inch wide. Don’t go super chunky or the processing time may not be sufficient. That 1/2 inch is about right.
You could use an apple peeler corer slicer for this step. It will cut your prep time in half! However, keep in mind that it does slice your apples very thin. I find that the super thin apple slices tend to end up too cooked for my liking. I simply peel and slice by hand 1/2 inch thickness.
Methods to prevent apples from browning.
You’ll need to blanch your apples to heat them up before combining with the thickened syrup. It is easiest to slice up all the apples and then heat them all at the same time.
To do this you might want to slice them into a treatment to prevent browning and then drain and blanch. It depends on how fast you are. If you get them all sliced quickly you can skip the treatments. I always treat mine because it is pretty simple and I never know when I’m going to be interrupted! I don’t like browned apples.
To treat your apples, prepare one of these solutions in a large pot and slice apples into the treatment. My preferred choice is saltwater. I was surprised at how well it works. You will drain the salt water and won’t notice any salty taste.
- Sugar Solution: Dissolve 3-4 tablespoons of sugar in 1 quart of water.
- Lemon Solution: Mix 2 tablespoons of lemon juice in 1 quart of water.
- Ascorbic Acid Solution (Fruit Fresh): Follow package directions for the white powder.
- Salt Solution: Dissolve 2 teaspoons of salt in one quart of water. (Currently my favorite)
Blanching apples
This recipe is a hot pack recipe. The blanching step is important. The apples need to be lightly heated which breaks the apple down just a bit, and releases a lot of the air in the fruit.
When all your apples are peeled and sliced, you are ready to blanch the apples. Simply drain off the treatment water and start blanching. You’ll want to do this in batches of about 5-6 cups. Add a batch of apples to a pot of boiling water and boil for 1 minute to thoroughly heat. Drain and cover to keep them warm while you make the thickened syrup. Blanch all apples.
Using a basket and large stock pot is the easiest way to do this. If you’ve got a blancher that works as well.
Prepare Your Thickened Syrup.
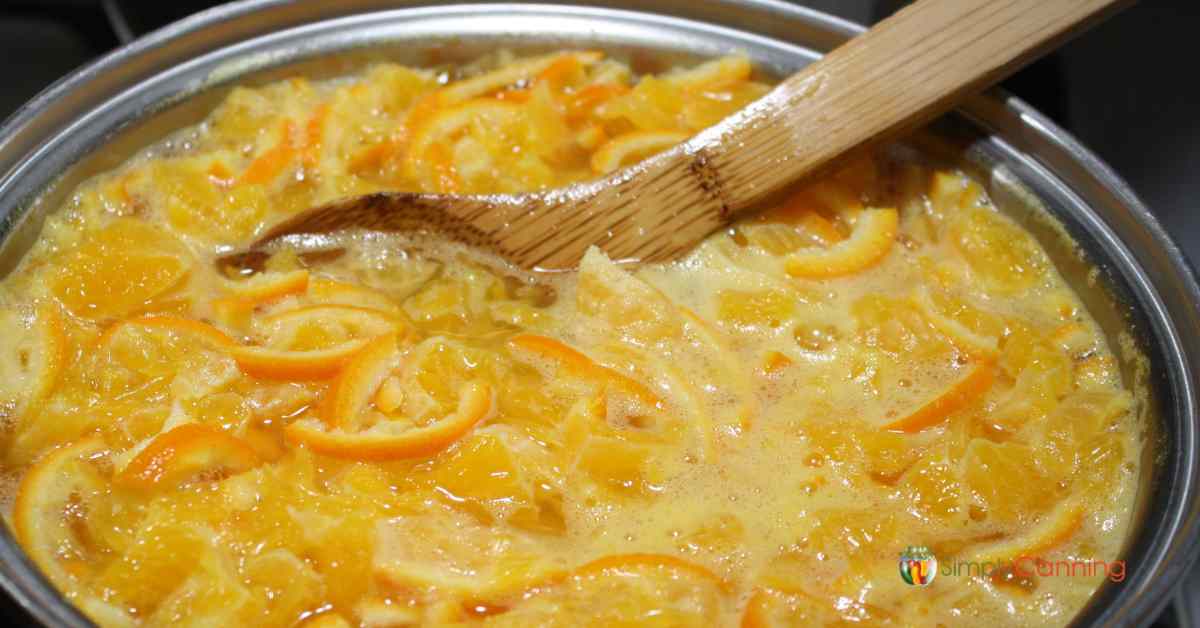
- Mix apple juice, water, sugar, Clear Jel®, cinnamon, and nutmeg.
- Heat and stir until it becomes thickened and bubbly.
- Add lemon juice and boil for 1 minute.
Combine sugar, Clear Jel®, and cinnamon or nutmeg with water and apple juice. (don’t add the lemon juice yet!). Cook this and bring to a low boil until it starts to thicken up. Stir constantly so it doesn’t scorch.
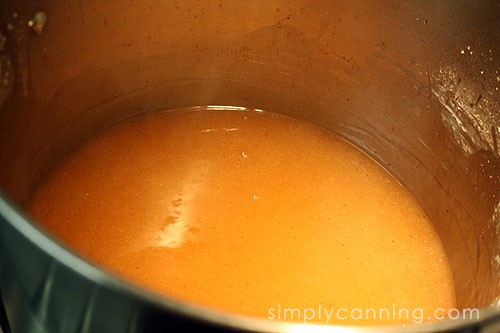
After it is thick and bubbly, add lemon juice and boil 1 minute, stirring constantly.
- It’s this combination of apple juice, water and lemon juice that makes apple pie filling safe for storage on the shelf. Please do not alter this ratio.
- You may adjust the amount of sugar to suit your taste.
- The cinnamon and nutmeg are optional. My husband is not a big cinnamon fan but he likes amounts I include here. If you love cinnamon you might want to add a little more.
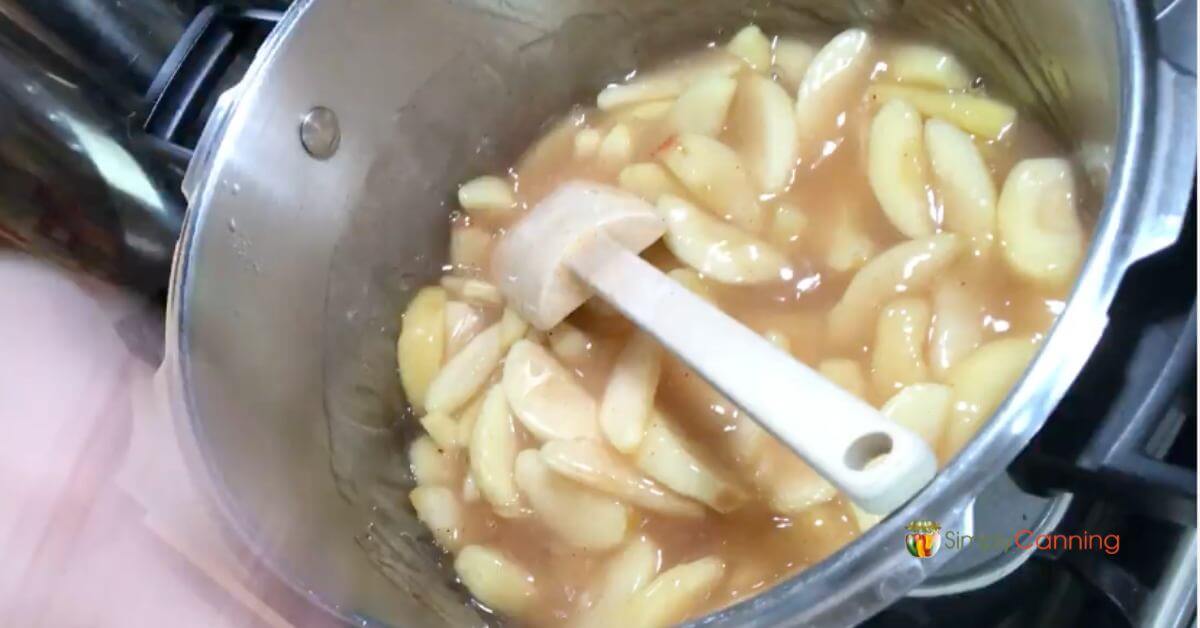
Combine apples and syrup.
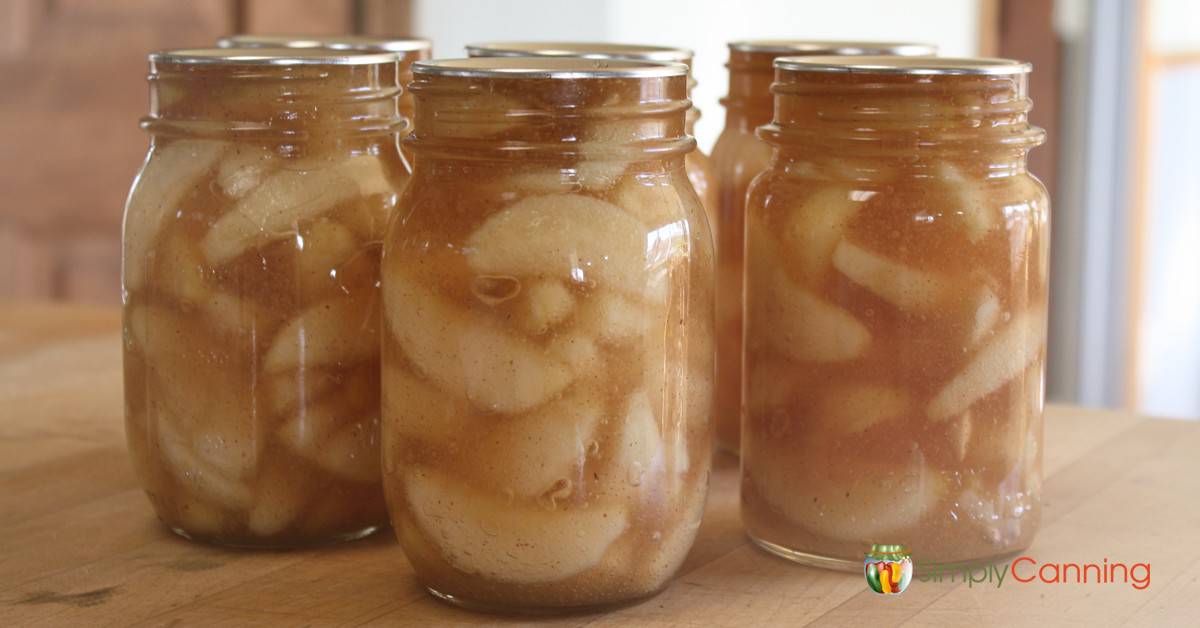
Mix thickened syrup and apples together, fill jars, and process.
- Gently combine thickened syrup and warmed apples.
- Fill each jar, leave a 1″ headspace.
- Eliminate air bubbles, wipe rim, and place the seal and ring.
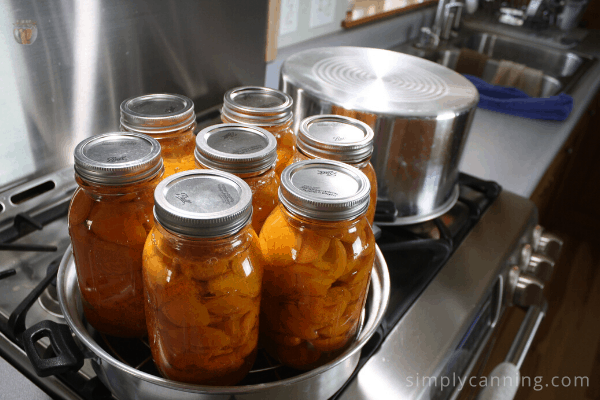
- Position the jar in the preheated canner. Repeat for all jars.
- Follow the processing times outlined in the chart below.
Fill jars with filling and remove air bubbles. Leave a 1″ headspace.
Here is a video clip of how I fill my jars.
This is taken from our Apple Pie Filling tutorial in the Canning Projects package. (link opens in a new window)
Use a bubble tool to run down the sides of the jar after filling. The syrup sometimes traps air bubbles and you want to release that. Just stick the bubble tool down in the jar and move things around. Running the tool down each side is a good idea.
After releasing any bubbles be sure and check your headspace again. Sometimes it will need to be adjusted. Top off with syrup if needed, or pull out an apple piece or two if the headspace is too high.
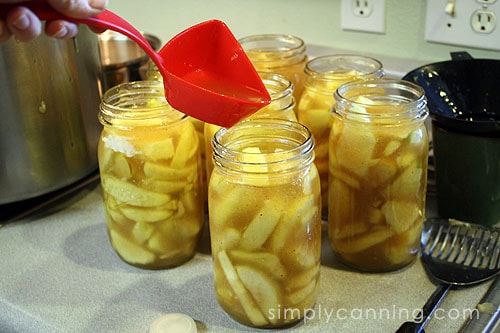
You’ll find that filling the jars can be a messy business! This is sticky sweet stuff. Be extra careful to wipe the rims off before you place the lids on the jar. You don’t want sugar or bits of syrup to interfere with the seal. ‘
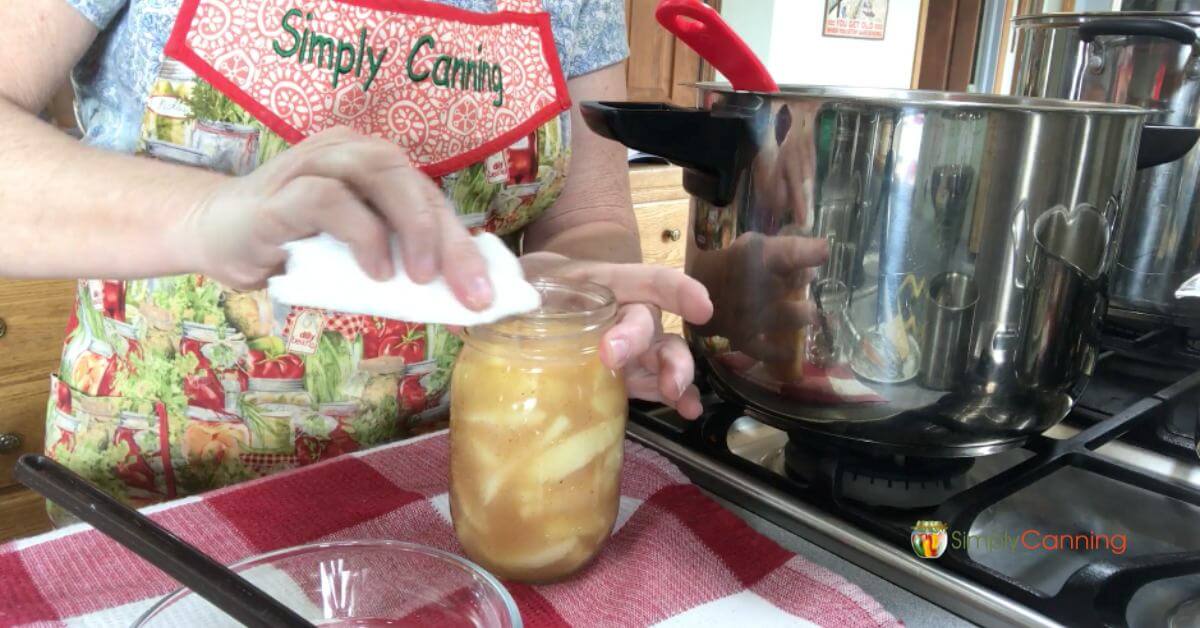
Place the lids on and add your screw bands.
When all jars are filled and in the canner, lower the jars into the water.
Processing
Place the jar in the warm canner. Proceed to fill all jars placing them in the canner.
When all the jars are filled, bring the water in the canner to a boil. When a boil is reached that is when you’ll start your timing.
Process for the length of time on the chart below. Adjust for your altitude.
Processing Times for Water Bath Canner (Hot Pack) Altitude – Pints and Quarts are Processed the Same
- Altitude – Time to Process
- 0-1,000 ft – 25 minutes
- 1,001-3,000 ft – 30 minutes
- 3,001-6,000 ft – 35 minutes
- above 6,000 ft – 40 minutes
After your time is over, turn the heat off remove the lid and allow the canner to rest for about 5 minutes. Then bring your jars up out of the water. Allow them to rest for another 5 minutes. Then remove the jars and place them a few inches apart on a thick towel to cool completely.
This slow cool down time helps with siphoning and liquid loss issues. You can read more about why siphoning happens sometimes here. It does not mean to leave the jars in the canner for hours. Just take a few minutes to allow the jars some resting time.
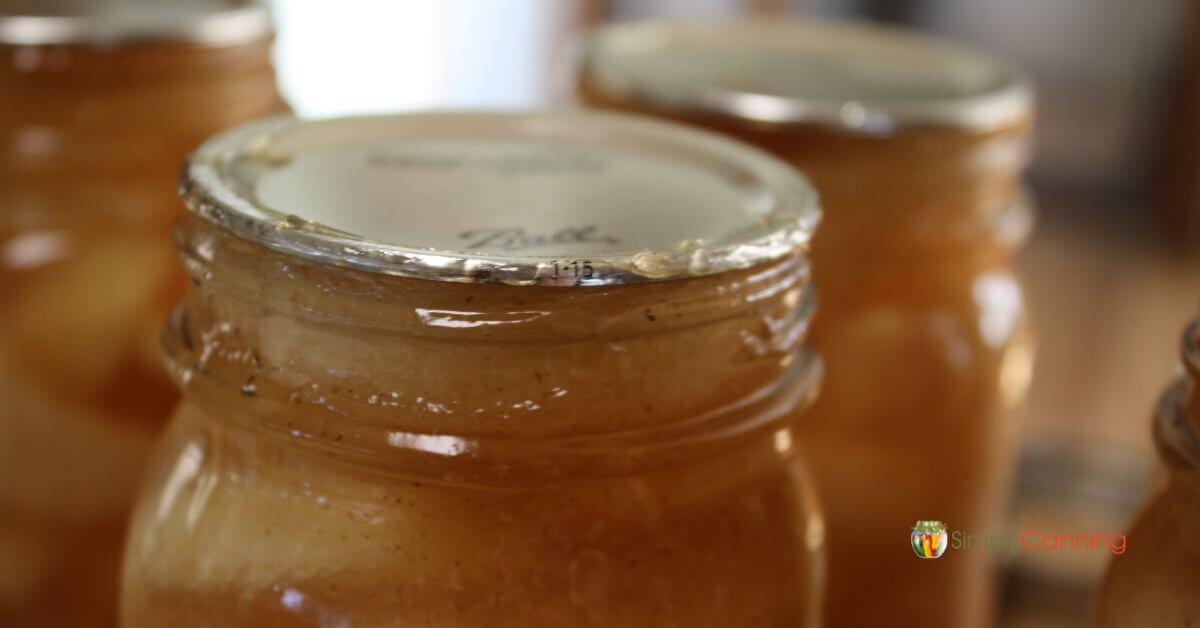
Leave them alone for about 12 hours. When they are cooled remove the metal bands, check the seals, label the jars and store them away!
Remember…. apple pie filling is a good candidate for steam canning. I’m using steam canning more and more. If you want you can also do half pints for small individual serving dessert jars. You’ll also process for the same 25 minutes.
Pressure Canning Apple Pie Filling
As a fruit product apple pie is safely canned in a water bath or steam canner. As far as I know there are no processing instruction for pressure canning. If you don’t have a water bath canner did you know you can use your pressure canner to do a boiling water bath?
Substitutions for Clear Gel
If you have not used Clear Jel®, I HIGHLY recommend it. Be sure you purchase the non-instant or regular cook type. It is a modified corn starch that is suitable for home canning.
If you don’t have Clear Jel, or don’t want to use it, I’d suggest just canning this recipe without clear jel, and thicken it when you open the jar to make your pie. There really is no substitution when you are canning it for storage on the shelf.
Canning apple slices for pie.
Another option to skip the clear jel is to can plain apples and add sugar and spices and thicken later. Directions for canning apples here. This is why I gravitate towards canning apples > apple pie filling these days. 🙂
You can also learn about canning apples without sugar here.
If you want to store it on the shelf, only clear jel is appropriate.
To thicken your pie later you can heat your apples, and gently stir in clear jel, flour, tapioca, cornstarch or whatever you want to bake the pie. BakingNeeds.com has a great article on thickening freshly made pie fillings with many ingredient options.
Why did my apple pie filling overflow all over!
Apple pie filling is notorious for overflowing the jars and creating a mess. This is also called siphoning, or liquid loss. It can make a mess.
To Avoid Leaking Pie Filling
- Have the correct headspace. The pie filling swells as it heats in the canner. Too little headspace and it will push out of the jar.
- Fully follow the blanching step. This removes air from the apples and helps to not have excess air in the jars during processing.
- Don’t over process. Your canner should be at a full rolling boil… but it doesn’t have to be so hard the water is splashing out of the canner. Make sure bubbles are happening and the water is rolling around.
And sometimes… it just happens.
If you end up with messy jars just wash them off and double check the seals. If they are sealed they are fine for storage. That seal may not be as strong, so check them every now and again and check it when you go to use the jar as well.
NCHFP vs Ball Apple Pie Filling Recipes
Years ago I used the Ball Blue Book recipe for apple pie filling. It did not include apple juice. The recommendations changed along the way and apple juice is now added into the filling. It adds lots of good flavor and is important for the tested process.
Both Ball and the National Center for Home Food Preservation instructions include lemon juice although in slightly different amounts. Another difference in these recipes is the seasonings. NCHFP uses just nutmeg, Ball uses nutmeg plus cinnamon. The good news is the seasonings are to taste.
One suggestion by the NCHFP is to add an extra 1/4 cup of lemon juice for each 6 quarts of slices if you’ve only got sweet apples. A tart apple adds good flavor to your pie filling adding that bit of lemon juice will make the flavor pop if all you’ve got is sweet apples.
Another suggestion by the NCHFP is to add a few drops of yellow food coloring if you wish. I have never added food coloring. Honestly I’m surprised at this suggestion. I don’t see how it is needed. But I suppose you could if you want.
*According to the Ohio State University Extension the sugar is adaptable to taste.
Here are the ingredients used in both the National Center for Home Food Preservation and Ball Canning Apple Pie recipes.
| For 7 quart quantity | NCHFP | Ball Recipe (current) |
| Sliced apples | 6 quarts (24 cups) | 24 cups |
| Sugar | 5 1/2 cups | 5 cups |
| Clear Jel | 1 1/2 cups | 1 1/2 cup |
| Apple juice | 5 cups | 5 cups |
| Water | 2 1/2 cups | 2 1/2 cups |
| Bottled lemon juice | 3/4 cup | 1 cup |
| Seasonings (this can be adapted to taste for either recipe) | 1 tsp nutmeg | 1/2 tsp cinnamon 1/2 tsp nutmeg |
| Yellow food coloring ( I don’t recommended) | 7 drops | No food coloring mentioned. |
How to Make Pie with Homemade Apple Pie Filling
Making your pie later is simply a matter of creating your crust, either homemade or purchased. Of course I prefer homemade, it’s so much better! But, I’ve been known to grab one of those refrigerator rolled up pie fillings when I knew I needed fast.
Place your bottom crust in the pie plate. Pour in your apple pie filling. The amount will depend on the size of your pie pan. For a 9 inch pie, I find that 1 quart is a little shy on filling but sometimes 2 quarts is a little too much.
My favorite way to handle this is to mix 1 quart pie filling, with 1 pint plain apples. This gives a perfect amount of pie filling and is heavy on fruit!
Top your filling with 2 T butter cut up. This is optional but oh my it adds so much flavor! I miss it when I forget.
Add your top crust. Pinch the edges together to seal. Cut a few slits in the top crust to allow steam to escape. Bake at 425 degrees 40-50 minutes. Watch for the filling to be bubbling through the slits to know when it is done.
Frequently Asked Questions
Most people say a tart apple is what you want for apple pie. But any crisp apple works. Softer textured apples like Red Delicious don’t turn out well. I like to combine a tart and sweet variety. Granny Smith is a great option for tart and crisp… and sweet varieties may vary according to where you live. Stayman, Golden Delicious, Rome, are all recommended.
Unfortunately there is no substitute for clear jel. It is the only recommended option for home canning any fruit pie filling.
It is generally recommended that you use home canned foods within a year for best quality. But don’t throw it away after that first year. Just make a plan to use it up. As long as the seal is intact it is a quality issue. The apples may be softer and the texture may suffer if you keep it longer.
Canning Apple Pie Filling
Equipment
- Vegetable Peeler or sharp knife
- Apple Peeler Corer Slicer optional, but very helpful
Ingredients
- 6 quarts Apples peeled, sliced
- 5 ½ cups Sugar
- 1 ½ cups Clear Jel
- 1 teaspoon Cinnamon
- 1 teaspoon Nutmeg
- 5 cups Apple Juice
- 2 ½ cups Water
- ¾ cup Lemon Juice
Instructions
- Start by preparing jars and getting water in the canner heating. You want the canner hot, but not boiling, when the jars are ready to be processed. See full water bath canning instructions here.
For a Hot Pack
- Peel, core, and slice apples into hot water.
- Boil for 1 minute, drain, and keep covered to keep warm.
- Combine apple juice, water, and lemon juice.
- Combine sugar, Clear Jel, cinnamon, and nutmeg.
- Heat and stir until thickened and bubbly.
- Add thickened syrup to your drained apples.
- Fill jar, leaving 1" headspace.
- Remove air bubbles, wipe the rim clean, and place on seal and ring.
- Place jar in the warm canner. Proceed to fill all jars.
- Process according to chart below.
Notes
Adapted from: The National Center for Home Food Preservation
Pin for Later
Sources
- https://nchfp.uga.edu/how/can_02/can_pie/apple_filling.html
- Ball Blue Book of Home Canning
- https://ohioline.osu.edu/factsheet/hyg-5355
I will be using this recipe in a few weeks to make some quarts of apple pie filling. I already have the clearjel, just got the apples in. We will see how this goes! I may cut back the sugar slightly, but otherwise I will stick to the recipe rigidly. I didn’t know I needed apple juice, but I will definitely get some. I don’t want a sad apple pie filling! (or worse, an unsafe one) I have lots of Cortland apples as those were in season around here. I hope this will make enough for multiple pies during winter… Read more »
Can I fill sterilized jars that are room temperature with filling and then put it in a hot water bath and bring to boil? It was for apple butter. Super newbie here! Thank you for the help!
It’s better if they are hot. The concern is any drastic temperature changes. So you should have hot apple butter going into hot jars, into hot (not boiling yet) water in the canner. Just keep your jars in the hot water in your canner. That is the easiest way to warm them up. I’ve got directions for apple butter here… . And more on using a water bath canner here… :). I hope those help!
“After your time is over, turn the heat off remove the lid and allow the canner to rest for about 5 minutes. Then bring your jars up out of the water. Allow them to rest for another 5 minutes. Then remove the jars and place them a few inches apart on a thick towel to cool completely. ” Confused about this. You say to wait 5 minutes and then bring jars out. Then you say allow them to rest for another 5 minutes and then remove. Are you supposed to leave the jars in the water bath canner for 10 minutes… Read more »
Let me rephrase and see if it helps. When the time is up turn off the heat and remove the lid. leave the jars in the water. Wait 5 minutes. Next bring the jars in the rack up out of the water. The jars will still be in the canner just resting on the edge mostly above the water. wait 5 minutes. Now you can remove the jars completely from the canner. Does that help? So there are 2 rest times, one down submerged and the other above the water. If after the second 5 minute rest (above the water)… Read more »
How many pounds are apples do I need to fill up the 7 quarts
You’ll need about 19 pounds for a full 7 quarts.