
Fruit Leather Recipe: How to Make Homemade Fruit Rollups
This page may contain affiliate links. More Information.
This fruit leather recipe isn’t hard to make, and kids love eating it. I love knowing that this homemade version avoids excess sugars and dyes from store-bought fruit rollups!
The images you’ll see here are with a batch made with sweet cherries. The same method works for other fruit and food combinations. The full recipe card is near the bottom of the page. The tips below cover trays, how to tell when it’s done, and storage.

How to Make Homemade Fruit Leather (Fruit Rollups)
Fruit Leather Recipe Preparations:
Gather Your Supplies:
- Blender.
- Dehydrator. I use my cabelas dehydrator.
- Spoon or other utensil to spread fruit. I find that the back of a large spoon works best.
- Dehydrator sheets. You’ll need to order something that fits your dehydrator.
- Parchment Paper. To keep your rollups from sticking together during storage.
Gather Your Ingredients:
- Cherries or other fruit of choice. (Ripe, fresh or frozen fruit will work.)
- Liquid (Only if your mixture is too dry.)
- Honey or sugar (Optional. I didn’t use it, but the Ohio Extension says you can, “Use ¼ to ½ cup sugar, corn syrup or honey for each 2 cups of fruit.”)
- Lemon juice or ascorbic acid (Optional. Ohio Extension suggests using it to prevent the fruit from darkening, which isn’t really applicable for cherries. For other fruit, use 2 tsp. lemon juice or ⅛ teaspoon ascorbic acid for every 2 cups of fruit.)
Fruit Leather Recipe Process:
These are the basic directions for any fruit. Scroll down to see exactly how my cherry batch went.
- Prepare the fruit.
Wash the fruit and remove stems, pits, seeds, and any peel you wouldn’t want to eat. Cut larger fruit into chunks. If you’re using frozen fruit, thaw it first. If it’s very juicy, you may want to drain off some of the liquid so your puree stays thick. But there is a lot of flavor in that juice so keep some of it. - Puree the fruit.
Blend the fruit until smooth. Add a little liquid only if the mixture is too dry to blend. Taste the puree, and add honey or sugar a little at a time if you want it sweeter. Add lemon juice or ascorbic acid if your fruit is light-colored. - Spread the puree on lined trays.
Spread an even layer of puree on dehydrator trays lined with dehydrator sheets. Aim for about 1/8 to 1/4 inch thick. Too thick and it won’t dry properly. Too thin and it’s hard to get off the trays. About 2 cups of puree covers a 12 by 17 inch pan, according to NDSU Extension. Dehydrator trays vary, so use that as a starting point. - Dehydrate.
The NCHFP says to dry fruit leather at 140 degrees F, but you might want to check your own dehydrator book. Time and temperature are a bit flexible. Fruit leather needs a little more heat than drying slices of fruit because it contains more liquid to start. Expect about 6-8 hours (or more) depending on your dehydrator, your fruit, and how thick you spread it. - Check that it’s done.
Remember don’t rely on time. You need to check the fruit. I go more into how to tell if it is done below. - Peel and roll.
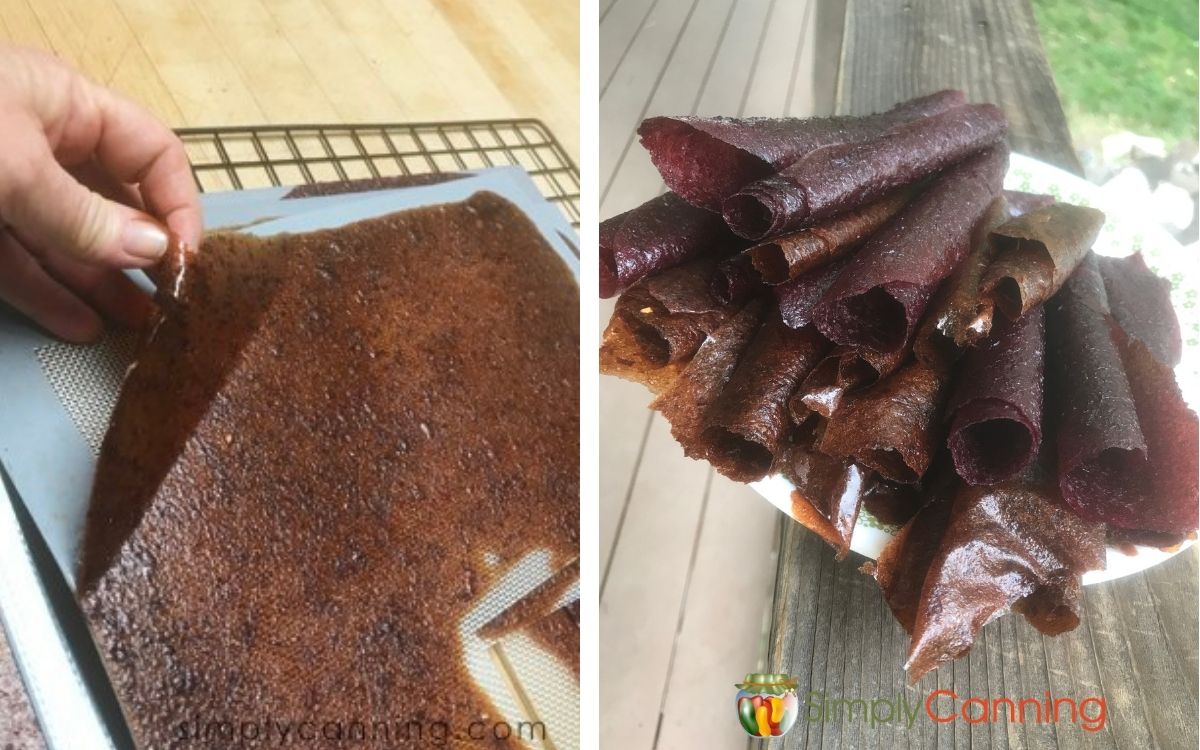
When the leather is ready, carefully peel it off the dehydrator sheets. It tends to peel easier if you do it while it is still a little warm. This is where you’ll learn how thick or thin makes it easier to handle. After you do a few batches, you’ll get a feel for it.
You can make your pieces super straight by using a butter knife or some such tool to cut through the leather a bit so it tears straight. Be careful not to cut into your sheets. I usually just tear as straight as I can. Mine were non-Pinterest worthy, LOL. Some people get nice, perfect rectangles. Mine were just various pieces rolled up. Roll the pieces loosely.
My Cherry Fruit Leather Batch
Here’s how I made the cherry fruit leather with some tips and what I learned.
I used 2 cups of sweet Bing cherries. They were frozen cherries from last year. We pitted them before I froze them. But note, a few pits were missed, so watch for them as you work. I had to pick a couple of pieces out when I was pouring the puree onto the tray. Don’t want crunchy bits in your fruit leather.
I didn’t add any sugar, extra liquid, or lemon juice. Cherries are naturally sweet, and the lemon juice isn’t really needed for dark fruit. I’ve only made this with sweet cherries. Sour cherries would probably need a bit of sweetener, so check the puree as you make it.
Should you simmer fruit first?
This is not needed for most fruit. If you’ve got firm less juicy fruit you might want to try it. I tested it with these cherries. Personally, I didn’t care for it.
At first, I tried simmering some of the cherries before blending them to see if it made a difference. They turned a little brown, and it did not save on drying time or help with ‘pourability’. The cooked cherries were too thin and it was awkward.
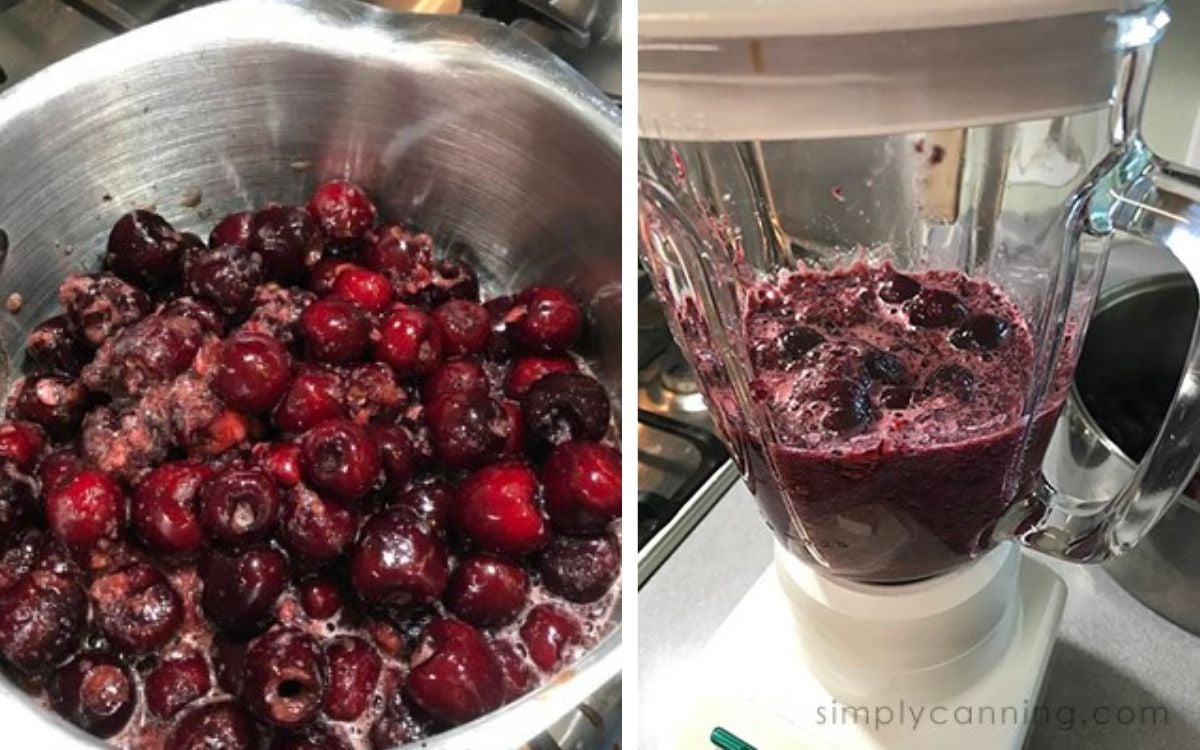
It did work, but not as easily as the uncooked cherries did. Draining off some of the liquid helped but I didn’t want to drain too much. There is a lot of flavor in that juice!
When I was filling my trays, I poured the puree a little too thin in some spots. If you look at my pictures, you’ll see those areas. It made the leather harder to peel off the trays. Still tasted good, though!
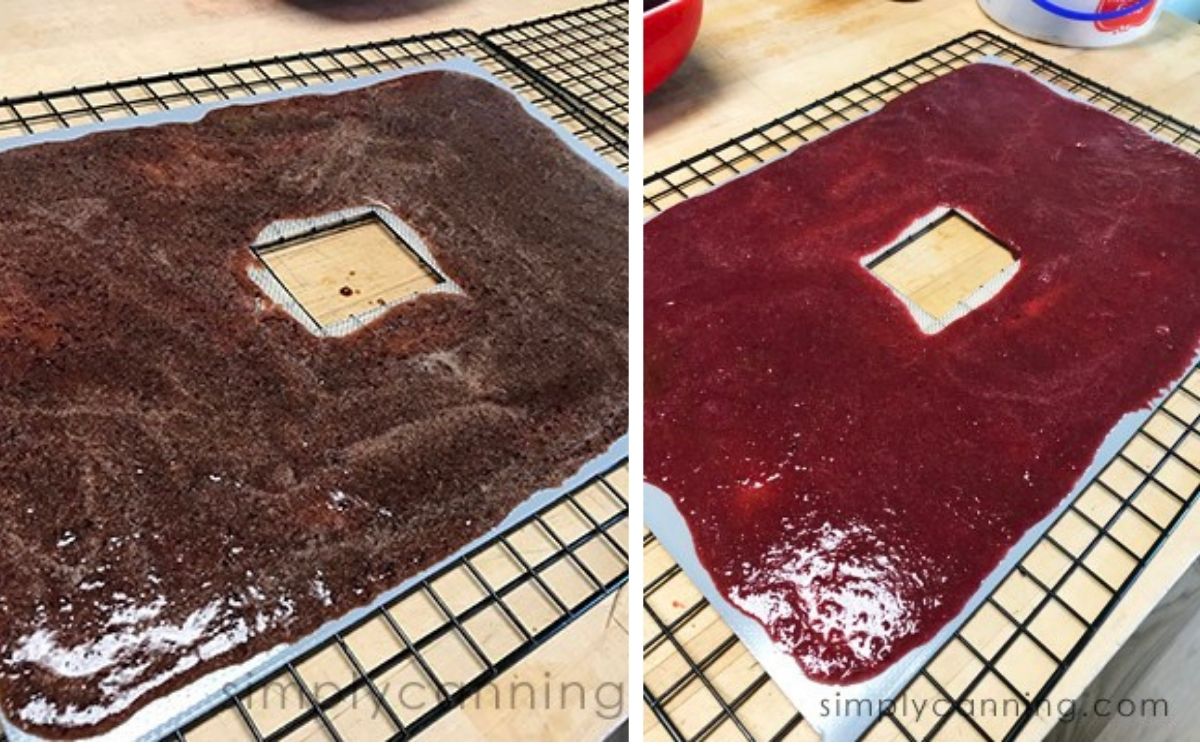
I dried mine in my Cabela’s dehydrator at 130 degrees, slightly lower than the 140 degrees the NCHFP recommends. It took longer than the 6-8 hours that is suggested.
Cherries are definitely sticky in my experience, because they contain lots of sugar. I should have rolled mine in parchment paper to keep the pieces apart. They ended up sticking together in storage and were a bit messy. But they didn’t last long! My sons had them eaten in a week or so.
Fruit Leather Trays
Let’s talk about the trays a bit. Fruit leather tends to stick to drying surfaces more than plain slices of fruit do. I’ve tested a few options in the past other than the silicone trays. Just to see how they’d do.
- Stoneware: I spread the puree directly on stoneware, and it stuck very badly. I don’t suggest it!
- Plastic wrap: This worked, but it wasn’t as effective as silicone. I’d use it in a pinch or if I were only making a small batch.
Silicone fruit leather dehydrator sheets: These are the best option I’ve found. The leather peels right off, which makes them the clear winner. I’ve linked to a variety on amazon, but you’ll need to look for what fits your dehydrator. Square? Round?
How to Tell When Fruit Leather Is Done
This is the big question… when is it done! It’s done when the leather is…leathery. It will be flat and not squishy. Touch the center or the thickest part of every tray.
- If your finger doesn’t leave a dent, it’s ready.
- It may still be sticky, depending on the fruit.
- Watch for a film of dryness outside but underneath it is still wet.
- The edges dry first, so don’t just check the edge of the tray. Check toward the center and in several places, because it may not dry perfectly evenly.
The dehydrating time depends on the type of fruit and how thick or thin you poured it. Do not just rely on time. The time given is just an estimate, and in my experience it can be way off. Climate matters, weather matters, how thick you poured your fruit matters. There are too many variables to be able to just say stop at 8 hours.
Can You Make Fruit Leather in the Oven?
I haven’t tried it, but it is an option if you don’t have a dehydrator. The NCHFP says your oven needs to hold a temperature as low as 140 to 145 degrees F. If it doesn’t go that low, it may not be suitable for drying food. Use a pan with edges, lined with plastic wrap (smooth out the wrinkles) or sprayed with cooking spray. The NCHFP says not to use waxed paper or aluminum foil. Check the temperature with an oven thermometer.
Drying in an oven can take up to 18 hours! Some extension guides suggest propping the oven door open 2 to 6 inches for air circulation. Which is not feasible if you’ve got children, this could be a safety hazard.
The oven option seems wasteful to me. Ok in a pinch or just a batch or 2. I still recommend a dehydrator if at all possible.
Fruit Leather Recipe Tips & FAQs
How Do You Store Fruit Rollups?
First make sure it is completely dry and cooled before you store it away. If it is not fully dry it will likely mold during storage.
You can roll them in parchment paper if you want to avoid sticking. (I recommend this!) Lay the piece of fruit leather flat on a piece of parchment and then roll them both up together. This way, there is parchment keeping the rolls from sticking together.
Mine would be eaten soon, so I didn’t worry about it. But after only a week in a jar on my counter, the rolls were pretty stuck together, so I will be using parchment paper next time with cherries. I’ve left fruit leather unlined and rolled lightly before with success, but that was an apple/fruit combination. The cherries were definitely more sticky.
Homemade fruit leather keeps up to a month at room temperature. It will last longer in the freezer. I’ll keep mine out on the counter a day or two but always end up putting it in the fridge after that. It doesn’t last long enough for me to bother freezing it.
What Fruit Combinations Should I Use for This Fruit Leather Recipe?
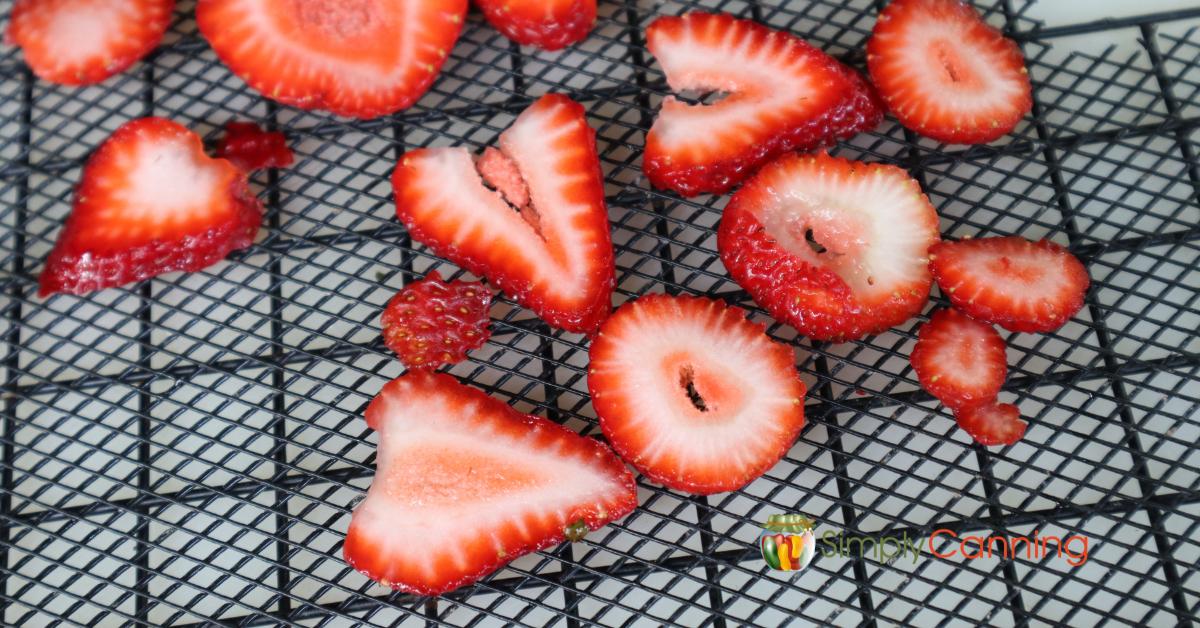
There are endless combinations for making fruit leather. Use your favorite fruit all by itself, like I did with the cherries. Applesauce mixed with almost any berry is a great combination too. Combine tart fruits or berries like currants with something sweet to contrast with the tartness. Strawberries all by themselves work really well!
I’ve done straight peaches. It is good, but peaches have a pretty mild flavor, and I tend to like fruit leather recipes with a stronger flavor. You can even add cinnamon, and I’ve read of adding chia seeds if you want to get all healthy. 🙂
Do I Need to Add Sugar to Cherry Fruit Leather?
I didn’t add any to mine, but I’ve only made it with sweet Bing cherries. Sour cherries would work too, but they might need a bit of sweetener. Check the puree as you make it, and add honey or sugar a little at a time until it tastes right to you.
Can I Use Frozen or Canned Fruit?
Yes. Frozen cherries worked well for me. If you use canned fruit drain off the liquid and add back only what your puree needs, so it stays thick.
Why Is My Cherry Fruit Leather Brittle?
It was probably dried too long or at too high a temperature. It’s still edible, but next time check it earlier. Cherry fruit leather should still be tacky, not crispy.
Is It Normal for Cherry Fruit Leather to Be Sticky?
Yes! Even when it’s dried perfectly. Cherries are naturally high in sugar, which is what makes them sticky. Roll the pieces in parchment paper to keep them apart.
How Long Does Fruit Leather Take in a Dehydrator?
The NCHFP says about 6 to 8 hours in a dehydrator. Your time will vary with your dehydrator, the fruit, and how thick you spread the puree, your climate, your weekly weather. Any time suggested is just that, a suggestion.
Recipe Card
Fruit Leather Recipe

Ingredients
- 2 cups Fruit
- Liquid if needed
- 1/4-1/2 cup Sugar or honey, but optional
- 2 teaspoons Lemon Juice or 1/8 teaspoon ascorbic acid
Instructions
- Puree fruit, adding more liquid if needed.
- Add honey/sugar and lemon juice if desired.
- Spread an even layer of puree on dehydrator trays lined with dehydrator sheets.
- Dehydrate at 130-140 degrees F until leathery (~6-8 hours).
- Peel off dehydrator sheets and roll using parchment paper.
- Store in an airtight container. (Freeze for long-term storage.)
Notes
Source: Ohio State Extension
Pin This to Find Later:

- Sources:
- NCHFP, Fruit Leathers: https://nchfp.uga.edu/how/dry/recipes/fruit-leathers/
- NCHFP, Mango Leather (oven method): https://nchfp.uga.edu/how/dry/recipes/mango-leather/
- Ohio State Extension: https://ohioline.osu.edu/factsheet/hyg-5361
- University of Alaska Fairbanks Extension (oven door): https://www.uaf.edu/ces/publications/database/food/fruit-leather.php
- NSDU,https://www.ndsu.edu/agriculture/extension/publications/food-preservation-making-fruit-leathers


Olivia, I’m not sure what you mean by (dry can low temp) but I would not do any sort of heating the roll-ups. I personally wouldn’t vacuum seal the roll-ups although I’ve read that many do. The fruit is dry… but still a sticky dry. It is not like dehydrated fruit for example. There is still some moisture in the end result. Roll-ups not really a food that will store long term. They are more for eating and snacking. I’d say a month at room temperature in a pantry for example. If you store them longer than that I’d put… Read more »