Fermenting Lids for Canning Jars
This page may contain affiliate links. More Information.
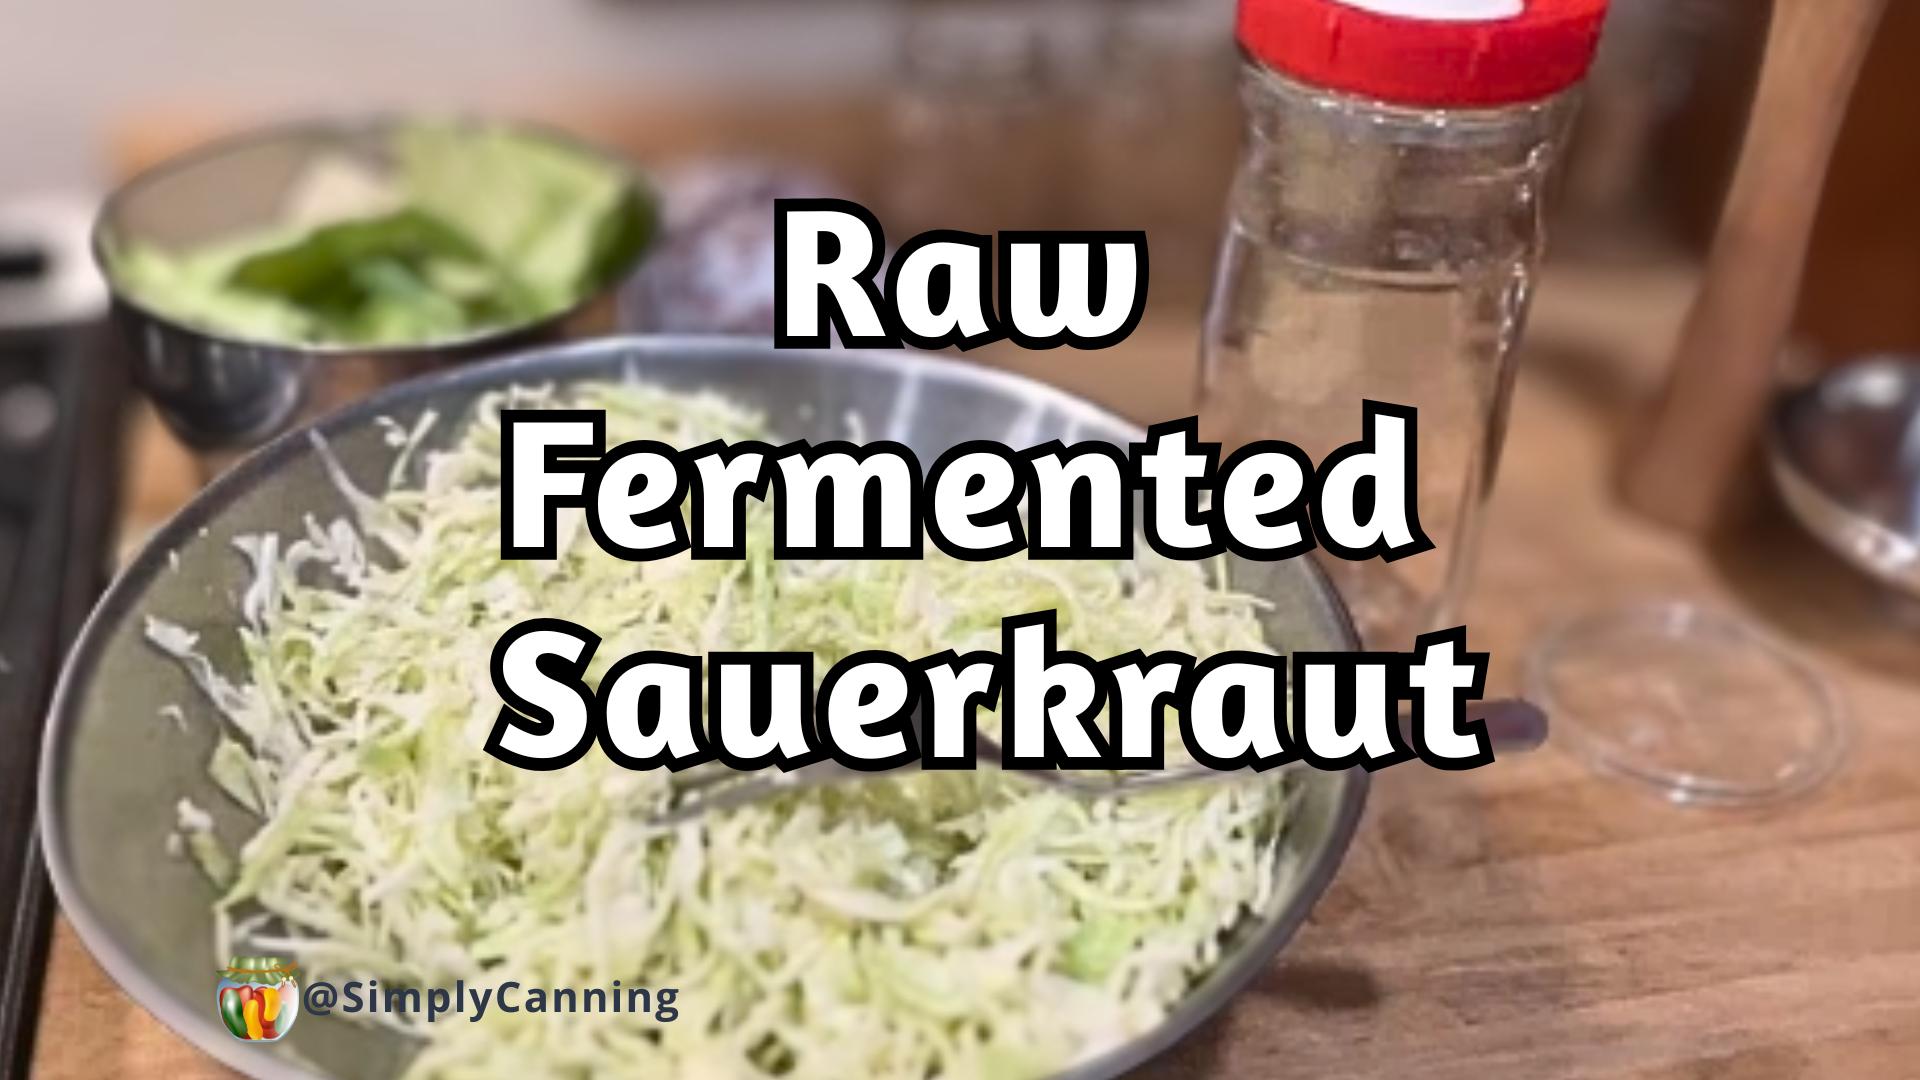
Comparing Fermenting Lids: When fermenting foods, choosing the right lid can make all the difference. And there are many styles to choose from. Most fit on standard wide mouth canning jars.
Over time, I’ve tried different fermenting methods: cheesecloth covers, freezer bags, airlock lids, and the Pickle Pipe fermenting lid. I’ve got some clear winners and losers.
Basic Fermenting
When you are fermenting food, you’ll place food in a container (mason jars work great) and keep the food submerged in a brine. Fermenting is anaerobic, which means without oxygen. That is why it should be either submerged or in an airtight container.
Many people use canning or mason jars when they are fermenting. You can do small batches in small jars or larger amounts in gallon size.
There are a large variety of fermenting lids for canning jars to choose from. Most fit wide mouth mason jars. A fermenting lids serves to allow gasses to escape while keeping oxygen out. This reduces scum or mold.
- Scum is not necessarily bad, you will just skim it off. But it is unappealing.
- Mold is different, if you end up with mold you should consider dumping that batch and starting over.
Holding your food under the brine can be as simple as setting a plate or a large cabbage leaf on top of the food to weigh it down. Or it can be with any of a number of fermenting lids and weights that are available.
I’m going to link here to a general selection of fermenting lids and kits at amazon. Many fit standard canning jars, some come with jars and some complete kits.
There are multiple options! I have not tried them all.
Below you’ll find the methods that I have used. With and without specialized lids.
You’ll notice… I definitely prefer a fermenting lid.
Fermenting Methods with no specialized lid.
Fermenting with Cheesecloth
Using cheesecloth as a cover, is a method I read about so I thought I’d try it. You can see the gallon jar I used in the image above.
A large cabbage leaf was placed over the shredded cabbage. Then a piece of cheesecloth placed over that to keep solids under the brine. Finally I placed a cheesecloth over the mouth of the jar as well.
It comes with some serious drawbacks. I did not like this method at all.
- Air Exposure: Fermenting is an anaerobic process, so keeping air out is crucial. Even with a cabbage leaf to hold food under the brine, bits of cabbage were floating to the surface. This leads to scum—and I’m not a fan of skimming it off daily.
- Smell: My family is sensitive to the smell of fermenting foods, and the cheesecloth doesn’t contain odors. My husband has walked into the kitchen and declared, “Something stinks!” I end up moving ferments to the porch, which is less convenient.
- Mess: I didn’t care for the cheesecloth soaking up the brine. It was just messy.
Fermenting With a Ziplock Bag Weight
This is the method I’d recommend if you don’t have a special lid. Weigh your ferments down with a freezer bag filled with brine.
Simply add brine to the baggie and set it down on top of your food. This holds the food down, the bag forms to the sides of the jar to keep air out.
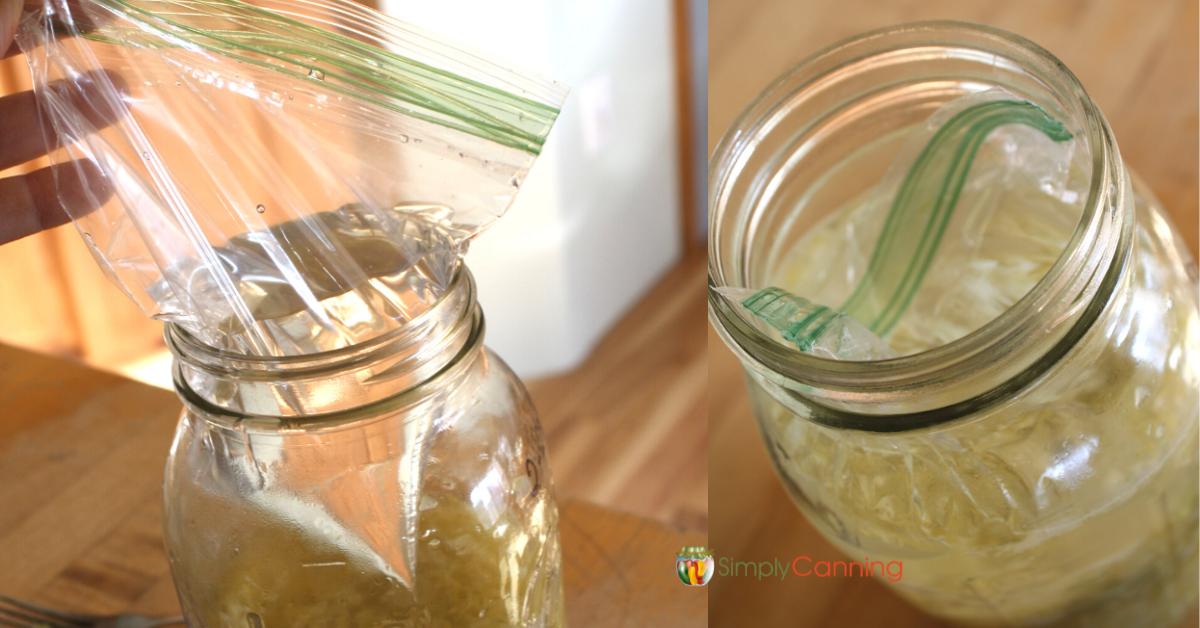
I prefer freezer bags just because they are heavy duty, but any food safe bag would work.
Important: You should use brine, not water to fill the bag. If the baggie breaks or leaks. you don’t want water to dilute the brine for your fermenting process.
Fermenting lids for canning jars
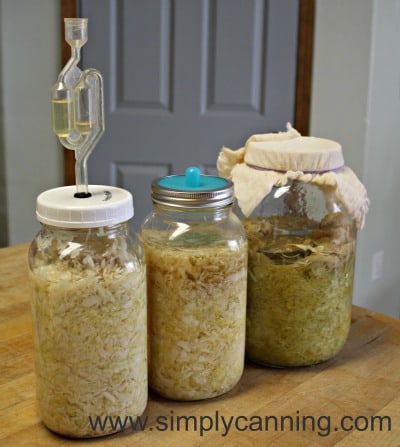
Fermenting with Airlock Lids
Airlock lids are a step up, offering better protection from oxygen. I’ve used these in the past and they do work. But I find them a little awkward and don’t care for them. Just personal preference. Many people use airlock lids and have no issues.
- How It Works: These lids use a water reservoir to let gases escape while keeping oxygen out.
- Pros: They reduce scum formation and protect the ferment better.
- Cons: The airlock sticks out awkwardly, making storage a challenge. They were too tall to fit in the cupboard I usually use for my ferments. This may or may not be an issue for you.
- Cleaning: They’re also tricky to clean—especially if fermenting liquid overflows. I never felt like I got the insides cleaned out well just rinsing. And that is pretty much the only way to do it.
There are many styles of these to choose from. Some come as complete lids, you can also purchase just the airlock to DIY your own lids.
Most are for wide mouth canning jars, but I did find some in other sizes. I’ll link to some varieties here.
- This is a complete fermenting lid that fits gallon jars.
- Here is a nice stainless steel set of airlock lids for widemouth canning jars.
- Here is a set of just the airlocks to fit into your own canning jar lids. These are an S shape style like I had.
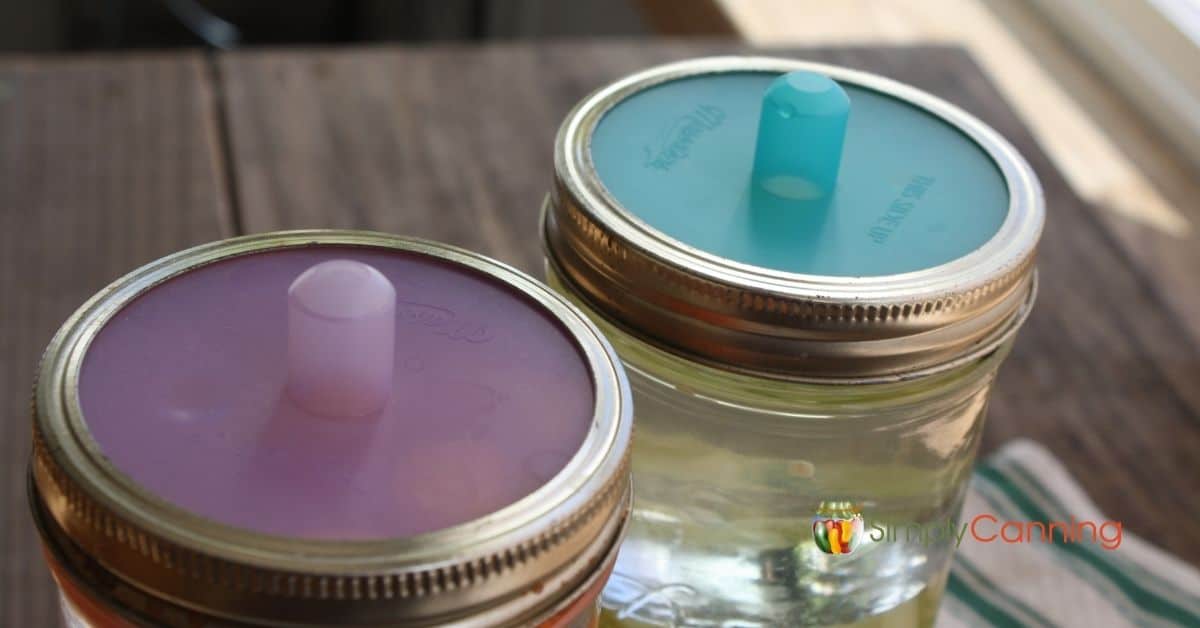
Fermenting with the Pickle Pipe
After trying the Pickle Pipe, it’s clear this one is my hands down favorite. Here are some main points but I do a full pickle pipe review here with instructions on how to use them.
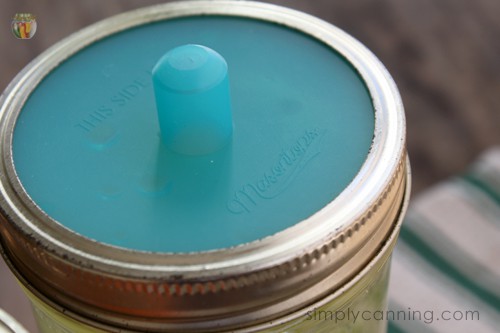
- Ease of Use: The silicone lid has a one-way valve that lets gases escape but keeps oxygen out. No water reservoirs needed.
- Convenience: It’s low-profile, dishwasher-safe, and contains smells. My jars fit easily in my cupboard, and my family doesn’t complain about odors.
- Effectiveness: The Pickle Pipe maintains the right conditions for fermentation without much monitoring. Mold has never been an issue when I’m using a pickle pipe.
- No Scum! I have never had scum or mold form when using a pickle pipe.
My Clear Winner
For me, the Pickle Pipe wins hands down. If you’re looking for an easy, effective fermenting solution, I highly recommend the Pickle Pipe.
You can find a full fermenting set with the pickle pipe here.